Walk into any well-designed dining room, hallway, or bathroom and you will likely notice paneling covering the lower third of the walls. That decorative wall treatment is called wainscoting, and it has been a staple of American home design since the colonial era. If you have ever asked what is wainscoting and whether it makes sense for your home, the answer is almost always yes. It protects walls from everyday wear, adds architectural interest, and can increase your home’s perceived value by thousands of dollars.
Wainscoting Defined
At its simplest, wainscoting is any decorative paneling applied to the lower portion of an interior wall, typically capped with a horizontal chair rail. The paneling usually covers the bottom 32 to 36 inches of the wall, though some styles extend higher. Historically, wainscoting served a purely functional purpose: protecting plaster walls from furniture scuffs and moisture. Today it doubles as a design element that adds depth, texture, and formality to virtually any room.
Most Popular Wainscoting Styles
Several distinct styles fall under the wainscoting umbrella. Each creates a different visual effect.
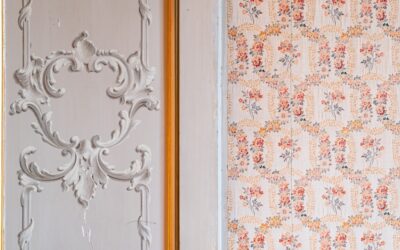
- Raised panel — beveled panels set inside a frame of stiles and rails. This is the most traditional style, commonly found in colonial and Federal-era homes. It adds significant depth and shadow lines to walls.
- Flat (recessed) panel — similar frame structure, but the center panel sits flush or slightly below the rails. Cleaner and less ornate than raised panel, making it popular in transitional and Craftsman interiors.
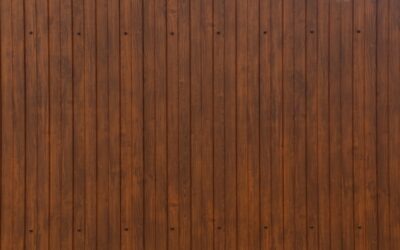
- Beadboard — narrow vertical planks with a small bead (rounded groove) between each one. This is the most casual wainscoting style and a natural fit for bathrooms, mudrooms, and cottage-style homes.
- Board and batten — flat boards joined by narrow vertical strips (battens). Creates strong vertical lines and works well in both farmhouse and modern settings.
- Shiplap — horizontally oriented boards with a slight overlap or gap. While technically a wall treatment rather than traditional wainscoting, it is frequently installed at wainscot height with a cap rail.
- Picture frame — applied molding rectangles on a flat wall surface. No actual paneling is involved, just the illusion of it. This is the most budget-friendly option and the easiest to DIY.
Materials and Their Costs
Material choice affects both the look and the budget. Solid hardwood raised-panel wainscoting is the most expensive option, running $18 to $35 per linear foot for materials alone. MDF (medium-density fiberboard) delivers a nearly identical painted appearance for $7 to $15 per linear foot and resists warping better than solid wood in humid environments like bathrooms.
Beadboard panels made from MDF or PVC sell at big-box stores for $15 to $30 per 4×8-foot sheet, covering 32 square feet per panel. PVC beadboard is the go-to material for bathrooms and laundry rooms because it is completely waterproof. For picture-frame wainscoting, you only need chair rail and panel molding, bringing material costs down to $3 to $6 per linear foot.
Proper Height and Proportions
Getting the height right is critical. The general rule is that wainscoting should cover the bottom one-third of the wall. In rooms with standard 8-foot ceilings, that means 32 inches from the floor to the top of the chair rail. For 9-foot ceilings, bump it up to 36 inches. For 10-foot ceilings, 38 to 42 inches looks proportional.
Going too low makes the wainscoting look like an afterthought. Going too high — above the halfway point — can make ceilings feel lower and the room feel closed in. When in doubt, measure up from the floor and use painter’s tape to mark the proposed cap rail line before committing.
Best Rooms for Wainscoting
Dining rooms and hallways are the most popular locations because these high-traffic areas benefit from the wall protection wainscoting provides. Chair backs bump dining room walls constantly, and hallways collect scuffs from bags, shoes, and pets.
Bathrooms are another prime candidate, especially for beadboard or PVC styles. Wainscoting gives a powder room an instant upgrade that costs far less than full-wall tile. Bedrooms and stairways are less common but equally effective. A board-and-batten treatment behind a bed can replace a traditional headboard while adding architectural detail to the entire wall.
DIY Installation Overview
Picture-frame and beadboard wainscoting are realistic weekend DIY projects. Raised-panel and flat-panel styles require more carpentry skill and specialized tools.
- Measure the room’s perimeter and subtract door and window openings. Add 10% for waste and cuts.
- Mark the chair rail height with a level line around the room. Use a laser level for long walls.
- Install panels or individual boards with construction adhesive and 18-gauge brad nails. Nail into studs where possible.
- Attach the chair rail molding along the top edge, followed by base cap molding at the bottom if desired.
- Fill all nail holes with lightweight spackle. Sand smooth after drying.
- Caulk every seam where molding meets the wall. This step makes the difference between amateur and professional results.
- Prime with a high-quality primer, then apply two coats of semi-gloss or satin paint. Semi-gloss is easier to clean and highlights the panel detail.
Professional Installation Costs
Hiring a carpenter for wainscoting installation typically costs $8 to $20 per square foot for labor, depending on the style complexity and your market. A 12×14-foot dining room with raised-panel wainscoting on three walls might run $2,500 to $4,500 total including materials and labor. Beadboard in a small bathroom can be completed for $800 to $1,500 professionally.
Get at least three quotes and ask to see examples of previous wainscoting work. The quality of coping, mitering, and finish work varies enormously between carpenters, and these details are highly visible in a paneled room.