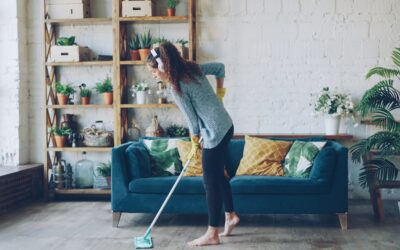
Luxury vinyl plank is famously low-maintenance, but the fastest way to dull that showroom finish is to clean it with the wrong stuff. If you’ve wondered what to use to clean LVP flooring, the honest answer is simpler and cheaper than the shelf of specialty bottles suggests: a pH-neutral cleaner, warm water, and a well-wrung mop. The bigger lesson is what to avoid, because abrasives, wax, oil soaps, and steam do real, sometimes permanent damage to vinyl’s wear layer. Here’s how to keep LVP looking new for its full lifespan.
- Start With the Basics: Dry, Then Damp
- The Right Cleaner: pH-Neutral
- What to Avoid at All Costs
- Why Steam Is Such a Problem
- Handling Spills and Tough Spots
- Protect the Floor Between Cleanings
- DIY vs. Store-Bought Cleaners
- How Often Should You Clean LVP?
- Reviving a Dull LVP Floor
- The Bottom Line on Products
Start With the Basics: Dry, Then Damp
Most LVP cleaning is just removing grit. Sand and dirt act like sandpaper underfoot, slowly scratching the wear layer. Sweep, dust mop, or vacuum with a hard-floor setting a few times a week, more in high-traffic entryways. Turn off the vacuum’s beater bar, which can scuff the surface.
For the actual wash, damp is the operative word. LVP is water-resistant, not a swimming pool. A microfiber mop wrung out until it’s barely moist cleans beautifully without flooding the seams, where standing water can eventually creep beneath the planks.
The Right Cleaner: pH-Neutral
The safest cleaner for vinyl plank is a pH-neutral floor cleaner. Neutral formulas lift dirt without etching, clouding, or leaving residue. You have a few solid options:
- Manufacturer-branded cleaners, which are formulated specifically for their flooring and won’t void a warranty.
- General pH-neutral hard-floor cleaners designed for luxury vinyl and laminate.
- A DIY mix of a few drops of dish soap in a gallon of warm water for routine cleaning, followed by a clear-water pass to rinse.
Some people use a splash of white vinegar in water. It works for occasional cleaning, but many manufacturers advise against acidic solutions on a regular basis because they can dull the finish over time. When in doubt, neutral is the reliable choice.
What to Avoid at All Costs
This is where LVP owners get burned. The following products and tools shorten your floor’s life:
- Abrasive scrubbers and powders, which scratch the protective wear layer permanently.
- Wax and polish, which build up a hazy film that’s brutal to remove and never intended for vinyl.
- Oil-based soaps like traditional wood cleaners, which leave a greasy, slippery residue.
- Bleach and ammonia, harsh enough to discolor and degrade the surface.
- Steam mops, the big one. High-heat steam can penetrate seams, soften the adhesive, and warp planks, and it voids most LVP warranties.
Why Steam Is Such a Problem
Steam mops get singled out because homeowners assume “waterproof” means steam-proof. It doesn’t. The combination of heat and forced moisture is exactly what LVP isn’t built for. Heat can loosen the click-lock or glue-down bond and cause cupping at the edges. No matter how convenient a steam mop feels, keep it off vinyl plank entirely.
Handling Spills and Tough Spots
Wipe spills promptly with a soft cloth, even though LVP tolerates moisture better than wood or laminate. For sticky messes, a damp cloth with a drop of neutral cleaner usually lifts them. Scuff marks from shoes or furniture often erase with a pencil eraser or a melamine sponge used gently.
For stubborn residue, resist the urge to scrub hard with anything abrasive. A little more cleaner and a little more patience protect the finish far better than elbow grease with a scouring pad.
Protect the Floor Between Cleanings
The best cleaning strategy is keeping dirt off in the first place. Place walk-off mats at every exterior door to trap grit, and use felt pads under furniture legs to prevent scratches. Avoid rubber-backed mats, which can react with vinyl and leave yellow stains; choose colorfast, breathable backing instead.
Lift furniture rather than dragging it, and use floor protectors under rolling chairs. These small habits mean your actual mopping stays quick and gentle.
DIY vs. Store-Bought Cleaners
You don’t have to choose between them, both have a place. A homemade solution of a few drops of dish soap in a gallon of warm water is cheap, effective, and residue-free for routine weekly cleaning, especially when you follow with a clear-water pass. It’s the frugal choice that keeps LVP looking sharp without special products.
Store-bought pH-neutral cleaners made for luxury vinyl earn their place for convenience and for tougher jobs. They’re pre-balanced, often streak-free, and formulated not to leave film. Manufacturer-branded cleaners are the safest bet if you want to protect your warranty. Whichever you pick, the golden rule is the same: neutral pH, and no residue left behind.
Watch out for products marketed as all-in-one “shine” cleaners, since many leave a polymer coating that builds up into haze over repeated use. If a cleaner promises to add gloss, read the label carefully, LVP doesn’t need added shine, and coatings are exactly what causes the cloudy buildup owners later struggle to remove. When in doubt, a plain neutral cleaner is always the safer long-term bet.
How Often Should You Clean LVP?
Frequency depends on traffic, but a simple rhythm keeps most floors pristine. Dry sweep or dust mop high-traffic zones like entryways and kitchens daily, and the whole floor two or three times a week. Damp mop once a week in busy areas, and every two weeks in low-traffic bedrooms.
Spot-clean spills immediately rather than waiting for the weekly wash. This tiered approach, frequent dry cleaning, occasional damp mopping, and instant spill response, does more to preserve the finish than any single deep clean, because it keeps abrasive grit off the surface in the first place.
Reviving a Dull LVP Floor
If your vinyl plank already looks hazy or dull, the culprit is usually residue buildup from the wrong cleaner, not worn-out flooring. Do a reset: mop with plain warm water and a splash of neutral cleaner, then rinse thoroughly with clear water to strip away film. Repeat if needed until the water runs clean.
Avoid the temptation to “restore shine” with wax or polish, which only creates more buildup. LVP’s shine comes from its factory wear layer, and once you clear off the residue, that original luster usually returns. If a floor stays dull after a thorough residue-stripping, the wear layer itself may be scratched from grit or abrasives, a reminder of why gentle care matters from day one.
The Bottom Line on Products
You don’t need a cabinet full of specialty bottles. Knowing what to use to clean LVP flooring comes down to one pairing: a pH-neutral cleaner and a barely-damp microfiber mop, backed by regular dry sweeping. Skip the abrasives, wax, oil soaps, and especially the steam, and your luxury vinyl plank will keep its finish and its warranty for years to come.
Prefer to explore on your own?
See how new flooring looks in your actual room in seconds — free, no signup.
Try the free Floor Studio →