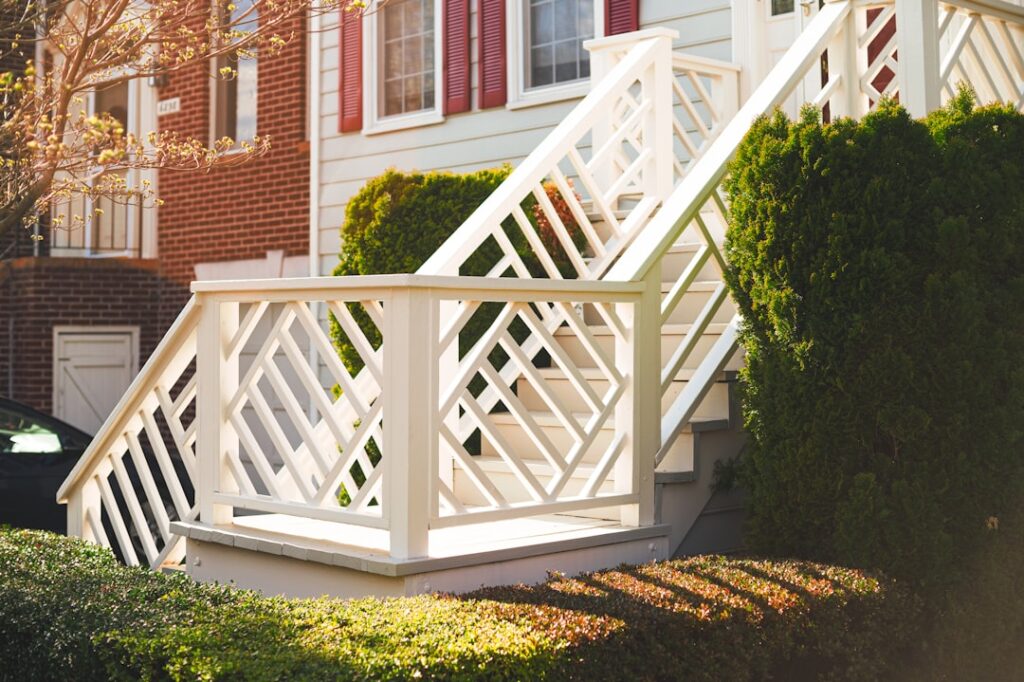
Few exterior upgrades deliver the crisp, finished look of a clean white railing along a porch or deck, and few materials hold that look as effortlessly as vinyl. A white vinyl railing never needs painting, won’t rot or splinter, and keeps its bright color for decades with almost no upkeep. For homeowners tired of scraping and repainting wood rails every few years, vinyl is the low-maintenance answer. This guide covers the benefits, the costs, installation, code requirements, and how vinyl stacks up against wood and aluminum.
Why Homeowners Choose White Vinyl
The appeal comes down to maintenance and longevity. Vinyl railing is made from rigid PVC, the same weatherproof material used in vinyl fencing and siding, and it shrugs off the elements that destroy wood.
- No painting, ever: The white color runs through the material, so it won’t peel, chip, or fade the way painted wood does.
- Rot- and insect-proof: Vinyl can’t absorb water, so it won’t rot, and termites have no interest in it.
- Easy cleaning: A garden hose or mild soap and water restores the bright white finish.
- Long life: Quality vinyl railing routinely lasts 20 to 30 years or more.
Vinyl Versus Wood and Aluminum
Every railing material has trade-offs. Here’s how white vinyl compares.
- Vinyl vs. wood: Wood costs less upfront and offers a natural look but demands ongoing painting, sealing, and eventual rot repair. Vinyl costs more initially and pays it back in zero maintenance.
- Vinyl vs. aluminum: Aluminum is stronger, slimmer, and good for modern looks and long spans, but costs more and offers fewer of the chunky, traditional profiles vinyl excels at. Both are low-maintenance.
For a classic colonial or farmhouse porch, white vinyl nails the look. For a sleek contemporary deck with thin cable-style infill, aluminum may suit better.
What White Vinyl Railing Costs
Pricing depends on style, height, and whether you hire out the install. As a general market range, vinyl railing materials run roughly $20 to $40 per linear foot, with premium styles and gate sections costing more. Professional installation typically adds $30 to $60 per linear foot depending on the deck height, post count, and site conditions. Pre-assembled kits with rails, balusters, and brackets simplify DIY installation and can cut labor cost substantially. Stairs and angled sections usually cost more than straight runs because of the extra cutting and bracketry.
Meeting Code Requirements
Railings are a safety system, and local building codes govern them strictly. While exact rules vary by jurisdiction, the common residential standards are worth knowing.
- Height: Guardrails on decks are commonly required to be at least 36 inches tall, and 42 inches in many areas, especially for elevated decks.
- Baluster spacing: Balusters must be spaced so a 4-inch sphere can’t pass between them, to keep children safe.
- Load strength: Railings must withstand a specified horizontal load, typically 200 pounds applied at the top rail.
Always confirm requirements with your local building department and pull a permit when one is required. Vinyl railing systems sold for decks are engineered to meet these codes when installed per the manufacturer’s instructions, including the metal reinforcement many systems use inside the rails and posts.
Installing Vinyl Railing
Most vinyl railing comes as a kit, and the process is approachable for a confident DIYer.
- Set and secure the posts first, plumb and at the correct spacing for the rail sections, anchoring them firmly to the deck framing with the manufacturer’s hardware.
- Measure and cut the bottom and top rails to length, accounting for the brackets.
- Insert the balusters into the pre-drilled holes in the rails, then attach the rail assembly to the posts with the supplied brackets.
- Cap the posts and check that everything is level, plumb, and solid before calling it done.
The most important step is anchoring the posts. A railing is only as strong as its post connections, so follow the load-rated hardware instructions exactly and don’t rely on surface-mount brackets alone where code calls for through-bolting to framing.
Styles and Baluster Options
White vinyl railing comes in more variety than many homeowners expect, and the style you choose sets the character of the porch or deck. The most common is the traditional system with square or contoured top and bottom rails and evenly spaced square balusters, the classic colonial look. For a more open feel that preserves a view, choose round aluminum balusters in a black or bronze finish set into the white rails, the dark spindles nearly disappear against the landscape. Decorative options include turned or colonial-profile balusters for a Victorian feel, and glass-panel inserts for an unobstructed sightline on a deck overlooking water or a yard. Top-rail profiles range from a flat drink rail wide enough to set a glass on, to a contoured grip rail that’s easier to hold on stairs. Most systems also offer matching gate kits and post caps, including solar-lit caps that glow at dusk, so you can coordinate the whole railing as one cohesive look.
Keeping It Bright White
Maintenance is minimal, which is the whole point. Hose the railing down a couple of times a year, and use mild soap and water with a soft brush for stubborn grime or mildew. A diluted vinegar or specialized vinyl cleaner removes the occasional stubborn stain. Avoid abrasive pads and harsh solvents that can dull the surface. Inspect post connections annually to be sure they stay tight and safe, retightening any hardware that has loosened with seasonal expansion and contraction. A railing that’s checked once a year will stay both bright and structurally sound for its full service life.
A white vinyl railing gives a deck or porch a clean, classic, finished edge that holds its look for decades without a paintbrush ever touching it. Confirm your local code for height and baluster spacing, anchor the posts properly, and choose a quality reinforced system. At D and G Floors we recommend vinyl railing to homeowners who want the bright traditional look without committing to a lifetime of scraping and repainting.
Prefer to explore on your own?
See how new flooring looks in your actual room in seconds — free, no signup.
Try the free Floor Studio →