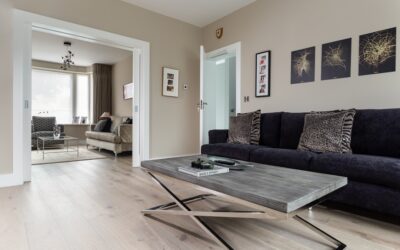
The trend started in restaurants and boutique hotels around 2014 and migrated steadily into residential design — reclaimed planks running floor to ceiling on an accent wall behind a bed, sofa, or fireplace. Wood flooring on walls uses traditional hardwood, engineered planks, or specialty wall-grade product to create a textured architectural feature that drywall and paint cannot match. Material costs run $3.99 per square foot for new oak engineered planks up to $24 per sq ft for genuine reclaimed barn wood. The look is striking when executed well, but installation differs significantly from floor installation in ways that catch DIYers off-guard if they assume the techniques transfer directly.
- Why Wood Walls Are Different From Wood Floors
- Product Choices for Wall Applications
- Attachment Method Decisions
- Wall Preparation That Determines Success
- Pattern Layout Choices
- Fire Code and Building Code Considerations
- Cost Breakdown for a Typical Accent Wall
- Common Installation Mistakes to Avoid
- Finishing and Long-Term Care
Why Wood Walls Are Different From Wood Floors
Wood floors carry load and deal with foot traffic, spills, and chair scrapes. Wood walls deal with none of that, but they have their own demands — gravity working against the attachment system, lower humidity at ceiling height than near the floor, and visual exposure that makes every imperfect joint immediately obvious. The plank thickness can be much thinner (5/16 inch or 3/8 inch is plenty) and the wear layer is irrelevant because nothing wears the surface, but the attachment method and pattern layout require fresh thinking.
Adhesive and finish nails replace the standard flooring nailer. Expansion gaps shrink to 1/8 inch instead of 3/8 inch because vertical movement is smaller. And the visible end-grain at top and bottom needs trim, picture-frame molding, or a careful reveal detail because there is no baseboard hiding the cut.
Product Choices for Wall Applications
- Reclaimed barn wood: $9 to $24 per sq ft, irregular widths, weathered patina
- New engineered planks: $3.99 to $8.99 per sq ft, uniform color, factory finish
- Specialty wall-grade thin planks: $5 to $14 per sq ft, 5/16 inch thickness
- Stikwood peel-and-stick: $8 to $14 per sq ft, factory adhesive, no nails
- Solid hardwood floor seconds: $2 to $4 per sq ft, mixed grades, requires sorting
Attachment Method Decisions
Three attachment systems work reliably for wood on walls. Construction adhesive plus finish nails is the workhorse method for most installs — a generous bead of Loctite Power Grab or Liquid Nails Heavy Duty along the back of each plank, combined with two or three 1-1/2 inch finish nails per plank into the wall studs. The adhesive holds the plank flat against the wall while the nails handle short-term load before the adhesive cures.
Peel-and-stick adhesive panels (Stikwood, Wallplanks, Timberchic) use a pressure-sensitive adhesive applied at the factory and pressed firmly against a clean, primed wall. The system works well over a fresh drywall or skim-coated surface but bonds poorly to textured walls, semi-gloss paint, or any surface with grease or dust contamination. Mechanical hidden-clip systems exist for high-end commercial work but are overkill for residential applications.
Wall Preparation That Determines Success
The wall surface beneath the wood plays a bigger role than most installers expect. Drywall must be skim-coated or primed and lightly sanded to eliminate paint texture that telegraphs through thin planks. Stud locations need precise marking because finish nails into drywall alone will not hold the weight of a wall full of planks over time — the adhesive carries the long-term load, but the nails carry the short-term load until the adhesive cures.
- Locate all studs with a stud finder and mark with a pencil from floor to ceiling
- Snap a level chalk line for the starter row near the bottom of the wall
- Prime any glossy or textured paint to give adhesive a fresh surface
- Pre-sort planks by color and length, laying them out flat on the floor first
- Cut around outlets, switches, and trim with a jigsaw or oscillating tool
Pattern Layout Choices
The pattern dictates the visual impact more than the wood species. A random-width random-length layout creates an organic, reclaimed-look pattern that hides cut edges and dye lot variations. A uniform-width staggered pattern reads more polished and modern. Vertical orientation makes the room feel taller, horizontal orientation makes it feel wider — pick deliberately based on the room’s existing proportions.
Stagger end joints by a minimum of 8 inches across adjacent rows. Plan the cuts so the last row is at least 3 inches wide rather than ending with a 1/2 inch sliver at the ceiling — this requires measuring the wall height precisely and adjusting the starter row position. Mock the layout on the floor first with the planks arranged in their planned positions before committing any adhesive to the wall.
Fire Code and Building Code Considerations
Wall-mounted wood creates a fuel load that drywall does not — relevant for code compliance in certain rooms and building types. The International Residential Code allows wood paneling up to 1/4 inch thick on residential interior walls without flame-spread treatment in most rooms, but kitchens, garages, and rooms with significant fire risk may require Class B flame spread rated material or coverage limits.
Check local building codes before installing wood walls in kitchens near cooking surfaces, around fireplaces, or in attached garages. Multi-family buildings (apartments, condos, townhouses) have stricter requirements — fire-rated assemblies in shared walls cannot be compromised by adding combustible material on the room side without engineering review.
Cost Breakdown for a Typical Accent Wall
A 10 foot wide by 9 foot tall accent wall (90 sq ft) in mid-range engineered plank at $6.49 per sq ft costs $584 in material with 10% overage. Adhesive (2 tubes at $9 each), finish nails ($12), and quarter-round ceiling trim ($25) add another $55 to the project. Tool rental for a finish nailer if not owned runs $35 per day. Total DIY cost: roughly $675 for the wall.
Professional installation labor for an accent wall runs $4 to $8 per sq ft because the work is visible from every angle and any imperfection shows. The same 90 sq ft wall installed turnkey costs $1,000 to $1,400 total. Reclaimed barn wood pushes the material cost to $1,800+ for the same wall, with similar labor pricing.
Common Installation Mistakes to Avoid
The most damaging mistake is failing to acclimate the wood before installation. Material delivered from a 70% humidity warehouse and installed in a 35% humidity home will shrink within 60 days, opening visible gaps between planks. Acclimate cartons in the install room for 7 days before any work begins, stacked flat with one inch of air space between boxes.
The second mistake is over-relying on adhesive without nails. Adhesive needs 24 to 72 hours to reach full bond strength, during which gravity will pull unsupported planks away from the wall and ruin the alignment. Use finish nails as temporary support during the cure window, then putty the nail holes after the adhesive sets.
Finishing and Long-Term Care
Factory-finished engineered planks need no additional finish — they arrive ready to install. Unfinished or reclaimed wood typically needs one or two coats of low-sheen waterborne urethane or a hardwax oil finish applied after install to even out the color and protect against minor surface scuffs. Wax-based finishes look beautiful but require periodic recoating, which is impractical on a wall surface that runs to a ceiling. Stick with a one-time finish system unless you have a clear plan to maintain the wall over time. Done correctly, wood flooring on walls delivers a strong visual statement that elevates the room without the maintenance overhead of an actual hardwood floor.
Prefer to explore on your own?
See how new flooring looks in your actual room in seconds — free, no signup.
Try the free Floor Studio →