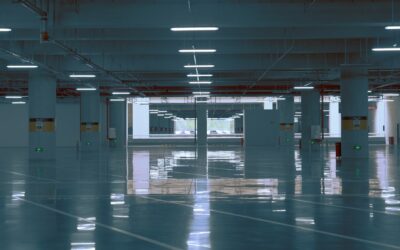
Not all epoxy is created equal, and the difference usually comes down to one number on the label. A 100 solids epoxy floor coating contains no water or solvent carriers, so nearly everything you roll onto the floor stays there as a thick, durable film. That single trait is why it dominates commercial garages, warehouses, and showrooms where cheaper coatings peel within a year. This guide explains what “100% solids” really means, how it compares to other epoxies, and how to apply it correctly.
Part of our Epoxy, Concrete & Garage Floors guide — explore the full guide →
- What “100% Solids” Actually Means
- How It Compares to Other Epoxy Types
- Where It Makes the Most Sense
- Surface Prep: The Make-or-Break Step
- Application Step by Step
- Cost and Coverage
- Curing Time and What to Expect
- Decorative and Slip-Resistance Options
- Common Mistakes That Ruin a Coating
- DIY or Hire a Pro?
- Is It the Right Choice for You?
What “100% Solids” Actually Means
The “solids” percentage tells you how much of the product remains on the floor after curing. In a water-based epoxy that is roughly 40 to 50 percent solids, half the volume evaporates as it dries, leaving a thin film maybe 3 mils thick. A 100 percent solids epoxy has no carrier to evaporate, so the full wet coat cures into place, building 10 mils or more from a single application.
That thickness is where the durability comes from. A thicker film resists abrasion, impact, chemicals, and hot-tire pickup, the problem where car tires literally lift lesser coatings off the concrete on a hot day. It is the same chemistry professionals use, now available to serious DIYers.
How It Compares to Other Epoxy Types
- 100% solids epoxy: thickest and most durable, 8 to 20 mils per coat. Cures fast and gives you a short working window, so it demands preparation and speed.
- Solvent-based epoxy: good penetration and adhesion, but strong fumes and VOC restrictions have made it less common for home use.
- Water-based epoxy: the kind in most big-box garage kits. Easy to apply, low odor, forgiving, but thin and less resistant to hot tires and heavy wear.
If you want a floor that shrugs off dropped tools, oil, road salt, and years of traffic, 100% solids is the clear winner. If you want a quick, low-cost refresh on a lightly used floor, a water-based kit may be enough.
Where It Makes the Most Sense
This coating earns its premium in demanding spaces: attached and detached garages that see daily car traffic, workshops, basements that double as gyms, and any commercial or agricultural floor. In a residential garage it turns a dusty slab into a showroom surface that wipes clean and shrugs off a dropped wrench.
It is overkill for a lightly used utility room or a floor you plan to cover with another material. But for a garage you actually work and park in, the extra cost pays back in a coating that lasts a decade or more instead of a couple of seasons.
Surface Prep: The Make-or-Break Step
Epoxy is only as good as the concrete under it, and 100% solids is unforgiving of shortcuts. The concrete must be clean, dry, and profiled so the coating can bond mechanically. Skip this and even the best epoxy will peel.
- Degrease and clean. Remove all oil and grime. Old stains may need a dedicated concrete degreaser.
- Test for moisture. Tape a plastic sheet down for 24 hours. Condensation underneath means the slab is too damp to coat.
- Profile the surface. Grind the concrete with a diamond grinder, or acid-etch it, to open the pores. The target is a texture like medium sandpaper (roughly CSP 2-3).
- Repair cracks and spalls with an epoxy or polyurea patch, then vacuum every speck of dust.
Application Step by Step
Because 100% solids epoxy cures fast, you work in small, organized batches. Have everything staged before you mix.
- Prime if recommended. Some systems call for a thin primer coat to seal the concrete and boost adhesion.
- Mix precisely. Combine Part A and Part B at the exact ratio for exactly the time stated. Under-mixing leaves soft spots that never cure.
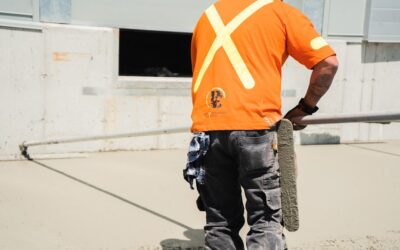
- Roll in sections. Cut in the edges with a brush, then roll the field with a 3/8-inch nap roller, working a manageable 4-by-4-foot area at a time.
- Broadcast flakes immediately if you want a decorative or slip-resistant finish, tossing them into the wet epoxy.
- Watch the pot life. Most 100% solids products give you 20 to 40 minutes of working time once mixed. When it starts to thicken in the bucket, stop using that batch.
A topcoat of clear epoxy or polyurethane over the base adds gloss, UV resistance, and extra wear protection, and it locks decorative flakes in place.
Cost and Coverage
Expect to pay more up front than a hardware-store kit. Materials for a 100% solids system run roughly $2 to $5 per square foot, and a full professional install lands around $5 to $12 per square foot depending on prep, flakes, and topcoats. A two-car garage of about 400 square feet might cost $800 to $2,000 in materials for a DIY job, or $2,500 to $5,000 installed.
Coverage is lower than thin coatings precisely because it goes on thick, often 40 to 50 square feet per gallon at a single high-build coat. Buy enough to finish in one session; you cannot easily blend a fresh batch into a coat that has started to cure.
Curing Time and What to Expect
Because there’s no solvent to flash off, 100% solids epoxy cures through a chemical reaction between the two parts, and temperature drives the timeline. In a shop around 70°F, expect it to be walkable in 12 to 24 hours, ready for light use in 2 to 3 days, and fully cured, ready for vehicle traffic, in 5 to 7 days. Cold slabs slow everything down and can leave a tacky surface, which is why most manufacturers specify an application temperature above 50 to 60°F.
Resist the urge to park on the floor early. Even when the surface feels hard, the coating continues to harden for days, and driving on it too soon risks hot-tire marks and premature wear. Give it the full week before parking a car if you can.
Decorative and Slip-Resistance Options
A thick base coat is also a great canvas for finishing touches. Broadcasting color flakes (vinyl chips) into the wet epoxy adds a speckled, professional look and hides minor imperfections. Metallic epoxy pigments can create a marbled, three-dimensional effect popular in showrooms and man caves. For traction, especially important on a smooth high-gloss floor that gets wet, add a fine anti-slip aggregate like aluminum oxide or a polymer grit to the clear topcoat.
Keep in mind that decorative flakes and a topcoat go hand in hand: the clear coat locks the flakes down and gives a smooth, sealed surface that’s easy to clean. Bare flakes without a topcoat feel rough and shed over time.
Common Mistakes That Ruin a Coating
- Skipping the moisture test: coating a damp slab causes bubbling and delamination weeks later.
- Inadequate profiling: failing to grind or etch leaves the concrete too smooth for a mechanical bond, and the epoxy peels.
- Off-ratio or under-mixing: guessing the mix or stirring too briefly leaves soft, uncured spots.
- Working too slowly: ignoring the pot life means the batch gels in the bucket and rolls out lumpy.
- Coating in the cold: applying below the minimum temperature leaves a tacky or uncured film.
DIY or Hire a Pro?
A determined DIYer can absolutely apply a 100% solids system, but be honest about the demands. The two hardest parts are surface prep, which usually requires renting a diamond grinder, and working fast enough to beat the short pot life. If you have a large garage, an uneven or previously coated slab, or a moisture issue, the odds of a mistake climb, and mistakes in this product are expensive to fix.
Hiring a professional installer typically runs $5 to $12 per square foot and gets you commercial grinding equipment, proper moisture testing, and a crew that can coat the whole floor within the working window. For a first-timer with a clean, dry, single-car garage, DIY is realistic. For a big or problematic floor, the pro’s result and warranty are often worth the premium.
Is It the Right Choice for You?
If you want the toughest, longest-lasting floor and you’re willing to invest in serious surface prep, a 100 solids epoxy floor coating is hard to beat. It resists hot tires, chemicals, and abrasion in a way thin coatings simply cannot match. The tradeoffs are a higher price, a demanding prep process, and a fast cure that punishes hesitation. Prep the slab properly, work in disciplined batches, and you’ll get a floor that still looks sharp long after cheaper coatings would have flaked away.