Few materials do more work for less money than 12×12 white tile. The 12-inch square format has been a jobsite staple for decades, and a clean white glaze still reads as bright, timeless, and easy to match. When homeowners ask me for a surface that photographs well, resells well, and forgives a first-time installer, 12×12 white tile is usually the first thing I pull off the shelf. It covers floors and walls, ceramic and porcelain, budget remodels and high-end kitchens alike.
- Ceramic vs. Porcelain in the 12-Inch Square Format
- Glossy vs. Matte: Choosing the Right Finish
- Grout Color Makes or Breaks the Look
- How Much 12×12 White Tile Do You Need
- Installing 12×12 Tile the Right Way
- What a 12×12 White Tile Project Really Costs
- Design Ideas and Pairings
- Maintenance and Longevity
That versatility is also where people get tripped up. A glossy 12-inch square on a bathroom floor can turn into a skating rink, and the wrong grout color can make a $2 tile look cheap. This guide walks you through the material choices, finishes, grout strategy, and installation details that separate a professional-looking job from an amateur one.
Ceramic vs. Porcelain in the 12-Inch Square Format
The white tile in the 12×12 size comes in two basic bodies: ceramic and porcelain. Ceramic is softer, cheaper, and typically runs $0.80 to $2.50 per square foot at the big-box level. It absorbs more water and chips more easily, which is why I steer clients toward ceramic for walls, backsplashes, and light-duty floors rather than busy entryways.
Porcelain is fired hotter and denser, with a water absorption rate below 0.5 percent. Expect to pay $2.50 to $6 per square foot for a decent white porcelain, more for rectified edges or a through-body color. Porcelain resists chipping, handles freeze-thaw cycles, and holds up in mudrooms, laundry rooms, and commercial-grade traffic. If the tile will see wheels, pets, or wet boots, spend the extra dollar and buy porcelain.
- Ceramic: lighter weight, easier to cut with a manual snap cutter, best for walls and low-traffic floors.
- Porcelain: denser and harder, needs a wet saw with a diamond blade, best for floors and wet areas.
- PEI rating: look for PEI 3 or higher for any floor; PEI 1 to 2 is wall-only.
Glossy vs. Matte: Choosing the Right Finish
Finish changes everything about how a white tile behaves and looks. Glossy glaze bounces light, makes small rooms feel larger, and wipes clean with a damp cloth, which is why it dominates kitchen backsplashes. The downside is that gloss shows water spots, soap film, and every scratch under raking light. On a floor, a high-gloss white becomes genuinely slippery when wet.
Matte and honed finishes trade some brightness for grip and forgiveness. A matte white floor hides footprints and dried water far better, and it carries a higher slip-resistance rating, often a dynamic coefficient of friction (DCOF) of 0.42 or above, which is the threshold for wet-area floors. My rule of thumb: gloss on walls, matte or textured on floors. If you love the look of gloss underfoot, at least confine it to a powder room that rarely gets splashed.
Grout Color Makes or Breaks the Look
The single biggest decision with white tile is not the tile, it is the grout. Grout color controls how busy the surface reads and how much maintenance you sign up for.
Bright White Grout
Matched white grout gives a seamless, monolithic look that feels modern and clean. It also shows dirt fast on floors and yellows over time near cooking oils. If you go bright white, use an epoxy or a high-performance cement grout and seal it well.
Gray Grout
A soft gray is the pragmatic choice for floors. It hides traffic patterns, disguises minor lippage, and frames each tile so the pattern reads intentional. A medium gray with white subway or square tile is a look that has never gone out of style.
Contrasting Dark Grout
Charcoal or black grout turns a plain white grid into a graphic statement, popular for retro and farmhouse baths. It demands precise spacing because any crooked line is now obvious, so it is not a beginner-friendly choice.
How Much 12×12 White Tile Do You Need
Each 12×12 tile covers exactly one square foot, which makes math refreshingly simple. Measure the room’s length by width in feet to get square footage, then add waste. For a straight, square room, add 10 percent for cuts and breakage. For a diagonal layout or a room with lots of jogs and closets, add 15 to 20 percent.
A 5-by-8-foot bathroom floor is 40 square feet, so you would buy 44 to 48 tiles. Always keep a full box of leftovers after the job. Dye lots vary between production runs, and matching a cracked tile three years later is nearly impossible without spares from the original lot.
Installing 12×12 Tile the Right Way
The square 12-inch format is one of the friendliest tiles to set because the grid stays predictable and lippage is easier to control than with long planks. That said, a flat substrate is non-negotiable.
- Check the subfloor. It should be flat to within 1/4 inch over 10 feet. On wood framing, add cement backer board or an uncoupling membrane before tiling.
- Dry-lay the layout. Find the center of the room, snap chalk lines, and dry-fit a row in each direction so you avoid a sliver cut against a prominent wall.
- Use the right trowel. A 1/4-by-3/8-inch square-notch trowel is standard for 12×12 floor tile. Back-butter each piece for full coverage.
- Set spacers. A 1/8-inch grout joint is typical for these tiles; 3/16 inch if the edges are not rectified.
- Let it cure. Wait 24 hours before grouting and 48 to 72 hours before heavy traffic.
Mix thinset to a peanut-butter consistency, and never spread more than you can set in 15 minutes or it skins over. For a typical 40-square-foot bathroom, a competent DIYer should plan a full weekend: one day to set, one day to grout and seal.
What a 12×12 White Tile Project Really Costs
Budget in three buckets: tile, materials, and labor. Here is a realistic breakdown for a floor install.
- Tile: $1 to $6 per square foot depending on ceramic vs. porcelain.
- Thinset, grout, backer board, sealer: roughly $1.50 to $3 per square foot.
- Professional labor: $5 to $12 per square foot in most U.S. markets, higher in coastal cities.
All in, a professionally installed white tile floor runs $8 to $20 per square foot. Doing it yourself can cut that to $3 to $9 per square foot, with your main investment being a wet saw rental at $40 to $70 a day. That savings is exactly why this format stays popular with hands-on homeowners.
Design Ideas and Pairings
White is a blank canvas, and small choices push it toward different styles. Set the tiles in a straight grid for a crisp, contemporary look, or run them on a 45-degree diagonal to make a narrow room feel wider. Pair a matte white floor with warm wood cabinetry for a Scandinavian feel, or with black fixtures and gray grout for an industrial edge.
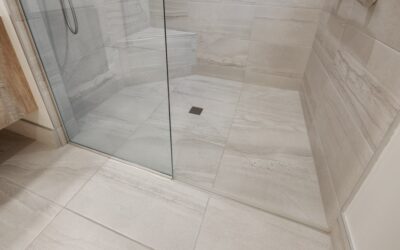
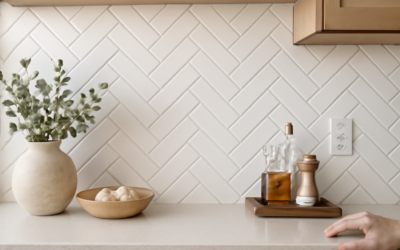
In a bathroom, carry the same 12-inch square up the shower walls and switch to a smaller mosaic on the shower floor for slip resistance and drainage slope. On a kitchen backsplash, a glossy white 12×12 cut down or paired with a bright grout keeps the space feeling open and easy to wipe down. Whatever direction you choose, the white square is the safe bet that still looks intentional years later, and it remains one of the easiest surfaces to update with paint and accessories instead of a full remodel.
Maintenance and Longevity
A sealed white tile floor is close to bulletproof. Sweep or vacuum grit that would otherwise scratch a glossy glaze, and damp-mop with a pH-neutral cleaner rather than vinegar, which erodes cement grout over time. Reseal cement grout every one to two years in wet areas. Do this, and a 12-inch white porcelain floor will outlast the rest of the room, giving you decades of bright, clean-looking service for one of the lowest costs per square foot in the tile aisle.
Prefer to explore on your own?
See how new flooring looks in your actual room in seconds — free, no signup.
Try the free Floor Studio →