Venting a wood stove straight up through the roof is the cleanest, best-drafting chimney layout you can build — and kits have made it a legitimate weekend project for a careful DIYer. A 6 inch through the roof chimney kit bundles the class A chimney pipe, ceiling support box, flashing, storm collar, and cap needed to get from the stove collar to open sky in one purchase, typically $600 to $1,400 depending on brand and ceiling height. Here is what the kits include, the clearance and height rules that keep the install legal and safe, and how the major brands compare.
Part of our Roofing guide — explore the full guide →
Why 6 Inch Is the Standard Size
Six-inch inner diameter matches the flue collar on the overwhelming majority of modern EPA-certified wood stoves — Drolet, Englander, Vermont Castings, Lopi, Pacific Energy, and most others. Matching the chimney to the collar size matters: upsizing slows flue gases and increases creosote; downsizing chokes draft. If your stove has an 8-inch collar (some older or large furnaces do), buy an 8-inch system, not a reduced 6-inch one. Always confirm against the stove manual, because the stove manufacturer’s venting instructions are enforceable code under most mechanical inspections.
What a Through-the-Roof Kit Includes
Kits vary, but a complete cathedral or flat-ceiling package generally contains:
- Class A chimney sections: Double-wall insulated stainless pipe (usually two or three 36 in. or 48 in. lengths) rated UL 103 HT for 2,100°F. This is the through-the-structure pipe.
- Ceiling support box or cathedral support: Carries the chimney weight and maintains clearance where the pipe passes the ceiling plane.
- Roof flashing: Pitched flashing sized to your roof slope (buy the right range — 0/12-6/12 or 6/12-12/12) with a storm collar to shed water above it.
- Rain cap: Stainless cap with spark screen.
- Attic insulation shield: Required whenever the pipe passes an insulated attic; keeps blown-in insulation off the hot pipe.
- Trim collar and sometimes a stovepipe adapter that transitions the interior single-wall or double-wall stovepipe to the class A system.
Note what kits usually do NOT include: the interior stovepipe from the stove to the ceiling box, extra chimney lengths for tall roofs, roof braces for chimneys extending more than 5 feet above the roof, and the elbows a slight offset might need. Budget those separately — interior double-wall stovepipe runs $60-$120 per 36-inch section.
The Clearance and Height Rules That Matter
Three numbers govern nearly every through-the-roof job:
- 2-inch clearance: Class A pipe must maintain 2 inches from all combustibles — framing, sheathing, insulation baffles — the entire way up. The support box and radiation shields enforce this at penetrations, but you must frame the roof opening to match (typically a 14.5 x 14.5 in. box between rafters for 6-inch pipe with an 8-inch outer diameter class A system; check your brand’s spec).
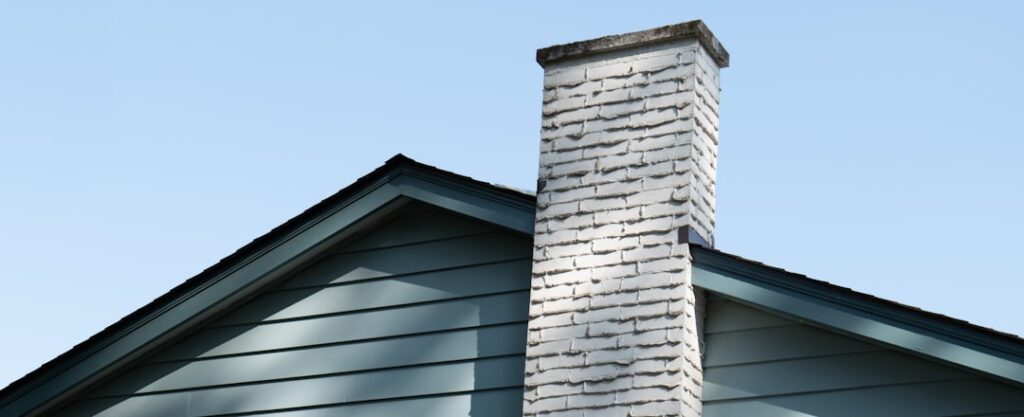
- The 10-3-2 rule: The chimney must terminate at least 3 feet above the roof penetration and at least 2 feet higher than anything (roof ridge, dormer, wall) within 10 feet horizontally. Steep roofs and ridge-adjacent penetrations eat pipe fast — placing the chimney near the ridge minimizes exposed pipe and bracing.
- 15-foot minimum system height: Most stove manufacturers require at least 12-15 feet of total vertical flue from the stove collar to cap for adequate draft. Single-story ranches with shallow attics sometimes come up short and draft poorly; add a section rather than living with a smoky stove.
Interior clearances for the stovepipe portion are separate: 18 inches to combustibles for single-wall pipe, 6 inches for double-wall — often the deciding factor for choosing double-wall inside.
Brand Comparison and Pricing
- DuraVent DuraTech/DuraPlus: The most widely stocked. DuraPlus is triple-wall, budget-friendly ($700-$1,000 for a typical kit); DuraTech is double-wall with solid-pack insulation, slimmer and a step up in quality ($900-$1,300).
- Selkirk SuperVent/SuperPro: Big-box staple (Lowe’s carries SuperVent). Complete JSC6 through-the-roof kits commonly run $600-$850. Good value; verify part availability for extensions before committing.
- ICC Excel: Premium Canadian system, superb insulation and lock, priced accordingly.
- Rock-Vent and other online direct brands: 304/316 stainless at aggressive prices with bundled interior pipe; quality has improved, but confirm UL 103 HT listing documents.
Critical compatibility warning: chimney brands do not interconnect. A DuraTech section will not twist-lock into a SuperVent support box. Pick one system and buy every component within it, including future extensions.
Installation Sequence in Brief
- Position the stove per its listed clearances, drop a plumb bob from the ceiling to the flue collar center, and mark the ceiling opening.
- Frame the opening, install the support box (it typically hangs 2-3 inches below the finished ceiling or per manual), and screw it to framing.
- Cut the roof opening from below, remove shingles above the hole line, and slide the flashing under the upslope shingles — flashing laps over shingles on the downslope side only. Seal nail heads with polyurethane sealant, not roofing tar.
- Stack class A sections up through the flashing, twist-locking each joint; fit the storm collar and seal its top edge with high-temp silicone.
- Add the attic insulation shield, cap the top, then connect interior stovepipe with three screws per joint, crimped ends pointing down toward the stove so creosote drips stay inside the pipe.
- Brace the chimney if more than 5 feet stands above the roofline, then do a small break-in fire and check draft.
Pull a mechanical permit — inspectors catch clearance mistakes that burn houses down, and unpermitted stove installs are a classic insurance claim denial. Professional installation of a kit runs $800-$2,000 on top of materials if you would rather not cut your own roof.
Maintenance and Long-Term Costs
Plan on sweeping the flue at least annually — every cord or two of wood if you burn green or smolder overnight fires. A 6-inch poly brush and fiberglass rod kit costs about $60, and a straight vertical chimney is the easiest kind to sweep from the roof or, with a SootEater rotary kit, from inside the house. Inspect the storm collar sealant each fall and the cap screen for creosote clogging mid-season. Done right, a stainless class A system carries a limited lifetime warranty and outlives the stove; the flashing sealant, at $8 a tube every few years, is the only recurring cost. For the money, straight up through the roof remains the best-drafting, lowest-maintenance chimney a wood burner can own.
Through the Roof vs. Through the Wall: Why Vertical Wins
The alternative layout — out a wall with a tee, then up the exterior — tempts people because it avoids cutting the roof. Resist it when you have the choice. Exterior chimneys run cold, and cold flues draft poorly and condense creosote faster; a through-the-wall system also needs two 90-degree turns, each of which costs draft, plus a tee cleanout and wall bracing every few feet. Material costs typically run $200-$500 higher for the same total height. The through-the-roof layout keeps the pipe warm inside the envelope, drafts the moment you light a match, and sweeps in one straight pull. The only scenarios that genuinely favor the wall exit are trusses you cannot legally cut, a finished ceiling you refuse to open, or a manufactured home installation following its specific listing.
Budget Worksheet for a Typical Install
A realistic all-in tally for a single-story home with an 8-foot ceiling and a 6/12 roof, done DIY with a mid-tier kit:
- Through-the-roof kit (support box, flashing, collar, cap, 3 ft class A): $650-$900
- Two additional 36 in. class A sections to reach 15 ft system height: $260-$400
- Interior double-wall stovepipe, two sections plus adapter: $180-$280
- Attic insulation shield (if not in kit), sealants, screws: $60-$120
- Permit and inspection: $50-$150
Total: roughly $1,200-$1,850 in materials — about what a chimney company charges for labor alone. Add a hearth pad ($150-$400) and wall heat shields if clearances demand them, and the complete stove-plus-chimney project still commonly lands under $3,500 with a quality $1,200 stove.
One last field tip: order one more chimney section than the tape measure says. The 10-3-2 rule, measured on the actual roof with the actual flashing in place, has a habit of demanding another 18 inches, and paying $40 freight to ship a single section three weeks into burning season is how that lesson usually gets learned.