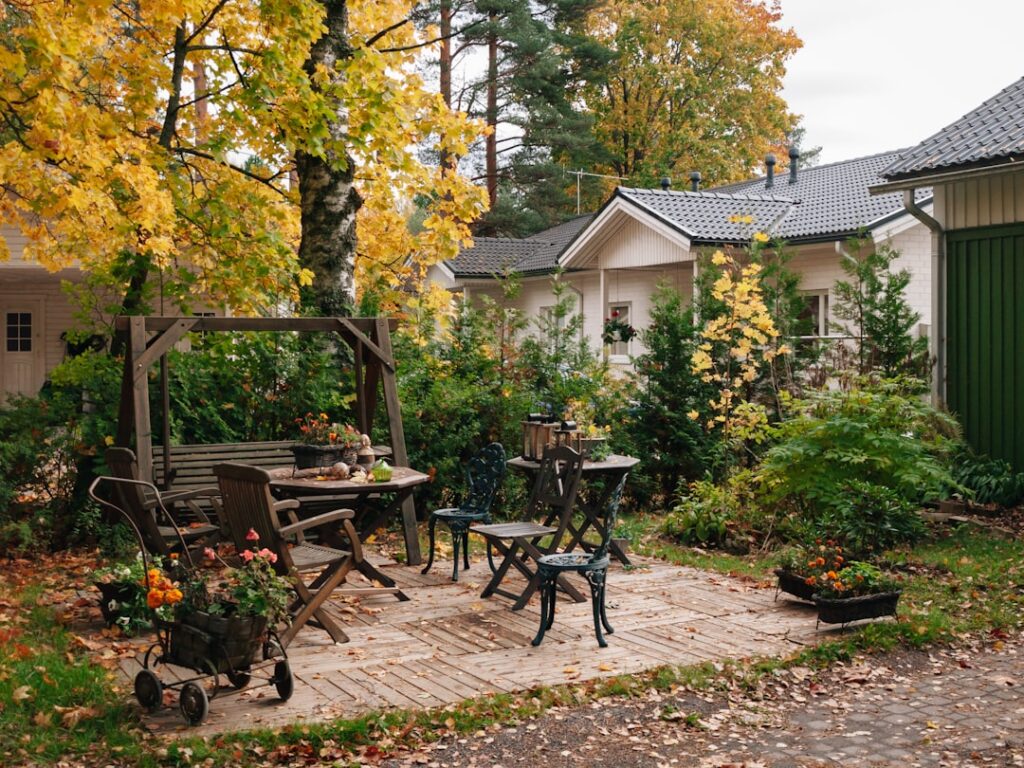
The best patios are not the biggest ones — they are the ones laid out around how you actually live. A 12×14-foot slab positioned to catch evening shade will get used five nights a week, while a sprawling 600-square-foot showpiece in full afternoon sun sits empty. These back yard patio ideas focus on that layout thinking: how to zone a yard for cooking, eating, and lounging, what to do when the yard is small or sloped, and what each ambition level realistically costs. For broader inspiration galleries, our patio ideas and patio design guides go deep on styles and materials; this one stays focused on making a backyard work.
Start With Zones, Not Shapes
Designers break a backyard patio into activity zones and size each one from furniture outward. A dining zone for six needs about 10×10 feet — a 48-inch table plus 36 inches of chair pullback on all sides. A lounge zone with a sofa, two chairs, and a coffee table wants 12×12. A grill station needs a modest 6×8, but put it downwind of the seating and at least 10 feet from the house and any wood fence. Sketch those rectangles on graph paper before choosing any material, and connect them with 36-48 inch pathways.
Two zones beat one big pad in almost every yard. Separating dining from lounging — even by a 2-foot planting strip or a change from pavers to gravel — makes the same square footage feel like a designed outdoor room instead of a parking apron.
Small Backyard Ideas: Under 20×20 Feet
Small yards reward commitment. Rather than shrinking a standard patio, let hardscape take over 60-80 percent of the space and treat the yard as a courtyard:
- Full-width paver terrace with planted borders — no token grass strip that becomes a mowing chore.
- Diagonal-set pavers or planks to make the space read wider than it is.
- Built-in bench seating along a fence — a 17-inch-high seat wall or cedar bench seats four in the footprint two chairs would occupy.
- Vertical layers: string lights overhead at 8-9 feet, wall planters, and a slim pergola create height where there is no width.
- A bistro corner — a 6×6 pad fits a 30-inch table and two chairs, enough for morning coffee in even the tiniest yard.
One material, edge to edge, keeps a small space calm. Save the mixed-material moves for bigger yards.
Entertaining Layouts: Built Around the Crowd
If hosting is the point, design for traffic flow. Guests cluster near food and fire, so place the grill zone adjacent to — not inside — the dining area, and give the cook 48 inches of clearance. A fire feature is the single highest-use addition for entertaining: a 44-inch fire pit with seating in a 12-14 foot circle around it extends the season by two months on either end. Position it away from overhead branches and check local burn ordinances; many suburbs allow propane fire tables anywhere but restrict wood fires within 15-25 feet of structures.
For bigger gatherings, an L-shaped layout hugging two sides of the house naturally splits into a conversation area and a dining area while keeping both close to the kitchen door. Add a 10×12 pergola over the dining half for shade and definition — and consider an outdoor-rated ceiling fan under it for July evenings.
Working With a Sloped Yard
Slope is opportunity disguised as a problem. A yard falling 3-4 feet invites a two-level patio: dining terrace at door level, fire-pit terrace a few steps down, linked by wide (minimum 4-foot) steps that double as casual seating. Terracing requires retaining walls, which adds $25-60 per face foot to the budget, but the result outclasses any flat design. On gentle slopes under 18 inches of fall, a single raised paver patio with a seat-height perimeter wall solves the grade and adds seating for a dozen people at once.
Material and Style Direction
Concrete remains the value king — plain broom-finish at $6-10 per square foot installed, or stamped patterns at $12-18 that mimic stone convincingly; our concrete patio designs guide covers the pattern and finish options in detail. Concrete pavers run $15-25 installed and win on repairability, natural flagstone $20-30 for the organic high-end look, and compacted pea gravel just $2-4 per square foot for the fastest DIY win. Match the material’s formality to the house: crisp large-format pavers suit modern architecture, tumbled cobble and irregular flagstone suit traditional homes.
Privacy and Enclosure
A patio nobody uses is usually a patio that feels watched. Fixes by budget: a 6×8 lattice privacy screen panel ($40-100) blocking the one critical sightline; a row of arborvitae (‘Green Giant’ plants 3 feet apart and gains 3 feet a year); a slat-wall screen of 1×4 cedar on posts ($15-25 per linear foot DIY); or a pergola with an outdoor curtain on the exposed side. You rarely need to enclose the whole patio — screening the neighbor’s second-story sightline over the seating zone is usually the entire job.
Budget Tiers: What Each Level Buys
- Under $1,000 (DIY weekend): a 10×12 pea gravel patio with steel edging, a fire bowl, string lights, and secondhand seating.
- $1,500-4,000: a DIY 12×14 paver patio on a proper compacted base, solar path lights, and a propane fire table.
- $4,000-9,000: professionally poured or stamped concrete at 300-400 square feet, a 10×12 cedar pergola kit, and a dedicated grill pad.
- $10,000-15,000+: two-level pavers with a seat wall, integrated low-voltage lighting, gas fire pit plumbed to the house line, and landscape planting.
Phasing is the underused strategy here: pour the pad and set the pergola posts this year, add the fire feature next spring, and plant the privacy screen in fall when nursery stock is discounted. A patio designed in zones phases naturally, because each zone is a self-contained project with its own budget line.
Whatever the tier, spend first on the base and drainage — a 1/4-inch-per-foot slope away from the house and 4-6 inches of compacted gravel under any hard surface. Every failed patio you have ever seen heaved or puddled because someone skipped that invisible layer.
Shade: The Make-or-Break Layer
An unshaded backyard patio in July is a griddle, and shade is the difference between a space used at 6 p.m. and one used all day. Match the solution to budget and sun angle: a cantilever umbrella ($150-500) covers a 10-foot circle and moves with the sun; a shade sail ($40-150 plus posts) handles awkward shapes and adds a modern line overhead; a pergola ($800-3,500 for a 10×12 kit) defines the room permanently and hosts vines, string lights, and a fan; and a retractable awning ($1,500-4,500 installed) shades the house-adjacent zone on demand and drops indoor cooling loads as a bonus. Watch the western exposure specifically — afternoon sun is the one that empties patios, so put the fixed shade where the 4-7 p.m. sun lands, not necessarily centered over the furniture.
Deciduous trees remain the best long-game answer: a maple or honey locust planted 15-20 feet off the southwest corner shades summer afternoons and drops its leaves to let winter sun through. A $60 sapling planted the same season you pour the patio will be doing real work by year five.
Finishing Touches That Earn Their Cost
Three additions consistently deliver the most use per dollar: overhead string lights on a dimmer (patios with good evening light get used twice as often), an 8×10 outdoor rug to anchor the lounge zone, and planters at the corners to soften the hardscape edges. Add an outdoor storage bench for cushions and you have removed the last friction between “nice patio” and “patio you are actually sitting on tonight.” Start with the zone sketch this weekend — every good backyard patio began as rectangles on graph paper, sized around the dinners and evenings you actually want to host.