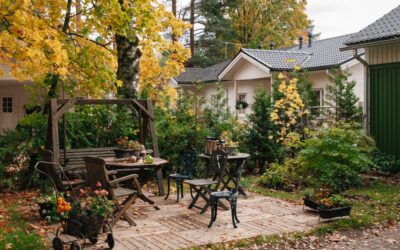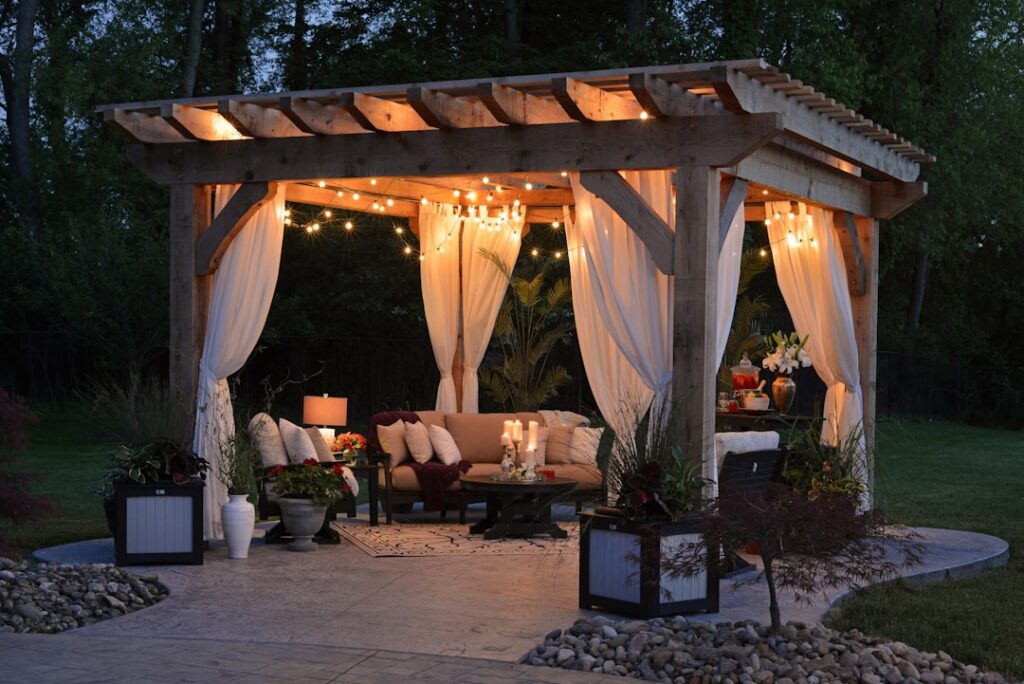
Most patios fail on paper, not in the ground — homeowners pick a material they love, pour a rectangle by the back door, and only then discover it’s too small for a table, bakes in afternoon sun, and has nowhere to plug in a light. The best patio ideas start with how you’ll actually use the space, then work backward to size, shape, material, and budget. After two decades around hardscape crews, I can tell you the difference between a patio that gets used every evening and one that collects leaves usually comes down to five decisions made before the first shovel hits dirt. Here’s how to make them well, whatever your yard and budget look like.
Part of our Decks & Outdoor guide — explore the full guide →
- Start With the Zones, Not the Shape
- Small-Yard Ideas That Live Large
- Ideas by Material — and What Each Really Costs
- Shade Ideas: From $30 to $30,000
- Fire, Water, and Light — the Features That Extend the Season
- Layout Ideas That Photograph Well and Age Well
- Furnishing and Finishing Touches
- Budgeting the Whole Project
Start With the Zones, Not the Shape
Sketch your yard and mark activity zones before you draw a single edge. A dining zone for a table seating six needs a bare minimum of 12 by 12 feet — that allows chairs to slide back without dropping off the edge. A conversation zone with four lounge chairs around a fire feature wants 10 by 10. A grill station needs a 4-by-6 landing zone, ideally 10 feet from the dining table so smoke doesn’t drift over dinner but the cook stays in the conversation. Add the zones together and most usable family patios land between 300 and 500 square feet.
Placement matters as much as size. Track the sun: a west-facing patio in Texas without shade is unusable from 2 p.m. until sunset in July, while a north-side patio in Michigan stays clammy and mossy. Watch drainage too — the finished surface must slope away from the house at roughly 1/4 inch per foot, so a patio in a low spot needs grading or a channel drain planned from the start, not bolted on after the first flood.
Small-Yard Ideas That Live Large
Under 200 square feet, go vertical and multifunctional. A 10-by-14 courtyard patio feels dramatically bigger with a diagonal or herringbone laying pattern, because the eye follows the long lines instead of the fence. Built-in seating — a masonry bench along one edge, capped in bluestone or a 2-inch paver — replaces four chairs’ worth of floor space and doubles as retaining if the yard slopes. Mount string lights overhead on two 4×4 cedar posts set in concrete and the patio gains a ceiling, which reads as an outdoor room rather than a slab.
Tight urban lots do well with a two-level design: a small 8-by-10 landing at the door stepping down 6 inches to the main area. One step of elevation change separates the zones visually without eating any square footage, and the step itself becomes overflow seating at a party.
Ideas by Material — and What Each Really Costs
Poured concrete is the value play at $8 to $14 per square foot installed, and broom-finished gray doesn’t have to be the end of it — integral color, a seeded exposed-aggregate finish, or saw-cut geometric joints lift the look for $2 to $5 more per foot. Stamped concrete runs $14 to $22 and mimics slate or flagstone convincingly from ten feet away, though it needs resealing every 2 to 3 years and any crack is forever.
Concrete pavers land at $16 to $28 per square foot installed and are the sweet spot for most homeowners: dozens of shapes and colors, individual units can be lifted and reset if the base shifts, and modern large-format 24-inch slab pavers deliver a clean, contemporary porcelain look at two-thirds the price. Natural stone — bluestone, travertine, flagstone — is the premium tier at $25 to $50 installed. Travertine stays remarkably cool underfoot, which makes it the go-to around Sun Belt pools, while thermal-finish bluestone owns the classic Northeast look. Gravel deserves a mention at $3 to $6 per square foot: a crushed-granite lounge area edged in steel with a fire bowl in the middle is the cheapest genuinely attractive patio you can build in a weekend.
Shade Ideas: From $30 to $30,000
No shade, no daytime use — it’s that simple in most of the country. A cantilevered offset umbrella covers 100 square feet for $150 to $400 and is the right first move while you learn how you use the space. A wood or aluminum pergola at $2,000 to $8,000 installed filters roughly half the light and carries string lights, ceiling fans, and climbing vines; add a canopy or shade cloth and you’re at 90 percent coverage on demand. Motorized louvered systems and retractable awnings occupy the top of the market, from $6,000 well into five figures, and earn their keep on west-facing exposures where you need full sun control.
Cheaper than all of it: plant shade. A fast-growing tree like an autumn blaze maple 15 feet off the southwest corner throws real shade in five years for under $300, and drops the surface temperature of the patio 20°F more effectively than any fabric.
Fire, Water, and Light — the Features That Extend the Season
A fire feature is the single highest-use-per-dollar addition. A steel fire bowl costs $150 to $600 and moves where you want it; a built-in gas fire pit with a plumbed line runs $2,500 to $6,000 and lights with a switch — no smoke, no ash, and it stretches patio season by a solid two months in northern states. Keep any wood-burning fire at least 10 feet from structures and check local ordinances, because many municipalities regulate open burning but allow gas.
Lighting should be layered, not blasted. Low-voltage path lights define edges, hardscape lights recessed under seat-wall caps and step treads handle safety, and warm 2700K string lights or a pergola-mounted fixture provide the ambient glow. A complete low-voltage system with a transformer and 10 to 12 fixtures runs $800 to $2,000 installed and transforms how often the space gets used after dark. Run one 20-amp GFCI outlet to the patio during construction no matter what — retrofitting power later costs triple.
Layout Ideas That Photograph Well and Age Well
Curves are seductive on paper and expensive in reality — every curved edge means cut pavers and waste. A cleaner approach is layered rectangles: a main dining rectangle, an offset lounge square, connected by a 4-foot-wide walkway band in a contrasting paver. Borders do heavy lifting too; a single soldier course of charcoal pavers framing a gray field costs almost nothing extra and makes a basic patio look designed. Leave planting pockets — a 2-by-2 cutout with an ornamental grass or a boulder breaks up big paved expanses and handles drainage besides.
Match the house. A modern farmhouse wants large-format slabs with tight joints; a craftsman bungalow suits tumbled pavers or irregular flagstone; a colonial takes brick running bond like it was always there. The patio should read as an extension of the architecture, not a catalog page dropped in the yard.
Furnishing and Finishing Touches
Furniture scale makes or breaks the finished space, and the mistake runs both directions. A 12-by-12 dining zone swallowed by an oversized sectional feels cramped; two lonely bistro chairs on 500 square feet feel like a parking lot. Measure furniture footprints against your zones before buying, and leave 3 feet of circulation around every piece. An outdoor rug — polypropylene, 8 by 10, $100 to $300 — anchors a seating group and warms up hard surfaces instantly. Planters do the work of walls: three large 20-inch pots with grasses or dwarf evergreens define the edge of a zone and screen the neighbor’s view for a fraction of what a fence section costs. Choose containers in one material family so the collection reads as intentional rather than accumulated.
Budgeting the Whole Project
For a realistic all-in number, take your square footage times the installed material rate, then add 20 to 35 percent for the extras that make it a living space — lighting, a shade structure, furniture, and planting. A 400-square-foot paver patio at $20 per foot is $8,000; the finished, furnished, lit version is closer to $11,000. Phase it if the budget’s tight: base and surface first (that’s the part you can’t easily redo), then shade the second season, then the fire feature. What you shouldn’t phase is size — pouring small and extending later almost always shows a seam and costs more than building it right once.