Most homeowners assume a usable backyard patio means tearing up the lawn for a $12,000 contractor pour. It doesn’t. Patio designs on a budget can land between $1,500 and $4,000 when you choose the right materials and do part of the labor yourself. The trick is knowing where the money actually goes, and where you can cut without ending up with a cracked, weed-choked mess two summers later. The cheapest patio is rarely the one that costs the least up front.
Part of our Decks & Outdoor guide — explore the full guide →
Start With Smart Material Choices
Material is where 60 to 70 percent of your budget disappears, so this decision matters more than any other. Poured concrete runs $6 to $12 per square foot installed, but a DIY gravel patio can cost as little as $1 to $3 per square foot. Pavers sit in the middle at $4 to $10 per square foot for materials, climbing higher if you hire installation.
For the lowest-cost durable option, decomposed granite and pea gravel are hard to beat. A 200-square-foot gravel patio needs roughly 2 to 3 cubic yards of stone over a compacted base, landscape fabric underneath, and an edge restraint. Total materials often stay under $400. If you want a more finished look, concrete pavers from a big-box store frequently sell for $1.50 to $3 each, and 16-inch squares cover about 1.75 square feet apiece.
Plan the Right Size and Layout
Bigger costs more, and oversizing is the most common budget killer. A patio for a small bistro set needs only 10 by 10 feet. A dining patio that seats six comfortably wants about 12 by 14 feet, allowing 3 feet of clearance behind pulled-out chairs. Don’t pave more than you’ll use.
Square and rectangular layouts are cheapest because they minimize cutting and waste. Curves and circular patterns look great but can add 15 to 20 percent in material waste plus hours of saw work. Sketch your design on graph paper first, where one square equals one foot, and you’ll catch sizing mistakes before they cost you money.
Do the Site Prep Yourself
Excavation and base prep are labor-heavy but require no special skill, which makes them the best place to save. Contractors charge $50 to $100 per hour for this grunt work. For a gravel or paver patio, dig down 6 to 8 inches, then build a base of 4 inches of compacted crushed stone topped with 1 inch of leveling sand.
Rent a plate compactor for about $60 to $80 per day rather than skipping compaction, which is the single biggest reason cheap patios fail. Maintain a slope of about 1/4 inch per foot away from your house so water drains instead of pooling against the foundation. A long level and a few stakes with string are all you need to check grade.
Affordable Patio Design Ideas That Look Expensive
You can fake a high-end look on a tight budget with a few proven moves:
- Mixed materials: Frame a gravel center with a single border row of pavers for a defined, custom appearance at minimal extra cost.
- Concrete with a finish: Stain or score a plain slab. A $30 bag of acid stain transforms gray concrete into something resembling flagstone.
- Recycled and reclaimed: Salvaged brick often sells for $0.25 to $0.50 each, and clean fill or broken concrete (urbanite) can be laid as free flagstone-style paving.
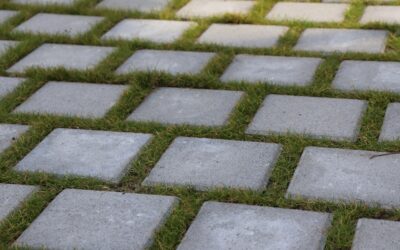
- Gravel and stepping stones: Large 24-inch concrete pads set in gravel give a modern, magazine-style path for a fraction of full paving.
Lighting punches well above its price too. A $40 set of solar string lights or a few $15 stake lights makes any patio feel finished after dark.
Furnish Without Overspending
Furniture can quietly double your project cost if you let it. A new outdoor dining set easily runs $800 to $2,000, so check the off-season instead. Late August through October is when retailers slash patio furniture 40 to 60 percent. Facebook Marketplace and estate sales routinely have solid metal or teak sets for $100 to $300.
If you’re handy, build a simple bench or coffee table from pressure-treated 2x4s and 4x4s for under $60 in lumber. Add a few weather-resistant outdoor cushions and a 9-foot market umbrella, which typically costs $50 to $90, and the space reads as a finished outdoor room rather than a slab of stone.
Add Greenery and Privacy Cheaply
Plants soften hard surfaces and make a budget patio feel intentional. Skip large nursery specimens, which can cost $80 to $150 each, and buy small one-gallon shrubs for $8 to $15 that fill in within a season or two. Group three to five potted plants in odd numbers for a designed look.
For privacy without a $3,000 fence, a row of arborvitae in containers, a $30 bamboo roll screen, or a simple lattice panel screwed to pressure-treated posts all work. Climbing vines like clematis or jasmine on that lattice cover it within a year and cost just a few dollars per plant.
Budget Breakdown and Pro Tips
For a typical 200-square-foot DIY paver patio, expect roughly this spread: $300 to $500 for pavers, $150 to $250 for base stone and sand, $40 for landscape fabric and edging, and $70 for compactor rental. That puts the hardscape near $700 total, with furniture and plants layered on as your budget allows.
A few hard-earned tips: always order 5 to 10 percent extra material to cover cuts and breakage, never lay pavers directly on dirt, and seal a stained concrete patio every two to three years to protect your work. Building your patio in phases, hardscape first, then furniture, then plantings, lets you spread the cost across multiple paychecks. Done this way, patio designs on a budget deliver an outdoor space that looks like it cost three times what you actually spent.
Avoid the Costly Beginner Errors
Most budget patio failures come down to three predictable mistakes. The first is skipping the compacted base, which lets pavers sink and heave within a single freeze-thaw cycle. The second is poor drainage, where a flat or backward slope sends rainwater pooling against the house and into the basement. The third is ignoring edge restraint, which lets the whole field of pavers slowly spread and gap at the perimeter.
Plastic paver edging costs only $15 to $25 for a 24-foot strip and stakes down in minutes, yet skipping it is the single most common reason a DIY paver patio looks ragged after one winter. Spend the extra half hour and the small sum; it protects every other dollar you put into the project. Weed growth is the other slow killer, which a good landscape fabric under the base and polymeric sand swept into the joints largely prevents.