Bathroom floor vinyl has become one of the most popular flooring choices for wet spaces — and for good reason. It is waterproof, comfortable underfoot, affordable, and available in designs that realistically mimic stone, marble, and hardwood. Whether you are renovating a master bath or updating a small powder room, this guide covers everything you need to know about choosing, installing, and maintaining vinyl flooring in your bathroom.
- Why Choose Vinyl for Your Bathroom Floor?
- Types of Bathroom Floor Vinyl
- Best Vinyl Designs for Bathrooms
- Bathroom Floor Vinyl Installation
- Subfloor Preparation
- Acclimation
- Sheet Vinyl Installation
- LVT and LVP Installation
- Around the Toilet
- Sealing Edges
- Bathroom Floor Vinyl Costs
- Bathroom Floor Vinyl vs. Other Options
- Maintenance Tips for Bathroom Vinyl Floors
- Is Bathroom Floor Vinyl Right for You?
Why Choose Vinyl for Your Bathroom Floor?
Bathrooms demand a floor that handles water, humidity, and temperature swings without failing. Vinyl delivers on all counts.
100% Waterproof
Unlike hardwood flooring or laminate flooring, vinyl does not absorb water. Spills, splashes, and even standing water from an overflowing tub will not damage the material. This is the single biggest advantage of bathroom floor vinyl.
Comfortable and Warm
Vinyl has a natural give that makes it more comfortable underfoot than ceramic tile or stone. It also retains warmth better, so you are not stepping onto an ice-cold floor on winter mornings.
Affordable
Bathroom floor vinyl costs significantly less than natural stone, porcelain tile, or waterproof hardwood alternatives. With prices starting under $2 per square foot for sheet vinyl, it fits nearly any budget.
Easy to Maintain
Sweep and damp mop — that is all vinyl needs. No grout to scrub, no sealing required, no special cleaning products necessary.
Realistic Designs
Modern vinyl printing and embossing technology creates remarkably realistic reproductions of marble, slate, travertine, and hardwood. Visitors often cannot tell the difference without touching the floor.
Types of Bathroom Floor Vinyl
There are three main categories of vinyl flooring suitable for bathrooms, each with distinct characteristics.
Sheet Vinyl
Sheet vinyl comes in large rolls — typically 6 or 12 feet wide — that are cut to fit your bathroom and laid in one or two continuous pieces. Because it has few or no seams, sheet vinyl provides the best water protection of any vinyl format. It is ideal for bathrooms where water resistance is the top priority.
Sheet vinyl is the most affordable option, starting at $1 to $3 per square foot for material. Installation requires precision cutting and typically involves adhesive, making it a job best suited for experienced DIYers or professionals.
Luxury Vinyl Tile (LVT)
LVT consists of individual tiles that mimic the look of ceramic, stone, or marble. Tiles are typically 12 by 12 inches or 12 by 24 inches and install with click-lock joints or adhesive. LVT gives you the sophisticated look of natural stone at a fraction of the cost.
LVT ranges from $2 to $5 per square foot and is a popular choice for bathrooms where you want a tile appearance without the cold feel and grout maintenance of real tile.
Luxury Vinyl Plank (LVP)
LVP flooring comes in plank format that replicates the look of hardwood. Planks are typically 6 to 9 inches wide and 36 to 48 inches long. Click-lock installation makes LVP a favorite among DIYers.
LVP costs $2 to $6 per square foot and is the right choice if you want a wood-look floor in your bathroom. The waterproof core means you get the aesthetic of hardwood without any moisture concerns.
SPC vs. WPC Vinyl
Within LVT and LVP, there are two core constructions to consider. SPC flooring (stone polymer composite) has a rigid, dense core that resists dents and handles temperature changes well. WPC (wood polymer composite) has a slightly softer, thicker core that provides better sound dampening and underfoot comfort. Both are fully waterproof and suitable for bathrooms. SPC tends to be the better choice for bathrooms over radiant heating systems.
Best Vinyl Designs for Bathrooms
Certain vinyl styles work especially well in bathroom settings.
Marble Look
Marble-look vinyl gives your bathroom a luxurious, spa-like feel at a fraction of real marble’s cost. White Carrara, Calacatta, and gray marble patterns are perennial favorites. The vinyl version eliminates marble’s porosity, staining susceptibility, and maintenance demands.
Wood Look
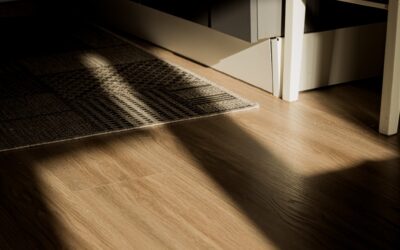
Light oak, weathered gray, and white-washed wood-look planks create a warm, inviting bathroom. The contrast between the “wood” floor and the bathroom’s wet environment creates visual interest that guests always notice.
Stone Look
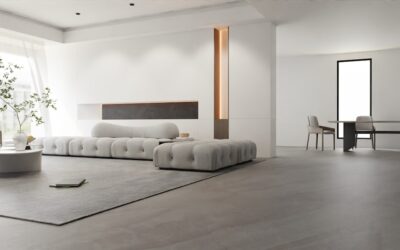
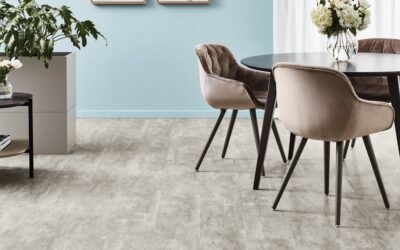
Slate, travertine, and concrete-look vinyl tiles bring an earthy, grounded feel to bathrooms. Large-format tiles with minimal grout lines create a modern, seamless appearance.
Geometric and Encaustic Patterns
Patterned vinyl tiles — including hexagons, Moroccan designs, and encaustic cement-tile replicas — add personality to small bathrooms. Sheet vinyl is particularly good for bold patterns because the print is continuous without individual tile seams.
Bathroom Floor Vinyl Installation
Installation methods vary by vinyl type, but all require proper preparation.
Subfloor Preparation
The subfloor must be clean, dry, flat, and smooth. Vinyl conforms to the surface beneath it, so any bumps, ridges, or debris will show through. Fill cracks and low spots with a leveling compound. For plywood subfloors, ensure all screw heads are flush. Remove the existing flooring unless the vinyl manufacturer approves installation over it.
Acclimation
Bring the vinyl into the bathroom at least 48 hours before installation. Let it acclimate to the room’s temperature and humidity. This is especially important for click-lock products that expand and contract with temperature changes.
Sheet Vinyl Installation
Create a paper or cardboard template of the bathroom floor, including cutouts for the toilet flange, vanity, and other fixtures. Transfer the template to the vinyl sheet and cut with a sharp utility knife. Apply adhesive to the subfloor (or use peel-and-stick sheet vinyl), position the sheet carefully, and roll with a floor roller to eliminate air bubbles. Seal seams with seam sealer.
LVT and LVP Installation
Click-lock LVT and LVP float over the subfloor without adhesive. Start from the longest wall and work across the room, clicking planks or tiles together row by row. Leave a 1/4-inch expansion gap around the perimeter, covered by baseboards or quarter-round trim. Cut pieces with a utility knife and straightedge or a vinyl cutter.
Around the Toilet
Remove the toilet before installing vinyl flooring for the best results. Install the vinyl, cut an opening around the toilet flange, then reinstall the toilet on top of the new floor. This eliminates messy cuts and ensures a watertight seal around the flange.
Sealing Edges
Apply a bead of 100% silicone caulk where the vinyl meets the bathtub, shower base, and toilet base. This prevents water from seeping under the vinyl at these critical junctions.
Bathroom Floor Vinyl Costs
Here is what you can expect to spend on bathroom floor vinyl in 2026.
- Sheet vinyl: $1 to $3 per square foot (material) + $1 to $3 installation
- Luxury vinyl tile (LVT): $2 to $5 per square foot + $2 to $4 installation
- Luxury vinyl plank (LVP): $2 to $6 per square foot + $2 to $4 installation
- SPC rigid core vinyl: $3 to $7 per square foot + $2 to $4 installation
For a typical 50-square-foot bathroom, total installed costs range from $200 to $550 depending on the product and whether you DIY or hire a professional. That makes vinyl one of the most budget-friendly bathroom flooring options available.
Bathroom Floor Vinyl vs. Other Options
How does vinyl compare to other popular bathroom flooring materials?
Vinyl vs. Ceramic Tile
Tile flooring is the traditional bathroom choice. It is extremely durable and waterproof when properly grouted. However, tile is cold, hard underfoot, slippery when wet (unless you choose textured tile), and requires grout maintenance. Vinyl is warmer, softer, and grout-free, making it more comfortable in bathrooms.
Vinyl vs. Natural Stone
Natural stone flooring is beautiful but expensive, porous (requiring regular sealing), and cold. Vinyl delivers a similar aesthetic at a fraction of the cost with none of the maintenance demands.
Vinyl vs. Waterproof Laminate
Waterproof flooring options in laminate have improved, but they still cannot match vinyl’s inherent moisture immunity. Vinyl remains the safer choice for bathrooms where water exposure is constant.
Maintenance Tips for Bathroom Vinyl Floors
Keeping your bathroom floor vinyl in top condition is simple.
Daily Care
Wipe up standing water after baths and showers. This is not strictly necessary for the vinyl itself, but it prevents water from migrating to edges and seams.
Weekly Cleaning
Sweep or vacuum with a soft-brush attachment to remove hair and debris. Follow with a damp mop using warm water and a pH-neutral vinyl floor cleaner.
Avoid Harsh Chemicals
Do not use abrasive cleaners, steel wool, or ammonia-based products on vinyl. These can dull the wear layer and damage the printed design.
Prevent Scratches
Place felt pads under bathroom furniture legs. Avoid dragging heavy items across the floor.
Temperature Considerations
Vinyl is compatible with radiant floor heating, which eliminates the only complaint some people have about bathroom floors — cold feet in the morning. Confirm the maximum temperature rating with the vinyl manufacturer before installing over radiant heat.
Is Bathroom Floor Vinyl Right for You?
Bathroom floor vinyl is an excellent choice for homeowners who want a waterproof, comfortable, attractive floor without the cost and maintenance of tile or stone. It installs quickly, performs reliably in wet conditions, and offers design options that match virtually any bathroom style.
If you prioritize ultimate durability and do not mind the cold feel, tile flooring may still be the better choice. But for most homeowners, bathroom floor vinyl hits the sweet spot of performance, price, and aesthetics. Explore our vinyl flooring guide for more on the full range of vinyl options available for every room in your home.
Prefer to explore on your own?
See how new flooring looks in your actual room in seconds — free, no signup.
Try the free Floor Studio →