The strip of wall behind a bathroom vanity takes more abuse per square inch than almost any painted surface in the house — faucet splash, soap spatter, toothpaste flick, hairspray fog, and the daily wet-hands wipe that slowly polishes paint to a shine before it peels. A bathroom sink tile backsplash is the permanent fix, and it’s also one of the highest-styling-impact-per-dollar projects in remodeling: the area is tiny (often 4 to 15 square feet), it sits at eye level next to the mirror, and even premium tile costs lunch money at this scale. But a vanity splash is not a shrunken kitchen backsplash — the heights, the sightlines, and the water pattern are all different, and designing it like a kitchen is the most common mistake I see.
- How a Vanity Splash Differs From a Kitchen Splash
- The Height Decision: Four Standard Treatments
- Tile Choices That Work at Arm's Length
- Design Details That Make It Look Custom
- Installation: A Genuinely Great First Tile Project
- What It Costs at Each Ambition Level
- Keeping It Clean for the Next Twenty Years
How a Vanity Splash Differs From a Kitchen Splash
Three differences drive every decision:
- The splash pattern is concentrated, not distributed. A kitchen wall catches grease aerosol across its whole length; a vanity wall catches direct water in an 18-to-24-inch arc around the faucet, plus ambient steam. Protection needs to be highest right behind the sink, which changes the height math.
- The mirror owns the wall. In most bathrooms, the mirror or medicine cabinet starts 4 to 10 inches above the counter and dominates the visual field. Your splash lives in the gap below the mirror and beside it — a horizontal ribbon, not a broad canvas. Busy patterns get chopped weirdly by mirror edges; simple tile usually wins.
- There’s no upper-cabinet line to stop at. Kitchens have a natural terminus at the uppers. Vanity splashes must end deliberately — at the mirror bottom, at a trim line, or at the ceiling — and an arbitrary stopping height is what makes DIY splashes look unfinished.
The Height Decision: Four Standard Treatments
- The 4-inch curb (builder standard). A single short course, often the counter material itself. It protects the caulk joint and nothing else — toothpaste and splash land above it daily. I install these only when a client insists; paint above a 4-inch splash in a family bathroom is a two-year repaint cycle.
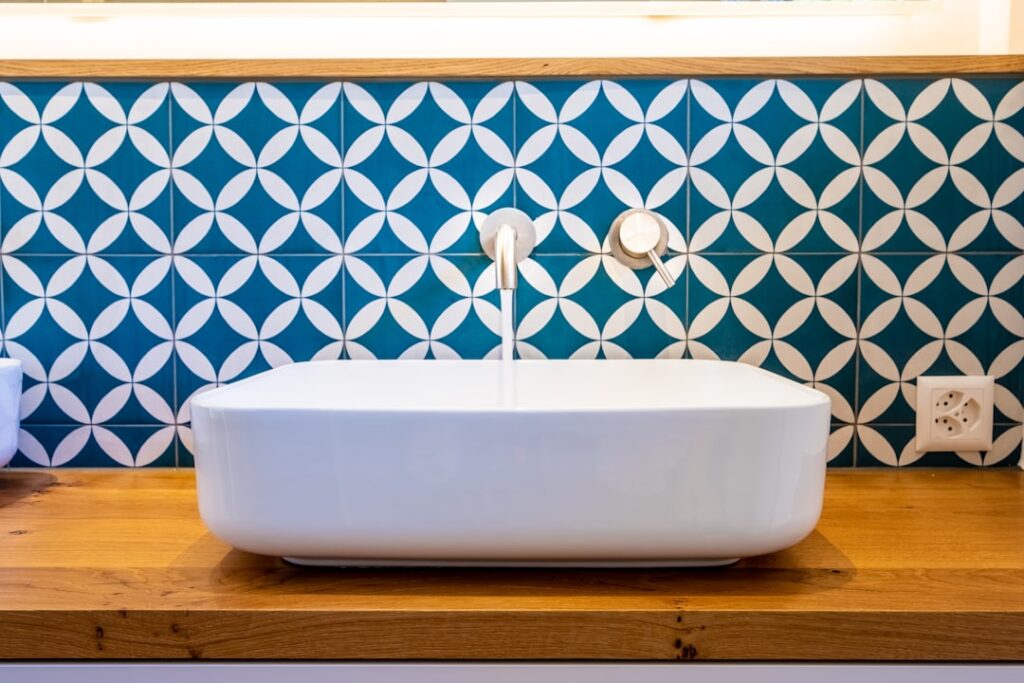
- Counter to mirror bottom (the sweet spot). Tile the gap — usually 8 to 12 inches — so the wall reads counter, tile band, mirror in one clean stack. Covers the entire direct-splash zone, uses 4 to 8 square feet of tile, and looks intentional. This is my default recommendation and about 70 percent of what I install.
- Counter to ceiling (the feature wall). Tile the whole vanity wall and hang the mirror on the tile. The current designer move — it turns the vanity wall into architecture and completely eliminates paint from the wet zone. Costs more (15 to 30 square feet) and requires drilling the mirror mounts through tile, but nothing else looks as finished. Standing water and steam make this genuinely functional in kids’ baths, not just pretty.
- Wainscot wrap. Tile to 36 to 48 inches around the whole room with the vanity wall matching. Traditional, great in older homes, and turns the splash question into a room design.
Whichever you choose, one non-negotiable: the counter-to-tile joint gets 100 percent silicone, not grout. Counters move; grout there cracks and wicks water down the backsplash gap into the cabinet.
Tile Choices That Work at Arm’s Length
This tile gets viewed from 18 inches away under vanity lighting — the most forensic viewing conditions in the house. What holds up:
| Tile | Price/sq ft | Why it works here |
|---|---|---|
| Glazed ceramic subway (3×6, 4×12) | $1–$4 | Wipeable, timeless, cheap enough to run full-height |
| Handmade-look / zellige ceramic | $8–$15 | Glaze shimmer is gorgeous under sconce light; small area makes it affordable |
| Slim kit-kat mosaics (0.5×4, 2×8 stacked) | $8–$18 | Fine texture that reads well close-up; sheets install fast |
| Marble-look porcelain 12×24 | $3–$8 | Slab look below the mirror, minimal joints |
| Real marble / stone mosaic | $10–$25 | Beautiful; must be sealed — toothpaste and cosmetics stain stone |
| Glass mosaic | $8–$20 | Glossy, waterproof, but shows every water spot; polishing-prone owners only |
Two close-range warnings. Heavily textured 3D tiles collect toothpaste spatter in their crevices — sculptural picks belong outside the direct splash arc. And bright white grout directly behind a sink dulls fast; a warm gray or greige grout two shades off the tile hides water spotting and halves your scrubbing.
Design Details That Make It Look Custom
- Align edges with something. End the tile flush with the vanity’s outside edges, the mirror’s edges, or the wall — never at a random inch mark. On a floating vanity, running tile the exact vanity width creates a crisp panel effect.
- Finish every exposed edge. Bullnose, a pencil trim, or a metal profile ($15 to $25 a stick, matte black and brushed brass both look sharp against ceramic). Raw tile edges at eye level are impossible to unsee.
- Mind the faucet and accessories. Wall-mounted faucets need their rough-in coordinated before tile; deck-mount faucets need the tile to clear handle sweep. Drill accessory holes (towel ring, sconces) with diamond bits, through masking tape, at low speed.
- Outlets: code wants receptacles within 3 feet of the basin, and they’ll likely land in your tile field. Outlet extenders bring them flush; consider swapping to a designer screwless plate — a $15 upgrade sitting in your most-photographed square foot.
- Light it. A splash under a single ceiling bulb disappears. Sconces or a backlit mirror rake light across the glaze — half the beauty of handmade tile is the light hitting it.
Installation: A Genuinely Great First Tile Project
A mirror-height vanity splash is my standard recommendation for first-time tilers: small area, no cuts harder than an outlet, failure costs two boxes of tile. The short version of the process: clean and sand the paint sheen off the wall (sound painted drywall is an acceptable substrate in this splash zone); mark a level line — vanities and counters are rarely level, and tile must be; spread mastic or modified thinset with a 1/4-inch V-notch trowel; set tile working off your level line with 1/16 or 1/8-inch spacers; grout the field after 24 hours; silicone the counter joint and any vertical inside corners. Total materials for an 8-square-foot splash: $60 to $180. A tile setter charges $300 to $700 for the same job — small-job minimums, not square footage, set that price.
What It Costs at Each Ambition Level
Counter-to-mirror band in glazed ceramic: $60 to $150 DIY, $350 to $700 hired. The same band in zellige or marble mosaic: $120 to $300 DIY. Full counter-to-ceiling feature wall, 25 square feet in handmade-look ceramic: $300 to $500 in materials, $900 to $1,800 installed. For context, that top-end feature wall costs less than most faucets in the showroom window — this is the cheapest square footage in your bathroom to make spectacular.
Keeping It Clean for the Next Twenty Years
Maintenance on a vanity splash is light, but the little there is matters. Toothpaste is mildly abrasive and slightly alkaline — wiped daily it’s nothing, but dried spatter left for weeks dulls soft glazes and stains light grout, so a ten-second wipe with a damp microfiber cloth during counter cleanup is the whole regimen. Skip abrasive powders and magic erasers on glossy and handmade glazes; they burnish the surface over time. Cement grout behind a sink benefits from a penetrating sealer once a year — a two-minute job on eight square feet — or spend the extra $20 on urethane or epoxy grout at install and never think about it again, which is what I do on every splash I set for my own family. The silicone bead at the counter is the one true wear item: expect to cut it out and re-run it every five to eight years, or sooner if it peels or darkens. It’s a $9 tube and twenty minutes, and it’s the difference between a dry vanity cabinet and the swollen particleboard shelf I find under half the sinks I open.
My standing advice when clients are vanity shopping: budget the splash with the vanity, not as an afterthought — the pair reads as one piece of furniture, and a $1,200 vanity under bare painted drywall looks unfinished the first time toothpaste hits the wall. Pick a tile you’d happily see at arm’s length every morning, run it at least to the mirror, silicone the counter line, and put a decent sconce on it. Ten square feet done thoughtfully outperforms a hundred square feet of anything else in this room.
Prefer to explore on your own?
See how new flooring looks in your actual room in seconds — free, no signup.
Try the free Floor Studio →