Most homeowners do not think about the small chrome handle under the bathroom vanity until water starts dripping or a faucet replacement goes sideways. A failed bathroom sink valve is one of the most common reasons a 30-minute faucet swap turns into a five-hour emergency, complete with a panicked call to a plumber on a Sunday afternoon. Knowing what is down there, how it fails, and when to replace it is genuinely useful knowledge.
Part of our Bathroom Remodeling & Flooring guide — explore the full guide →
What a Bathroom Sink Valve Actually Is
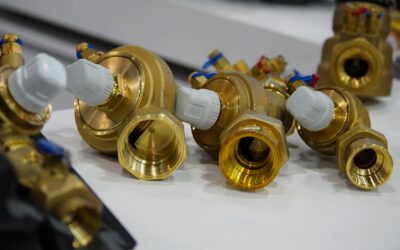
The valve under your sink is an angle stop, also called a shutoff valve or supply stop. It does two jobs: it changes the direction of the supply line by 90 degrees from the wall to the faucet, and it lets you isolate that fixture without shutting down the whole house. Most homes have two of them per sink, one hot and one cold, mounted to copper or PEX stub-outs coming out of the wall.
You will encounter three main valve styles. Compression valves use a multi-turn handle with an internal rubber washer that seats against a brass orifice. Quarter-turn ball valves use a stainless ball with a port through the middle and turn 90 degrees from full open to full closed. Cartridge valves are less common on residential sink stops but show up in some commercial buildings.
Why Sink Valves Fail
Compression valves are the workhorses of American plumbing, but they fail predictably. The internal washer hardens and cracks after 10 to 15 years, especially in hot-side service or in homes with water heaters running above 130 degrees Fahrenheit. The packing nut behind the handle can also leak, dripping down the stem when you operate the valve. Mineral buildup from hard water (anything above 7 grains per gallon) accelerates both failure modes.
Quarter-turn valves last longer in theory but have their own failure: the lever-style handle can become impossible to operate if the valve has not been cycled in years. Calcium carbonate locks the ball in place and forcing it can shear the stem.
Signs You Need to Replace Yours
Some symptoms are obvious, others quietly cost you for years. Watch for:
- Visible drips at the packing nut or where the supply tube connects
- Inability to fully shut off water – faucet still drips after closing valve
- Handle that spins freely without turning the stem (internal failure)
- Green or white crystalline crust around the valve body (slow leak evaporating)
- Stuck handle that will not budge after years of disuse
- Any compression valve over 20 years old before a faucet replacement
If you are paying a plumber to replace a faucet, ask them to replace the angle stops at the same time. The added labor is minimal and you avoid a return trip when the old valve fails six months later.
Step-by-Step Replacement
Replacing a bathroom sink valve is genuinely a one-hour DIY job for someone comfortable with hand tools. You will need a basin wrench (around $25 at Home Depot), two adjustable crescent wrenches, a bucket, towels, Teflon tape, and the new valves themselves.
- Shut off water at the main supply or the branch line. Open the sink faucet to confirm pressure is gone.
- Disconnect the supply tube from the old valve using a crescent wrench on the compression nut. Have a towel ready.
- Remove the old valve. For a compression valve attached to a copper stub-out, loosen the compression nut at the wall. The valve slides off the copper pipe.
- Inspect the copper stub. If it is corroded, pitted, or scarred, you may need to call a plumber to extend the pipe or solder a new fitting.
- Install the new valve. A SharkBite quarter-turn valve costs around $12 to $18 and pushes onto the copper without tools – just verify the pipe is cut clean and deburred. Compression-style replacements need the new nut and ring (always included in the kit).
- Reconnect the supply tube using a fresh braided stainless line if the old one is more than 5 years old. Stainless braided supplies cost $6 to $12 and are far safer than plastic.
- Turn water on slowly and check for drips at every connection. Operate the valve through its full range to confirm clean shutoff.
What Plumbers Charge in 2026
If DIY is not in the cards, expect a licensed plumber to charge somewhere in these bands for a stand-alone visit:
- Single valve replacement on copper stub: $125 to $225
- Both valves under one sink: $185 to $325
- Valve plus 6-inch copper pipe extension or repair: $275 to $450
- After-hours or weekend service call: add $150 to $250
These figures vary significantly by region. Coastal California and the Northeast tend to run 25 to 40 percent above the national median, while the Midwest and Southeast usually fall below it.
Quarter-Turn vs. Compression: Which to Buy
For a replacement valve, I almost always recommend quarter-turn ball valves over multi-turn compression. The reason is operational reliability. A ball valve that has been cycled in the last few years opens and closes with one quick flick of the lever, exactly when you need it – a leaking supply line at 2 a.m. The trade-off is slightly higher cost ($10 to $20 versus $5 to $10) and a larger valve body.
For homes with PEX supplies, SharkBite or similar push-fit quarter-turn valves are the easiest install. For traditional copper, a compression-style quarter-turn from BrassCraft or similar is what most plumbers carry on their trucks.
One More Thing: Exercise Your Valves
Every six months, open and close each shutoff valve in your house through its full range. Two seconds per valve, total. This single habit will prevent the calcium-lockup that turns a working valve into an emergency at the worst possible time. Make it part of changing smoke detector batteries every spring and fall.