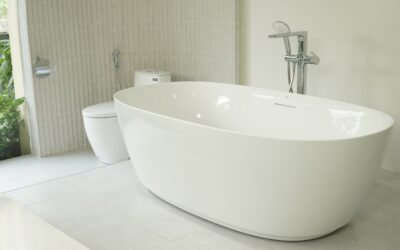
Bathtub epoxy is a two-part coating that bonds to porcelain, fiberglass, or acrylic to give a stained or chipped tub a smooth, glossy new surface without ripping it out. When your tub still functions but looks tired, bathtub epoxy lets you resurface it for a small fraction of what full replacement costs, often in a single weekend.
Part of our Epoxy, Concrete & Garage Floors guide — explore the full guide →
Refinishing has come a long way from the flaky spray jobs of decades past. Modern kits and professional systems use acid-etch primers, catalyzed epoxy or urethane topcoats, and proper ventilation to deliver a hard, durable shell that can last 10 to 15 years when applied correctly.
How Bathtub Epoxy Works
Epoxy coatings cure through a chemical reaction rather than simply drying. You mix a resin with a hardener, and the two react to form a rigid, cross-linked film that grips the tub surface. Because the bond is chemical as well as mechanical, surface preparation is everything; the coating can only hold as well as the layer beneath it.
Most systems build up in three stages: an etching or bonding primer that bites into the glossy factory finish, one or two coats of pigmented epoxy for color and coverage, and sometimes a clear topcoat for extra gloss and abrasion resistance. Total dry film thickness usually lands between 4 and 10 mils.
When Refinishing Makes Sense
Epoxy is not a fix for every tub. It shines in specific situations and falls short in others. Reach for it when your tub has surface stains, minor chips, dull spots, or an outdated color but remains structurally sound.
- Good candidates: stained porcelain, faded pink or avocado tubs, light chips, dull acrylic.
- Poor candidates: cracked fiberglass, tubs with soft spots, active leaks, or severe rust through the metal.
If the tub flexes underfoot or the substrate is compromised, a coating only hides the problem temporarily. In those cases, replacement or a tub liner is the smarter call.
What You Will Need
Whether you buy a consumer kit for $30 to $80 or hire a pro, the same materials appear in the process. A DIY refinishing kit typically includes:
- Etching or bonding agent and a cleaning acid
- Two-part epoxy resin and hardener
- Foam rollers, a fine brush, and stir sticks
- Respirator rated for organic vapors, gloves, and eye protection
You will also want painter’s tape, plastic sheeting, 400 and 600-grit wet-dry sandpaper, a heat-safe box fan for ventilation, and a strong degreaser. Do not skimp on the respirator; epoxy and its solvents give off fumes you should never breathe.
Step-by-Step Application
Discipline in the prep stage separates a glass-smooth result from a peeling mess six months later. Follow this order:
- Remove the drain, overflow cover, and any caulk, then ventilate the room thoroughly.
- Scrub the tub with a heavy degreaser to strip soap scum and body oils.
- Apply the etching solution to dull the factory gloss, then rinse and dry completely.
- Sand the entire surface with 400-grit paper so the primer has tooth to grab.
- Wipe with the recommended solvent and let it flash off; the surface must be spotless.
- Mix only what you can use in the pot life, usually 20 to 45 minutes.
- Roll and tip the first coat in thin, even passes, avoiding puddles and runs.
- Wait the recoat window, then apply the second coat perpendicular to the first.
Thin coats are the secret. Two or three light passes level far better than one heavy layer and dramatically reduce sags and orange-peel texture.
Cure Time and First Use
Patience protects your investment. Most epoxy tub coatings are dry to the touch in 4 to 8 hours, but they are nowhere near ready for water. Plan on waiting 24 to 48 hours before the first shower and up to 3 to 5 days for the coating to reach full chemical hardness.
Keep the bathroom warm, ideally 65 to 75°F, and well ventilated during the entire cure. Cold, damp air slows the reaction and can leave the surface soft. Reinstall the drain hardware and re-caulk only after the coating has fully hardened.
DIY Versus Professional Refinishing
The choice between a weekend kit and a hired pro comes down to finish quality, durability, and your tolerance for fumes and fussy prep. Both routes use similar chemistry, but the results can differ sharply.
Doing It Yourself
A kit saves hundreds of dollars and suits handy homeowners who follow directions carefully. The trade-offs are a thinner, brush-and-roller finish that can show texture, a shorter lifespan, and real exposure to solvent fumes in a small room. Ventilation and patience are non-negotiable.
Hiring a Professional
Pros spray the coating for a factory-smooth, mirror finish and often use industrial primers and catalysts not sold in consumer kits. They also handle the fumes with proper equipment. You pay more, but you typically get a harder, longer-lasting shell and a warranty of 3 to 5 years.
Common Problems and How to Avoid Them
Most refinishing failures trace back to a handful of avoidable mistakes. Knowing them in advance keeps your finish smooth and stuck down:
- Peeling: almost always poor prep. Etch, sand, and degrease thoroughly so the coating can bond.
- Runs and sags: coats applied too thick. Build up in thin, even layers instead.
- Slow or soft cure: a cold, humid bathroom. Warm the room and run a fan.
- Orange-peel texture: foam roller moving too fast or wrong nap. Roll slowly and tip off with light passes.
- Bubbles: shaking rather than stirring the resin. Mix gently to avoid trapping air.
Cost Compared to Replacement
The economics are what draw most people to refinishing. A DIY kit costs $30 to $80 plus a few hours of labor. Professional refinishing runs $300 to $650 for a standard tub, with premium or clawfoot work reaching $900. Full replacement, by contrast, easily hits $1,500 to $5,000 once you add demolition, plumbing, tile repair, and disposal.
The trade-off is lifespan. A professional epoxy finish lasts 10 to 15 years; a careful DIY job often 5 to 10. A new tub can serve 30 years or more. If you plan to sell soon or want a quick refresh, epoxy is the clear value; if this is your forever tub, weigh replacement.
Keeping the Finish Looking New
A refinished tub needs slightly gentler care than factory porcelain. Follow a few habits and the surface stays glossy for years:
- Clean with non-abrasive liquid cleaners only; skip powdered scrubs and steel wool.
- Avoid bath mats with suction cups, which trap water and can lift the coating.
- Fix dripping faucets promptly, since constant water wears a channel over time.
- Never use bleach-heavy products daily, as they can dull the sheen.
Wipe the tub dry after heavy use when you can, and address any small chip quickly with a touch-up kit before moisture creeps under the coating.
Frequently Asked Questions
How long does bathtub epoxy last? A professional application typically lasts 10 to 15 years, while a DIY job runs 5 to 10 depending on prep quality and daily care.
Can I refinish over an old refinish? Yes, but the old coating must be sound. Sand it thoroughly for adhesion, or strip failing areas down to the original surface first.
Is the smell dangerous? The fumes are strong and should not be inhaled. Always wear a vapor respirator, open windows, run a fan, and keep kids and pets out until the room clears.