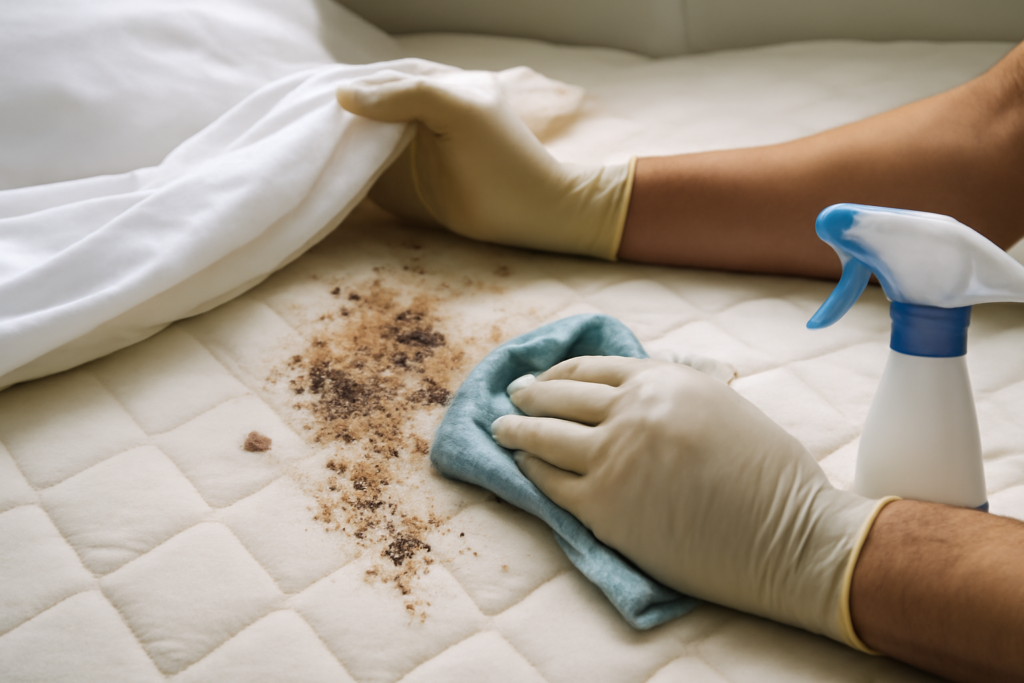
Finding mysterious marks on your sheets can be unsettling, especially when you suspect an infestation. Bed bug mattress stains are one of the earliest and most reliable warning signs, often appearing before you ever spot a live insect. Learning to read those marks tells you what stage the problem is at and how urgently you need to act.
This guide breaks down exactly what the different stains look like, how to tell them apart from ordinary sweat or blood marks, and the step-by-step methods for cleaning them safely. Knowing the signs early can save you hundreds of dollars in extermination and a lot of sleepless nights.
The Four Types of Bed Bug Stains
Bed bugs leave behind several distinct kinds of marks, and each tells a different part of the story. Recognizing all four gives you a clearer picture of how established the infestation is.
Rusty or Reddish-Brown Blood Smears
When you roll over in your sleep, you can crush a bed bug that just fed. The result is a small rust-colored or reddish-brown smear, usually 1 to 3 millimeters across. These smears tend to cluster near seams, along the piping edge of the mattress, and where your body contacts the sheets. Fresh smears look bright red; older ones darken to a rusty brown as the blood oxidizes.
Dark Black Specks (Fecal Spots)
The most telling sign. Bed bug droppings are digested blood, and they dry into tiny black or dark-brown dots about the size of a pen-tip or a period on a page. Because the excrement is liquid when deposited, it often bleeds slightly into the fabric like a marker dot on paper, giving the spots a blurred rather than sharp edge. You’ll find them concentrated in seams, tufts, tags, and the corners of the mattress and box spring.
Yellowish or Translucent Patches (Shed Skins and Eggs)
As bed bugs grow, they molt five times, shedding their amber-colored exoskeletons. These leave pale yellow, papery casings and can create faint discolored patches over time. Eggs are about 1 millimeter, pearly white, and often glued into crevices. While not a “stain” in the classic sense, these deposits stain the fabric subtly and confirm active breeding.
Yellow or Brownish Sweat-Like Halos
Larger yellowish patches sometimes form around clusters of activity, a mix of crushed bugs, fecal matter, and body oils. These can be mistaken for ordinary sweat stains, which is why context matters. If a yellow patch is ringed by black specks, bed bugs are the likely cause.
How to Tell Bed Bug Stains From Other Marks
Not every spot on your mattress means an infestation. Sweat, drooling, spilled drinks, and old menstrual or nosebleed blood all leave marks too. Use these clues to separate a real bed bug problem from a harmless stain.
- Location: Bed bug marks cluster in seams, folds, tufts, tags, and mattress corners because that’s where the insects hide. Random spots in the open center of the mattress are more likely sweat or spills.
- Pattern: Fecal spots appear in tight groups or trails, not as isolated single dots.
- Smear test: Dab a suspected black speck with a damp white cloth or cotton swab. If it smears reddish-brown, it’s digested blood, a strong bed bug indicator. Dirt or mold won’t smear red.
- Company they keep: Bed bug staining usually comes with other evidence, shed skins, a sweet musty odor some describe as coriander-like, and itchy bite lines on your skin.
If you check these boxes, treat it as a likely infestation and inspect further before it spreads.
Confirming an Infestation
Before you launch into cleaning, do a thorough inspection so you know the scope. Strip the bed completely and check these spots with a flashlight and, ideally, a credit card to scrape along seams:
- The piping and seams around all four edges of the mattress.
- Under the mattress tags and inside any tufts or buttons.
- The box spring, especially the underside where the fabric staples in.
- The bed frame joints, headboard cracks, and screw holes.
- Behind the headboard, in the nightstand, and along nearby baseboard gaps.
Live bed bugs are flat, reddish-brown, and roughly apple-seed sized at 4 to 5 millimeters when adult. Spotting live insects or a heavy concentration of fecal spotting means the infestation is established and you’ll likely need professional treatment.
How to Clean Bed Bug Stains From a Mattress
Cleaning the stains is only cosmetic unless you also treat the bugs, so do both. Here’s a safe, effective process using common household supplies.
Step 1: Vacuum First
Run a vacuum with a crevice tool along every seam, tuft, and edge to remove live bugs, eggs, and loose fecal debris. Immediately empty the canister into a sealed plastic bag and take it outside to the trash, or your vacuum becomes a transport vessel.
Step 2: Treat the Stains
For fresh blood smears, mix 2 tablespoons of hydrogen peroxide (3%) with a teaspoon of dish soap and a little cold water. Cold is essential; hot water sets protein-based blood stains permanently. Dab, don’t rub, with a white cloth, working from the outside of the stain inward.
For dried fecal spots, an enzyme-based cleaner breaks down the digested blood. Apply it, let it sit for 10 to 15 minutes, then blot. A paste of baking soda and cold water also lifts many stains: spread it on, wait 30 minutes, then vacuum the residue.
Step 3: Disinfect and Deodorize
Lightly mist the treated areas with a solution of equal parts white vinegar and water to neutralize odor, then blot. Avoid soaking the mattress; excess moisture invites mold inside the foam. Let the mattress air-dry fully, ideally in sunlight, which also helps kill remaining bugs with heat.
Step 4: Encase the Mattress
Once clean and dry, seal the mattress and box spring in a certified bed bug-proof encasement. These zippered covers, usually $30 to $60 for a queen, trap any surviving bugs inside where they eventually starve, and prevent new ones from colonizing the seams. Leave the encasement on for at least a year, since bed bugs can survive months without feeding.
When to Replace the Mattress
You don’t always have to toss the mattress. A properly treated and encased mattress is safe to keep. Consider replacement only if the infestation is severe, the staining is extensive and permanent, or the mattress is already near the end of its life. If you do discard it, wrap it in plastic and label it “bed bugs” so no one salvages it and spreads the problem.
Preventing Future Stains
Stopping bed bugs before they settle in is far cheaper than treatment. Build these habits into your routine:
- Use a mattress encasement permanently, even after treatment ends.
- Inspect hotel beds and luggage when you travel, the most common way bed bugs enter a home.
- Wash and dry bedding weekly on high heat; 20 minutes at 120°F or above kills all life stages.
- Reduce clutter near the bed so bugs have fewer hiding spots.
- Check secondhand furniture carefully before bringing it inside.
Frequently Asked Questions
Do bed bug stains mean I still have bed bugs?
Not necessarily. Stains persist long after bugs are gone, so old marks alone don’t confirm an active infestation. Look for fresh fecal spots, live insects, shed skins, or new bites to confirm the bugs are still present.
Can I get bed bug stains out completely?
Fresh stains treated promptly with cold water and hydrogen peroxide often come out fully. Old, set-in fecal and blood spots may fade but leave a faint permanent shadow. An encasement hides any residual marks.
Are the black specks dangerous to touch?
Bed bug fecal matter isn’t known to transmit disease, but you should still wear gloves and wash your hands afterward. The bigger risk is spreading live bugs or eggs, so contain everything in sealed bags.
Will bleach or hot water work better?
Avoid both on blood-based stains. Chlorine bleach can damage and discolor mattress fabric, and hot water permanently sets protein stains. Cold water with an enzyme cleaner or peroxide is the safer, more effective route.
The Bottom Line
Bed bug mattress stains, the rusty smears, black fecal specks, pale shed skins, and yellow halos, are a clear early alarm worth heeding. Identify them by their clustered location along seams and the reddish smear they leave when dampened. Clean them with a vacuum, cold water, hydrogen peroxide, and enzyme cleaners, then seal the mattress in an encasement and treat the room itself. Catch the signs early and you can often save the mattress and stop a small problem from becoming an expensive one.