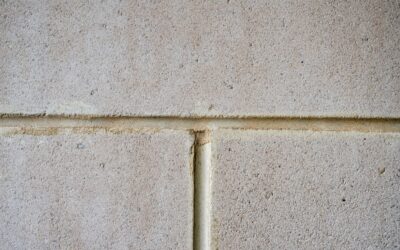
Walk through any house painted more than three years ago and you can spot the cheap caulk immediately. Hairline cracks where the baseboard meets the wall, yellowed lines along door casings, shrinking gaps near crown molding. Choosing the best caulk for trim is the difference between a finish that looks fresh for a decade and one that calls for touch-ups every spring. The category is dominated by acrylic latex with silicone, but a few specialized hybrids are worth knowing about for high-movement joints.
Part of our Paint & Walls guide — explore the full guide →
- Why Trim Caulk Has to Outperform Bathroom Caulk
- Top 5 Caulks for Interior Trim Work
- What to Avoid on Trim Joints
- Reading the Tube Like a Pro
- How to Apply Caulk for an Invisible Trim Line
- How Much Caulk You Need
- When to Recaulk Existing Trim
- Cost Comparison: DIY vs Hired Painter
- Frequently Asked Questions
Why Trim Caulk Has to Outperform Bathroom Caulk
Trim joints flex constantly. Wood expands and contracts up to 1/8 inch across a 6-foot baseboard as humidity swings between 30 and 60 percent. Hardwood floors heave slightly, drywall shifts with the framing, and HVAC cycles tug at every seam. A caulk that does not stretch will crack within a season.
Trim caulk also has to take paint. Pure silicone, the gold standard for kitchens and baths, repels every coating ever made. Paint beads up and peels off within weeks. That is why “paintable” is the first specification to look for on the tube. Acrylic latex base with siliconized polymers gives you the flexibility of silicone with the paint-grip of latex.
Top 5 Caulks for Interior Trim Work
After years of testing on baseboards, casings, crown, and chair rails, these five rise to the top.
1. Sherwin-Williams Power House Acrylic Latex (~$5)
The professional painter favorite. Tools beautifully with a wet finger, dries in 30 minutes, and accepts paint within an hour. Permanently flexible to about 25 percent joint movement. Available at Sherwin-Williams stores in white, almond, and clear.
2. Big Stretch by Sashco (~$10)
Industry leader for stretchability at 500 percent elongation. Bridges gaps up to 2 inches and stays flexible for 50-plus years per the manufacturer warranty. Slightly thicker than standard caulk so it takes practice to tool smoothly. Best for older homes with seasonal movement.
3. DAP Alex Plus Acrylic Latex Plus Silicone (~$4)
The most widely available option in big-box stores. Performs well on small to medium gaps under 1/4 inch. Takes paint cleanly within 30 minutes. Not the longest-lasting on the list, but you can buy it at any Lowes or Home Depot at midnight.
4. Loctite PL Polyurethane (~$8)
For exterior trim, fascia, and any joint exposed to weather. Cures rock-hard, paints over after 24 hours, and lasts 20-plus years. Sticks aggressively to wood, brick, vinyl siding, and PVC trim. Use sparingly indoors because it shrinks slightly as it cures.
5. OSI Quad Max (~$9)
Hybrid polymer that bridges the gap between caulk and adhesive. Excellent for stair treads, riser joints, and trim that takes physical contact. Cures in 30 minutes and accepts most paints in two hours.
What to Avoid on Trim Joints
Pure silicone tops the avoid list. Even tubes labeled “paintable silicone” rarely hold paint reliably. The same goes for butyl-based caulks, which stay sticky and bleed through latex paint within months. Cheap painter’s caulk under $2 a tube cures brittle and almost guarantees cracks within 12 months.
Latex-only formulas without siliconized additives shrink as they dry and pull away from joints. They are fine for filling nail holes but not for the long bead along a baseboard.
Reading the Tube Like a Pro
Three numbers tell you nearly everything about a caulk’s quality. Joint movement rating shows the percentage the bead can stretch and compress without failing. Look for at least 25 percent for trim, 50 percent for older homes. Cure time tells you when paint can go on, anywhere from 30 minutes to 24 hours. Lifespan claims of 25 to 50 years suggest the manufacturer used quality polymers and acrylic content above 80 percent.
Skip any tube that does not list these specs. A vague “all-purpose” caulk usually means low-grade filler and binders that fail fast.
How to Apply Caulk for an Invisible Trim Line
Cut the tip at a 45-degree angle and as close to the tip as possible for a thin bead. Bigger tip openings dump too much caulk and create messy joints that need extra cleanup. Pierce the inner seal with a long nail through the tip.
Run the bead in one continuous motion, holding the gun at 45 degrees and pushing rather than pulling for cleaner results. A pushed bead packs caulk into the joint, while a pulled bead skims across the surface and leaves voids.
Tooling the Bead
Within a minute of laying the bead, smooth it with a damp finger or a silicone tool. Wet your finger from a small bowl of water with a drop of dish soap, which prevents caulk from sticking. Work in 18-inch sections so the surface stays workable.
Cleaning Up
Wipe stray caulk immediately with a damp microfiber cloth. Once acrylic latex skins over (about 10 minutes), it pulls off paint and finish during cleanup. Keep a wet rag in your back pocket for the entire job.
How Much Caulk You Need
One 10.1-ounce tube covers about 28 linear feet at a 1/4-inch bead. A typical 12-by-14 foot room with baseboards, two door casings, and crown molding needs roughly three tubes. Buy four to be safe and return what you do not use. Running out mid-project usually means a half-tube of skinned caulk in a different color the next morning.
When to Recaulk Existing Trim
Inspect trim caulk every spring. Cracks wider than a hairline, gaps where you can see drywall behind, or yellowed lines all signal it is time to redo. Cut out the failed bead with a utility knife or oscillating tool with a caulk-removal blade. Vacuum the joint clean and apply fresh caulk. Painting over cracked caulk just buys you a few months before the cracks reappear.
Cost Comparison: DIY vs Hired Painter
Caulking baseboards and trim throughout a 2,000 square foot home runs about $60 to $80 in materials for the DIY route. Painters charge $0.75 to $2 per linear foot for caulking alone, putting professional cost at $400 to $1,200 for the same home. The skill takes about an hour to learn on a closet baseboard, and the savings pay for premium caulk many times over.
Frequently Asked Questions
How long does trim caulk need to dry before painting?
Acrylic latex caulks accept paint in 30 minutes to 1 hour. Hybrid and polyurethane caulks need 2 to 24 hours. Always check the tube and wait the full time, otherwise paint cracks as the caulk continues to cure.
Can I caulk over old caulk?
Only if the old bead is fully intact, clean, and well-bonded. Most pros remove old caulk first because new caulk does not bond reliably to cured caulk. Cutting it out and starting fresh delivers a much longer-lasting result.
What is the best caulk color for white trim?
White caulk works for almost all white trim. If you have a colored or stained trim, paint the caulk after it cures rather than trying to match the color. Painted caulk blends invisibly.
Does caulk really last 50 years?
Premium caulks like Big Stretch hit those numbers in lab tests on stable joints. Real-world life ranges 15 to 30 years on interior trim depending on humidity, paint quality, and joint movement. Cheap caulks fail in 1 to 5 years.