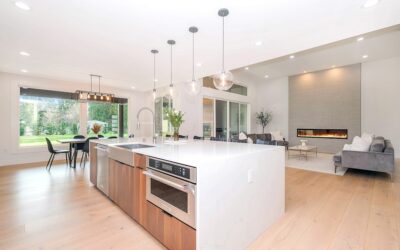
For homeowners who want the warmth of real wood without the sticker shock of walnut or cherry, a birch countertop is one of the best-value butcher block surfaces you can buy. It brings a pale, creamy tone and tight, even grain to a kitchen, and it costs a fraction of premium hardwoods. I have installed plenty of these in budget-conscious kitchens and rentals, and with the right sealing they hold up better than most people expect.
What Birch Brings to the Kitchen
Birch is a light-colored hardwood, ranging from nearly white sapwood to a pale honey with occasional reddish-brown heartwood streaks. The grain is fine, straight, and subtle, which gives a clean, Scandinavian look that fits modern, farmhouse, and minimalist kitchens alike. Because it is so pale, it reflects light and makes small kitchens feel brighter. It is a diffuse-porous wood, meaning the grain is smoother and less dramatic than oak, so it reads calm rather than busy.
Cost and Where to Buy
Price is birch’s biggest selling point. Expect to pay roughly $20 to $60 per square foot for a birch countertop, materials only, with the low end covering IKEA-style prefabricated slabs and the high end covering custom-cut, thicker blocks.
- IKEA is the classic budget source; its birch and beech butcher block counters are affordable, come in standard depths, and are easy to cut down at home.
- Lumber Liquidators (LL Flooring) and similar outlets carry butcher block slabs you can fabricate yourself.
- Home centers like Home Depot and Lowe’s stock birch and other butcher block in common sizes.
- Local cabinet and lumber shops can build custom birch tops to exact dimensions if you need an odd length or a thicker profile.
A standard slab is usually 1.5 inches thick and 25 inches deep, sized to sit on standard base cabinets. Buy a few inches long so you can trim to fit.
Edge Grain vs. End Grain
Butcher block comes in two constructions, and the difference matters:
- Edge grain glues long strips side by side with the grain running lengthwise. It is more affordable, more common, and perfectly fine as a countertop surface. Nearly all IKEA-style birch tops are edge grain.
- End grain stands the wood fibers vertically like a classic chopping block. It self-heals from knife cuts and looks stunning, but it costs significantly more and is heavier and thicker.
For a working countertop, edge grain birch is the practical pick. Reserve end grain for a dedicated chopping station if you truly cut directly on the wood.
Sealing and Finishing
How you finish a birch countertop determines everything about how it performs. You have two main paths, and I tell clients to choose based on how they plan to use the surface.
Mineral Oil or Oil-Wax Finish
Food-safe mineral oil, or a beeswax-and-oil blend, soaks into the wood and leaves a natural matte look you can cut on directly. It is easy to apply and easy to repair. The catch is upkeep: you re-oil every one to three months, more often at first. Apply a generous coat, let it soak for a few hours or overnight, then wipe off the excess.
Polyurethane or Hard Waterproof Finish
A film finish like a water-based polyurethane or a marine-grade product seals the surface against water and stains and needs no regular reapplication. The trade-off is that you cannot cut on it, and if the film scratches or wears through you must sand and refinish that whole section. For a countertop around a sink, a durable film finish is far more forgiving than oil.
My typical recommendation: oil finish if you want a natural work surface you will maintain, polyurethane if you want low-maintenance protection, especially near water.
Durability and What to Expect
Birch rates around 1,260 on the Janka hardness scale, which is respectable, harder than pine and comparable to some softer oaks, though softer than hard maple. It will dent under a dropped can and scratch with heavy use, but those marks sand out. The real enemy is standing water. Left unsealed around a sink, water swells the wood, blackens it, and can cause the glued joints to separate. Keep the area behind the sink well sealed and wipe up spills promptly. Never leave a wet dish rag sitting on the surface overnight.
Care and Cleaning
- Wipe daily with a damp cloth and mild dish soap; dry it afterward.
- Disinfect occasionally with a diluted white vinegar solution rather than harsh bleach.
- Remove water rings and light stains by scrubbing with a paste of salt and lemon, then re-oil.
- Sand out deep scratches or burns with fine-grit paper and refinish the spot.
- Always use trivets; hot pans scorch wood permanently.
Birch vs. Maple and Oak
Compared to hard maple, the gold-standard butcher block wood, birch is softer and cheaper but has a similar pale look, so it is a smart budget stand-in for maple’s appearance. Against red oak, birch is smoother-grained and lighter in color, where oak brings bold open grain and a warmer tone but a busier look and a slightly more porous surface. If your priority is a bright, clean, affordable wood surface and you are willing to keep it sealed, a birch countertop delivers a lot of style for the money. If you want maximum hardness and plan to abuse it daily, spend up for hard maple instead.
Installing a Birch Countertop Yourself
Unlike stone, birch butcher block is genuinely DIY-friendly, which is another reason it appeals to budget renovators. A prefabricated slab can be cut with a circular saw fitted with a fine-tooth blade, and you can shape a sink cutout with a jigsaw. Here is the basic sequence I follow:
- Let the slab acclimate in your kitchen for a few days so it adjusts to your home’s humidity before cutting.
- Measure and cut to length, then dry-fit on the cabinets to confirm the fit.
- Seal all sides, including the underside and cut edges, before final installation.
- Fasten from underneath through the cabinet frame using elongated pilot holes or figure-eight fasteners that let the wood expand and contract with the seasons.
- Never glue the top rigidly to the cabinets; wood moves, and pinning it down causes cracks.
That last point trips up a lot of first-timers. Wood expands across its width with humidity, so the fasteners need to allow a little movement or you will see splits within a year.
Pros and Cons at a Glance
Before you commit, weigh the honest trade-offs of a birch countertop:
Pros
- Affordable, often half the cost of maple or a third of stone.
- Warm, bright, clean look that suits many styles.
- DIY-friendly to cut, fit, and finish.
- Scratches, dents, and burns can be sanded out and refinished.
Cons
- Softer than maple, so it dents and scratches more easily.
- Vulnerable to water damage if the seal fails, especially near sinks.
- Oil finishes require re-application every one to three months.
- Not heat resistant; hot pans leave permanent scorch marks.
For a value-driven kitchen, a rental upgrade, or an island where you want warmth on a budget, birch is hard to beat. Go in understanding the sealing routine, keep water in check, and it will reward you with years of good-looking, repairable service.