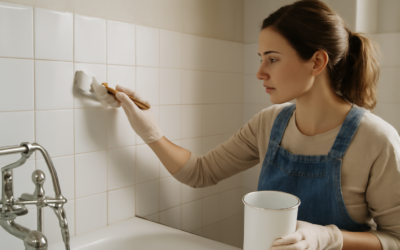
Every few months a homeowner asks me whether they can run black grout in shower installations without regretting it, and the honest answer is: yes, but only if you go in with your eyes open. Black grout is one of the most striking design choices in a modern bathroom, and it solves the single biggest complaint people have about tile showers, which is grout that looks filthy no matter how often you scrub. But black grout comes with its own set of trade-offs, and the difference between a shower that looks incredible for a decade and one that looks streaky within a year usually comes down to product choice and a little know-how.
- Why People Want Black Grout in a Shower
- The Real Trade-Offs of Black Grout in Shower Walls
- Why I Recommend Epoxy Grout for Black Showers
- Sealing Cement-Based Black Grout
- Keeping Black Grout in Shower Looking Sharp
- Black Grout Options by Brand
- Design Tips for Getting the Look Right
- The Bottom Line on Black Grout in Shower Installs
I’ve installed dark grout in dozens of showers, and I’ve also been called in to fix jobs where black grout went wrong. This guide covers exactly what to expect, the real pros and cons, why I steer clients toward epoxy, and how to keep it looking sharp.
Why People Want Black Grout in a Shower
The appeal is easy to understand once you’ve lived with white grout. Here’s what black grout delivers that lighter shades can’t.
- Hides mildew and dirt: The number one reason. Black grout masks the pink and gray mildew stains that make white grout look neglected within months.
- Dramatic, modern look: Pair it with white subway or hexagon tile and you get that high-contrast, editorial bathroom look that reads as intentional and expensive.
- Defines the pattern: Black outlines each tile, turning a simple layout into a graphic feature wall.
- Low visual maintenance: Even when it needs cleaning, it looks better longer between deep scrubs than white.
The Real Trade-Offs of Black Grout in Shower Walls
Here’s where I have to be straight with you, because the marketing photos never mention the downsides. Black grout in shower environments faces a few specific challenges that don’t affect a dry backsplash.
Soap scum shows up
The same contrast that hides dark mildew works against you with light residue. Bar soap, body wash film, and shampoo splatter leave a whitish, cloudy haze that is far more visible on black grout than on gray or white. If your household uses a lot of bar soap, expect to wipe down more often.
Mineral scale and hard water
If you have hard water, dissolved calcium and magnesium dry into chalky white deposits that cling to grout lines. On black grout these show as ghostly streaks and spots. A squeegee after each shower and a water softener make a huge difference here.
Efflorescence
Cement-based grout can develop efflorescence, a white crystalline bloom that forms when moisture pushes mineral salts to the surface. It’s most common in showers because of constant water exposure, and on black grout it stands out dramatically. Proper waterproofing behind the tile and full curing before use reduce the risk.
Fading and lightening
Cheap cement grout dyed black can fade or lighten unevenly over time, especially where cleaners and constant water break down the pigment. This is the single biggest reason to spend up on the right product.
Why I Recommend Epoxy Grout for Black Showers
If you take one piece of advice from this guide, make it this: for black grout in a shower, use epoxy grout, not standard cement grout. Products like Laticrete SpectraLOCK, Mapei Kerapoxy CQ, and Custom Building Products CEG-Lite are engineered exactly for this situation.
- Colorfast: The pigment is locked into the resin, so black stays black instead of fading to a patchy charcoal.
- Non-porous: Epoxy doesn’t absorb water, soap, or stains, so no sealing is ever required.
- Stain and mildew resistant: It resists the mold growth that plagues cement grout in wet joints.
- No efflorescence: Because it doesn’t wick moisture, that white bloom simply can’t form.
Epoxy costs more, roughly $60 to $90 per unit versus $15 to $22 for a bag of cement grout, and it sets fast so it’s less forgiving to install. For a shower, that premium is worth every penny. If your budget forces cement grout, at minimum choose a quality brand and commit to a rigorous sealing schedule.
Sealing Cement-Based Black Grout
If you do use cement grout, sealing is non-negotiable in a shower. An unsealed dark grout joint absorbs water, breeds mildew inside the grout, and fades faster.
- Let grout cure a full 48 to 72 hours before sealing.
- Apply a penetrating sealer such as Aqua Mix Sealer’s Choice Gold or Miracle 511 Impregnator.
- Brush it into every joint, let it dwell 5 to 10 minutes, then buff off all haze so it doesn’t leave a film on the tile.
- Apply two coats on shower walls and the floor.
- Reseal every 6 to 12 months in a shower, more often than you would elsewhere in the house because of constant moisture.
Keeping Black Grout in Shower Looking Sharp
Whether you go epoxy or cement, a simple routine keeps black grout crisp and free of the soap and scale that undermine it.
- Squeegee after every shower. Thirty seconds of pushing water off the walls prevents most mineral scale and soap film.
- Switch to liquid body wash. Bar soap leaves far more scum than gel or liquid formulas.
- Weekly wipe-down. Use a pH-neutral cleaner and a microfiber cloth. Avoid acidic cleaners like vinegar on cement grout, which can etch and lighten it.
- Skip bleach on cement grout. Repeated bleach exposure fades black pigment. Use it sparingly if at all.
- Ventilate. Run the exhaust fan during and 20 minutes after showers to cut the humidity that feeds mildew.
- Consider a water softener if you have hard water and want to eliminate scale streaks for good.
Black Grout Options by Brand
Not every “black” is the same, and the name on the bag rarely matches across manufacturers. Some cure to a true jet black while others land closer to deep charcoal. These are the ones I keep in the truck for shower work:
- Laticrete SpectraLOCK: #22 Midnight Black is my top pick for showers, an epoxy that stays dead black and never needs sealing.
- Mapei: Kerapoxy CQ in #47 Charcoal or #12 Black gives a colorfast epoxy finish; their cement Ultracolor Plus FA #47 works if you must go cement.
- Custom Building Products: CEG-Lite epoxy and Polyblend #60 Charcoal for the budget cement route.
- TEC: “Black Licorice” runs a true deep black and is popular for high-contrast subway installs.
Buy a color sample or the smallest available unit, mix a spoonful, and cure it on scrap tile in your bathroom’s actual light before committing. What looks jet black on a store chip can read as soft charcoal under warm LED bulbs.
Design Tips for Getting the Look Right
Black grout is high-contrast by nature, so a few design decisions make or break the result.
- Pair with light tile like white, cream, or pale gray for the classic dramatic look; black-on-black reads as one dark mass and can feel like a cave.
- Keep grout lines consistent. Because black outlines every tile, sloppy or uneven joints are painfully obvious. This is a job where installation quality shows.
- Test a sample board. Grout cures lighter than it looks wet, so confirm your “black” isn’t actually a dark charcoal you’ll be disappointed by.
- Match the caulk. Use a color-matched silicone caulk at corners and the tub line, since grout should never fill those movement joints.
The Bottom Line on Black Grout in Shower Installs
Black grout in shower designs can look absolutely stunning and genuinely solves the maintenance headache of mildew-stained white grout, but it isn’t a set-it-and-forget-it choice. The dark color that hides dirt also spotlights soap scum, hard-water scale, and efflorescence, so your success hinges on using the right product and building a simple habit or two. Choose epoxy grout to lock in the color and shrug off water, or seal cement grout religiously if the budget demands it, then squeegee after showers and wipe weekly. Do that, and your black grout will stay as bold and clean as the day it was installed, giving you the dramatic bathroom you wanted without the upkeep you feared.
Prefer to explore on your own?
See how new flooring looks in your actual room in seconds — free, no signup.
Try the free Floor Studio →