The most common complaint about floating shelves is not how they look on day one. It is how they look six months later, drooping at the front edge under a stack of cookbooks. Built in floating shelves solve that problem by anchoring into the wall framing itself, either with a hidden steel bracket lagged into studs or a wood cleat built into the wall cavity, so the shelf carries real weight with no visible support. Done right, they read as part of the architecture, like a window sill or a mantel. Done wrong, they pull out of drywall and take a chunk of the wall with them.
What Makes Built In Floating Shelves Different
Store-bought floating shelves usually hang on a thin metal plate held by two or three drywall anchors. They are fine for a few picture frames and not much else. A true built-in version ties into the structure. The support hardware is fastened directly to wall studs, or the shelf is framed into the wall before drywall goes up, and the shelf itself is often custom-sized to fit an alcove, a niche beside a fireplace, or a full wall run.
Because the load path goes into framing rather than gypsum, a well-built shelf can hold 50 to 150 pounds per linear foot of stud attachment, depending on the bracket and shelf depth. That makes them practical for kitchens, home libraries, and entertainment walls, not just decor.
Built-ins also have a visual advantage. They can be scribed tight to side walls, finished to match adjacent trim or cabinetry, and sized to line up with window heads, tile lines, or backsplash edges. The result looks deliberate rather than added on.
Choosing a Support System
Everything about a floating shelf depends on what holds it up. There are three main approaches.
Steel rod or bar brackets
These are the most popular option for homeowners. A steel backplate screws into two or more studs with 3-inch or longer structural screws, and solid steel rods (typically 3/8 to 1/2 inch diameter) or flat bars project out from it. The shelf has matching holes drilled into its back edge and slides over the rods. Heavy-duty versions from companies that make hidden shelf hardware cost $30 to $90 per bracket and are rated for 100 pounds or more when fastened into studs. Rod length should be at least two-thirds of the shelf depth.
Wood torsion box with cleat
A classic carpenter’s method. You fasten a 2×2 or 2×3 ladder frame (a cleat with short arms) to the studs, then slide a hollow shelf box made from 1/2-inch plywood or MDF over it and glue or screw it in place. The finished shelf is thick, usually 2 to 3 inches, which suits a chunky modern look. Materials run $20 to $50 per shelf.
In-wall blocking during construction
If the walls are open during a remodel, you can install horizontal 2x blocking between studs at shelf height, then bolt brackets into both the studs and the blocking. This gives the strongest attachment and lets you place brackets anywhere along the run rather than only at 16-inch stud centers. It is the best choice for long shelves carrying dishes or books.
Picking the Right Material and Size
Shelf material affects both appearance and stiffness. Solid hardwood such as white oak, walnut, or maple is the premium choice; a 1-3/4-inch-thick oak shelf that is 10 inches deep and 48 inches long costs roughly $120 to $250 from a lumberyard or online woodworker. Rift-sawn or quartersawn boards resist cupping better than flat-sawn stock. Reclaimed barn wood beams offer character, but check that they are dry (under 12 percent moisture content) and free of hidden nails before drilling.
Plywood or MDF torsion boxes are lighter and cheaper, and they take paint well. Veneered plywood with edge banding can mimic solid wood at a fraction of the cost.
Depth and length guidelines that work in most homes:
- Depth: 8 to 10 inches for books and decor, 10 to 12 inches for dishes. Anything deeper than 12 inches puts heavy leverage on the brackets.
- Thickness: at least 1-1/2 inches for solid wood on rod brackets; 2 inches or more looks proportional on shelves longer than 48 inches.
- Span between supports: no more than 32 inches for loaded shelves. Solid oak 1-1/2 inches thick will sag visibly over a 48-inch unsupported span under books.
- Vertical spacing: 12 to 15 inches between shelves for general use; 18 inches above a counter to clear small appliances.
Best Places to Install Them
Kitchens are the most popular location. Open shelves flanking a range hood or replacing a run of upper cabinets make everyday dishes easy to grab and visually open the room. Pair them with a tile or stone backsplash that runs up to the ceiling for a clean look, and seal wood shelves with a water-resistant finish since they will see steam and grease.
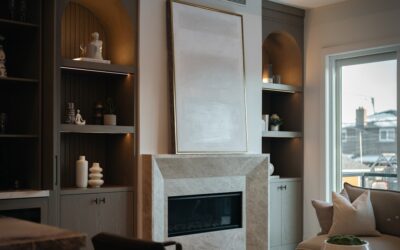
Living rooms benefit from built-in shelving in the alcoves beside a fireplace, where the side walls give you something to scribe against. Bathrooms take them well above a toilet or beside a vanity, though you should use moisture-tolerant materials like sealed teak, white oak with a marine-grade finish, or painted PVC-core boards. Home offices, reading nooks, and mudrooms round out the list.
Avoid installing heavily loaded shelves on walls you cannot open or verify, such as plaster-and-lath walls with irregular framing, unless you can confirm solid stud locations.
How to Install a Built-In Floating Shelf
Here is the basic process for a rod-bracket shelf on an existing drywall wall. Plan on half a day for a single shelf if you are comfortable with a drill and a level.
- Locate studs and utilities. Use a stud finder, then confirm with a small finish nail. Scan for wiring and plumbing; outlets and switches often indicate cables running vertically from them.
- Mark your line. Snap or laser a level line at the bracket height. Remember the shelf top will sit higher than the bracket by half the shelf thickness.
- Mount the bracket. Hold the backplate to the line and drive 3- to 3-1/2-inch structural screws into every stud it crosses. Check level again before the final tightening. Shim behind the plate if the wall is out of plane.
- Drill the shelf. Transfer rod positions to the shelf’s back edge. Drill holes 1/16 inch larger than the rod diameter, perfectly perpendicular, using a drill guide or drill press. Depth should match the rod length plus 1/4 inch.
- Test fit. Slide the shelf on. If it tips forward slightly under load, that is normal; many installers angle rods up 1 to 2 degrees to compensate.
- Secure and finish. Add construction adhesive or epoxy in the holes for a permanent install, or a small screw up through the underside into the backplate. Caulk the joint between shelf and wall with paintable caulk for a true built-in appearance.
For a recessed look, some homeowners cut a shallow notch in the drywall so the backplate sits flush with the stud face and the shelf tucks tight to the wall. This takes more patching but eliminates any visible gap.
What Built-In Shelving Costs
DIY costs are modest. For a single 48-inch solid oak shelf with heavy-duty hidden brackets, expect $150 to $350 in materials. A wall of four to six shelves runs $600 to $1,500 depending on wood species.
Hiring a finish carpenter typically costs $200 to $500 per shelf installed, including hardware, fitting, and caulking, or $65 to $125 per hour. Custom built-in shelving with scribed ends, integrated lighting, and in-wall blocking can run $1,500 to $5,000 for a full alcove or kitchen wall. Adding LED strip lighting under each shelf costs another $100 to $300 per run plus an electrician’s time if you want it hardwired.
Common Mistakes to Avoid
Nearly all shelf failures trace back to a handful of errors. Skipping the studs is number one: even rated toggle anchors are no substitute for wood framing when a shelf is loaded. Using rods that are too short is next, because short rods concentrate stress at the back of the shelf and can split solid wood.
Other pitfalls include using unseasoned lumber that warps after installation, drilling holes at a slight angle so the shelf sits crooked, and overloading long spans. Wet environments cause trouble when shelves are left unsealed; three coats of a polyurethane or hardwax oil protect wood from humidity and splashes. Finally, do not forget the wall behind. Rearranging a loaded shelf later is difficult, so plan outlets, tile, and paint before you mount.
Styling and Finishing Tips
Match the shelf finish to something already in the room. White oak shelves tie in nicely with oak flooring or cabinetry, while painted shelves in the wall color almost disappear and put the focus on what they hold. Walnut adds warmth against white tile or subway backsplash.
Keep the edges crisp. A square edge with a slight 1/16-inch round-over looks built-in; heavy ogee profiles look like retail shelving. When stacking multiple shelves, align them with other architectural lines such as the top of a window casing or the height of the range hood. Leave some breathing room when styling: roughly one-third empty space keeps open shelving from looking cluttered.
If you are working on an older home, check plaster walls carefully. Built-ins look spectacular in period homes but require longer screws to reach through 3/4-inch plaster and lath into studs.
Frequently Asked Questions
How much weight can built-in floating shelves hold?
Shelves anchored to studs with heavy-duty steel brackets typically hold 50 to 150 pounds per stud connection. Total capacity depends on shelf depth, material thickness, and span between supports, so check the bracket manufacturer’s rating.
Can I install floating shelves without studs?
For light decor, heavy-duty toggle bolts can work. For books or dishes, you need stud attachment or in-wall blocking. Drywall alone crushes and pulls out under sustained weight.
What is the best wood for floating shelves?
White oak, walnut, and hard maple are strong, stable, and attractive. Rift-sawn boards resist warping. For painted shelves, a plywood or MDF torsion box is lighter and less expensive.
How deep should kitchen floating shelves be?
Ten to 12 inches is the practical range for kitchen use, deep enough for dinner plates. Going deeper adds leverage on the brackets and increases the risk of sagging.
Do floating shelves add value to a home?
Well-built, integrated shelving is viewed as a desirable feature by many buyers, especially in kitchens and living rooms. Poorly installed or sagging shelves can have the opposite effect.