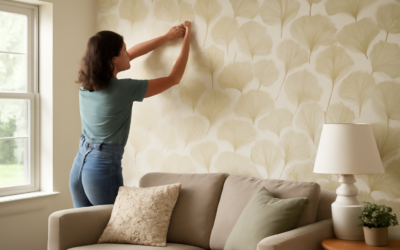
Designers call the ceiling the fifth wall, and for the last decade it has quietly become the most undervalued surface in a home. Hanging ceiling wall paper changes a plain white box into a finished room in a single afternoon, often for less than 200 dollars in materials. The result reads as instantly designed without any structural work, which is why ceiling paper has become the secret weapon of high-end designers on rentals, period restorations, and small powder rooms. The trick is choosing the right pattern, prepping the surface properly, and surviving the install without throwing the roller across the room.
Why Paper the Ceiling at All
Most rooms have flat white ceilings because builders cap off the project that way. Adding pattern overhead does three things: it pulls the eye up, which makes the room feel taller and more architectural; it adds a layer of design that paint alone cannot reproduce; and it disguises minor texture imperfections, drywall seams, or popcorn ceiling remnants better than smooth paint.
A small bathroom, dining nook, or entry foyer with papered ceiling photographs roughly 40 percent better in real estate listings than the same room with a plain ceiling, according to staging industry data. The visual impact-to-cost ratio is hard to beat.
Patterns That Work on Ceilings
Not every pattern hangs well overhead. The best ceiling-friendly designs include:
- Non-directional patterns: Stars, dots, small florals, geometric tessellations that look correct from every angle
- Soft watercolor washes: Sky-like clouds, abstract paint strokes; forgiving of seams and minor imperfections
- Small-scale repeats: Repeats under 8 inches hide pattern matching mistakes
- Faux finishes: Tin tile lookalikes, beaded board, plaster textures; period-appropriate in older homes
- Botanical and chinoiserie: Soft branch and bird motifs scale well overhead when colors stay muted
Avoid directional patterns with obvious tops and bottoms, like striped patterns, hand-drawn scenes, or large damasks. They confuse the eye when applied overhead.
Prepping the Ceiling Properly
Skip the prep and the paper will fail within months. Start by checking the surface for any popcorn or textured finish. If you have a popcorn ceiling, scrape it (wear a respirator and check for asbestos if the house is pre-1980) or skim coat with joint compound. Smooth, flat drywall is the only proper substrate.
Fill any nail pops, cracks, and seams with lightweight spackle. Sand smooth with 220-grit. Prime the ceiling with a high-quality acrylic primer like Zinsser Bulls Eye 1-2-3 (about 25 dollars per gallon) and let it cure 24 hours. For peel-and-stick papers, white primer matters extra because the pattern’s transparency lets dark ceiling colors bleed through.
Paste-the-Wall vs Peel-and-Stick
Two main paper types dominate the DIY market:
- Peel-and-stick (removable): Easier for first-timers; lifts and repositions; thinner; 35 to 70 dollars per 16 sq ft roll. Brands: Tempaper, Chasing Paper, Spoonflower removable
- Paste-the-wall traditional: More durable; sharper colors; harder to install overhead; 40 to 120 dollars per roll. Brands: York, Cole & Son, Farrow & Ball
For ceilings, paste-the-wall paper tends to hang flatter and last longer (10 to 15 years vs 5 to 8 for peel-and-stick). But peel-and-stick is far more forgiving when you are working overhead with sticky paper and a tired neck.
Calculating How Much You Need
Measure the ceiling length and width, multiply for square footage, then add 15 to 20 percent for pattern matching waste. A standard roll covers 27 to 30 square feet of ceiling once you account for matching and trim. For a 10-by-12-foot bedroom ceiling (120 sq ft), buy five rolls minimum. For a 6-by-8 powder room (48 sq ft), three rolls is usually enough.
Buy all rolls in the same dye lot. Even a single roll from a different batch can show as a faint color band across the ceiling under natural light.
Step-by-Step Installation
Tools you need: laser level, sharp utility knife with fresh blades, smoothing tool, paint roller and tray (for paste-the-wall), seam roller, sponge, ladder, and a helper. A second set of hands is non-negotiable for ceiling installs.
- Mark a straight starting line on the ceiling using a laser level, 1 inch shy of one wall
- Cut your first strip 4 inches longer than the ceiling width to allow trimming
- For paste-the-wall, roll paste onto the ceiling, not the paper
- Position the strip with the help of your second person, aligning to the laser line
- Smooth from center outward with the smoothing tool, working out air bubbles
- Match the pattern at the seam and slide the next strip against the first; do not overlap
- Roll the seam lightly with a seam roller
- Trim excess at walls and around fixtures with a sharp utility knife and a metal straightedge
- Sponge off any paste residue immediately to prevent staining
Plan 4 to 6 hours for a small room, full day for a bedroom-sized ceiling. Replace your utility knife blade every 8 to 10 cuts. A dull blade tears paper and leaves frayed edges that no amount of trim can hide.
Working Around Lights and Vents
Turn off the breaker before working around light fixtures. Remove the fixture and let it hang on its supply wires. Cut a small X over the fixture box in the paper, fold the flaps up, and trim flush with the box edge before reinstalling the fixture. The trim ring or canopy will hide the cut edge.
For HVAC vents, smoke detectors, and ceiling fans, the same X-cut method works. Take photos before disassembly so reinstallation goes faster.
Common Mistakes to Avoid
Skipping the primer is the number one cause of papers peeling off ceilings within six months. Trying to install solo invites torn paper and crooked seams. Picking too bold a pattern in a small room can make the ceiling feel like it is pressing down; a 5 to 10 percent pattern density usually photographs better than 30 plus percent. And running paper across joint seams without proper smoothing leaves visible ridges that catch light at the worst angle.
Cost and Time Summary
Material costs run 150 to 450 dollars for a typical bathroom or small room ceiling. Professional installation adds 4 to 9 dollars per square foot, so a 100 sq ft ceiling installed by a paperhanger lands at 600 to 1,200 dollars total. DIY savings are real, but plan a full weekend and accept that the first strip will probably need to come down once before you get the rhythm.
Ceiling wall paper is one of the highest-impact, lowest-cost design moves available to homeowners. Pick a forgiving pattern, prep the surface religiously, hang it with a partner, and your room will feel custom-designed for the price of a nice dinner out.