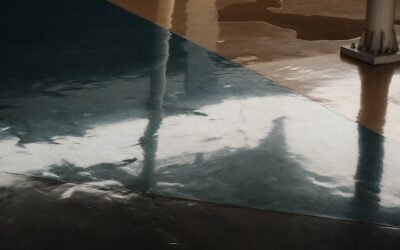
Most people think of epoxy as the gray or tan coating on a mechanic’s floor, but clear epoxy paint is where the material really shows off. Instead of hiding your surface, it deepens the color, adds a glass-like shine, and locks in a wear layer that shrugs off tires, dropped tools, and hot coffee mugs. Whether you want to protect a stained concrete slab, seal a live-edge wood countertop, or add depth to a garage floor with decorative flakes, a clear topcoat is usually the last and most important step. Get the surface prep wrong, though, and even the best resin will peel within a year.
Part of our Epoxy, Concrete & Garage Floors guide — explore the full guide →
What Clear Epoxy Paint Actually Is
Despite the name, clear epoxy is not really paint. It’s a two-part thermosetting resin: you mix a resin (Part A) with a hardener (Part B), and a chemical reaction turns the liquid into a hard, transparent plastic. True paint dries by evaporation and stays relatively soft. Epoxy cures, meaning it becomes a solid film that is far tougher than acrylic or latex. Most clear formulas cure to a hardness of roughly 80 on the Shore D scale, which is why a properly applied floor can take 3,000 pounds of vehicle weight without denting.
You’ll see two broad categories. Thin-film “roll-on” clear coats go down at 3 to 10 mils per coat and are used to seal painted or flaked floors. Thick “deep-pour” or tabletop epoxies self-level at 1/8 inch or more per pour and are used for countertops, bar tops, and river tables. They are chemically similar but formulated for very different thicknesses.
Where a Clear Coat Makes Sense
Garage and basement floors are the most common job. A clear coat over a base color, or over decorative vinyl flakes, gives you the durable topcoat that carries the abuse. Homeowners also use it to seal stained or stamped concrete on patios, to give butcher-block and reclaimed-wood counters a waterproof finish, and to preserve bar tops embedded with photos, coins, or bottle caps.
It’s less appropriate outdoors in direct sun. Standard epoxy ambers and chalks under UV light, sometimes yellowing noticeably within 6 to 12 months. If the surface faces sunlight, plan to add a UV-stable polyaspartic or polyurethane clear coat on top, or choose an epoxy specifically marketed as UV-resistant.
Surface Prep Is 80 Percent of the Job
Adhesion failures almost always trace back to prep, not product. For concrete, the slab must be clean, dry, and profiled so the resin can grip. Start by degreasing with a strong cleaner, then either acid-etch with a phosphoric or citric etching solution or, better, mechanically grind the surface with a diamond cup wheel to a CSP-2 profile. Rinse thoroughly and let it dry completely.
Run a simple moisture test before you commit: tape a 2-foot square of plastic sheeting to the slab and leave it overnight. If condensation forms underneath, the concrete is passing moisture and epoxy will eventually blister. For wood, sand to 120 grit, vacuum, and wipe with a tack cloth. Any wax, silicone, or old finish must come off, because clear resin telegraphs every fisheye and contaminant.
How to Apply Clear Epoxy Paint
Working time matters more than almost anything. Once you combine Part A and Part B, the clock starts, and most clear coats give you only 20 to 40 minutes of pot life before the mix begins to gel. Mix only what you can spread in that window.
- Control the room. Aim for 60 to 85 degrees F and low humidity. Cold slows the cure; heat shortens your working time.
- Measure precisely. Mix the exact ratio the label calls for, usually 2:1 or 1:1 by volume. Guessing leaves you with tacky spots that never harden.
- Blend for three minutes. Scrape the sides and bottom of the bucket, then pour into a fresh container and mix again to avoid unmixed resin clinging to the walls.
- Roll thin and even. Use a 3/8-inch nap roller for floors, keeping a wet edge and working in 4-by-4-foot sections. For counters, pour and spread with a notched squeegee.
- Pop the bubbles. Pass a propane or heat torch a few inches above thick pours to release trapped air. On floors, a spiked roller does the same job.
Most systems want a second coat within the recoat window, often 12 to 24 hours. Miss that window and you’ll need to lightly sand the first coat for the next one to bond.
Cost and Coverage
Budget realistically. A roll-on clear coat covers roughly 250 to 400 square feet per gallon at one thin coat, and a two-part clear kit runs about $50 to $90 per gallon. Deep-pour tabletop epoxy is pricier by volume, often $60 to $120 per gallon, because you’re using far more material per square foot. For a typical two-car garage of about 400 to 500 square feet, expect $150 to $400 in clear coat alone if you apply two coats. Add another $100 to $200 for grinding rental, etch, rollers, and a proper respirator.
Choosing a Product
For garage and basement floors, a water-based or 100-percent-solids clear epoxy from brands like Rust-Oleum, KILZ, or a dedicated coatings supplier will serve most homeowners well. For countertops and bar tops, look specifically for a “tabletop” or “coating” epoxy rated for the pour depth you need, and confirm it’s food-safe if the surface touches food. If the piece lives in sunlight, prioritize a UV-resistant clear or plan on a polyaspartic topcoat.
- Thin floors and sealing: roll-on clear coat, 3 to 10 mils.
- Counters and bar tops: self-leveling tabletop epoxy, poured 1/8 inch per lift.
- Sunlit surfaces: UV-stable epoxy or a polyaspartic topcoat.
Common Mistakes to Avoid
Skipping the moisture test tops the list, followed by mixing off-ratio and applying too thick in one pass. Thick roll-on coats trap solvent and stay soft. Rushing the cure is another trap: full chemical cure takes 5 to 7 days, so even if a garage floor feels dry to the touch in 24 hours, wait a week before parking a vehicle on it. Finally, don’t apply clear epoxy over a dirty or glossy old finish without scuffing it first.
Maintaining a Clear Epoxy Finish
One of the quiet perks of a clear coat is how little upkeep it demands, but a few habits keep it looking new for a decade instead of a few years. Sweep or dust-mop grit regularly, because sand and dirt act like sandpaper underfoot and slowly abrade the surface sheen. For deeper cleaning, mop with warm water and a pH-neutral cleaner; avoid harsh degreasers and acidic products, which can dull a clear finish over time. Wipe up gasoline, brake fluid, and battery acid promptly on a garage floor, since even a chemical-resistant coating isn’t meant to sit under aggressive solvents indefinitely.
Protect high-wear spots too. Place a mat under a car’s engine bay if it drips, use furniture pads under heavy tool chests, and lay down a walk-off mat at the door to catch grit before it reaches the coating. If a clear floor eventually loses its gloss in traffic lanes after several years, you can often scuff-sand and roll on a fresh clear coat rather than stripping the whole thing, which is far cheaper than a full redo. On countertops, use trivets and cutting boards; while cured epoxy resists heat better than most finishes, a hot pan set directly on it can still leave a mark.
Is Clear Epoxy Paint Worth It?
For a durable, easy-to-clean surface that lasts 5 to 10 years or more, clear epoxy is one of the best values in home improvement, especially as a DIY project. The material cost is modest, and the payoff is a floor or counter that resists chemicals, abrasion, and moisture. The catch is discipline: careful prep, accurate mixing, and patience during cure. Nail those three things and your clear epoxy paint project will look professional and hold up for years.