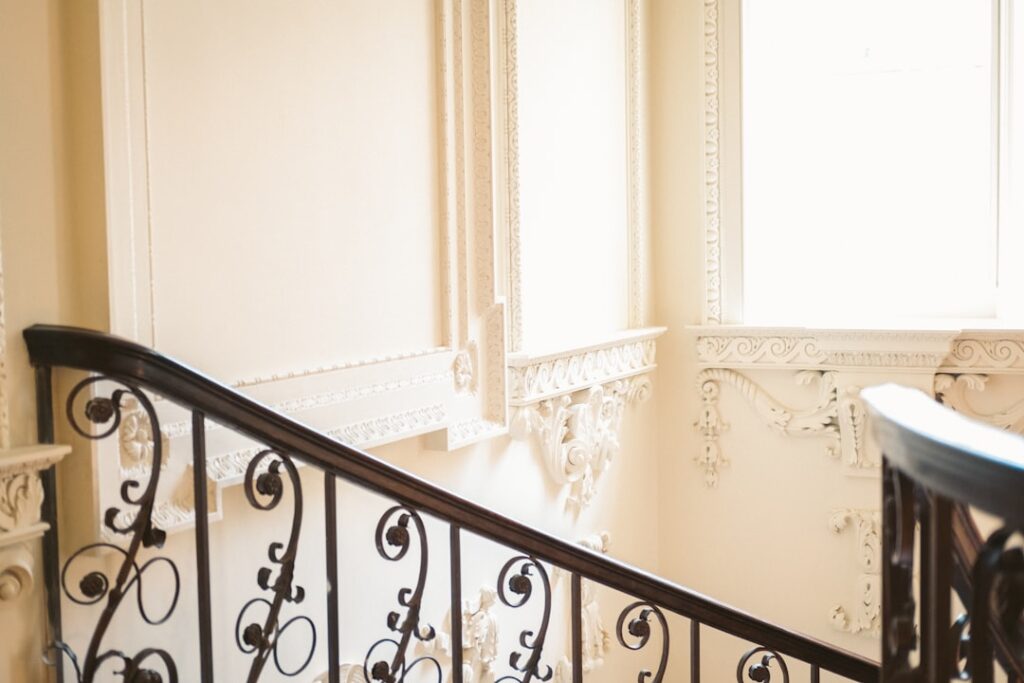
Cove crown molding gets used as one phrase, but it names two related things: cove molding — the simple concave profile that eases a wall into a ceiling — and combined cove-and-crown treatments, where a cove’s soft curve is one element in a larger crown profile or a built-up assembly. Knowing which one your room wants, at what size, in which material, is the difference between trim that quietly finishes a room and trim that fights it. This guide covers the cove-versus-crown distinction, combined profiles, sizing rules by ceiling height, paint-grade versus stain-grade choices, and the install details that make curved profiles behave.
- Cove vs Crown: The Actual Difference
- Combined Cove-Crown Profiles
- Sizing by Ceiling Height
- Paint-Grade vs Stain-Grade
- Install Notes for Sprung Profiles
- Pairings That Work
- FAQ
- Is cove molding cheaper than crown?
- Can I mix cove in some rooms and crown in others?
- What size cove for cabinets vs ceilings?
- Does cove molding work with modern flat-panel style?
- Bottom Line
Cove vs Crown: The Actual Difference
- Cove molding is a single concave arc — a scooped quarter-round in reverse. Clean, unornamented, and visually quiet. It springs from wall to ceiling at (usually) 45°, and small sizes (⅝ to 1¾ inches) also serve inside corners on cabinetry, stairs, and paneling.
- Crown molding is the broader family of sprung ceiling trim, typically built from an S-curve (cyma recta or cyma reversa) plus fillets, beads, and steps. Ornamental by design; it projects shadow lines and reads traditional-to-formal.
Put simply: every cove at a ceiling is doing crown’s job with a minimalist accent, and many crowns contain a cove within their profile. The choice is stylistic:
| Cove | Crown | |
|---|---|---|
| Line character | One soft shadow, curves inward | Layered shadows, curves in and out |
| Style fit | Modern, transitional, cottage, Craftsman-adjacent, plaster-look | Colonial, traditional, formal, classical |
| Visual weight | Light; almost disappears painted ceiling-color | Announces itself; frames the ceiling |
| Cost (paint-grade) | $1-$3/lin ft | $1.50-$6/lin ft one-piece |
| Forgiveness | High — simple curve hides wavy ceilings well | Moderate — crisp fillets telegraph gaps |
The cove’s superpower in current design: painted the ceiling color, a 3-4 inch cove mimics an old-world plaster cove transition — the “curved ceiling” look — for a few dollars a foot.
Combined Cove-Crown Profiles
Three ways cove and crown join forces:
- Milled combination profiles: stock “cove crown” moldings put a deep cove as the central element with small fillets or beads at the edges — more presence than plain cove, less frill than classical crown. Common in 3¼-5¼ inch widths; the go-to for transitional homes that find full crown fussy.
- Built-up assemblies: the classic three-piece trick — a flat frieze board on the wall, a crown or large cove sprung above it, and a bed or cove molding at the ceiling — builds a 7-12 inch architectural cornice from cheap stock. A large cove used as the sprung member with a small cove above creates a stepped plaster-cornice look; using crown as the sprung member goes formal.
- Cove-with-lighting: mount the cove (or crown) an inch or two below the ceiling on blocking, leave the top open, and lay LED strip behind it — indirect “cove lighting” washing the ceiling. Foam and polyurethane profiles made for this cost $2-$5/ft.
Sizing by Ceiling Height
Scale rules that keep trim proportionate (widths are the face/projection of the installed assembly):
| Ceiling height | Cove or crown size |
|---|---|
| 8 ft | 2½-4½ inches; simple profiles; avoid heavy buildup |
| 9 ft | 4-6 inches; one-piece crown or cove-crown combos shine |
| 10 ft | 5-7½ inches; built-up assemblies start earning their keep |
| 11-12 ft+ | 7-12+ inches; multi-piece cornices; single small coves vanish |
Two adjustments: rooms see trim size relative to their footprint, so a large open-plan space wants the top of its range; and painted-ceiling-color cove can run smaller than the chart because it reads as architecture, not trim. When in doubt, tack up a test length (or a cardboard mockup) and look from the doorway.
Paint-Grade vs Stain-Grade
Paint-grade
- MDF: $1-$2.50/ft, dead-smooth, no knots, crisp machining; heavy, sags between fasteners on long ceiling spans, and hates moisture. The default for painted rooms.
- Primed finger-jointed pine: $1.50-$3/ft, lighter and stiffer than MDF, takes nails better overhead — worth the small premium for ceilings.
- Polyurethane/PVC foam: $2-$6/ft, featherweight (installs with adhesive plus a few pins), pre-primed, moisture-proof — the ace for bathrooms, big ornate profiles, and cove-lighting troughs. Dents easier than wood.
Stain-grade
- Solid pine (clear): $2-$4/ft, warm and traditional under stain.
- Oak, maple, cherry: $4-$12/ft; match your other stained trim species exactly — stained oak crown over painted poplar base reads fine, but mixed stained species clash.
- Stain-grade demands better joinery: no caulk rescue, so copes and miters must be tight off the saw, and grain/color matching between sticks matters. Budget 20-30% extra material for selection.
Install Notes for Sprung Profiles
Cove and crown both install “sprung” — leaning between wall and ceiling with an open triangular void behind — which drives all the technique:
- Know your spring angle: most profiles are 45/45 or 52/38. It determines your miter/bevel settings and how the piece seats in a miter saw.
- Cut upside-down and backwards against the fence (ceiling side down on the saw table), or use a compound-miter chart with the molding flat. For 90° corners with 45/45 cove: 45° miter cuts nested; flat-cut settings differ — chart it, and cut test blocks first.
- Cope inside corners on wood and MDF: miter one piece square into the corner, cope the mating piece to the profile with a coping saw. Coped joints stay closed when framing moves; mitered inside corners open by Christmas. Simple cove profiles are among the easiest copes to learn on.
- Nail into structure: top plate of the wall gives continuous nailing along walls parallel to joists; otherwise hit studs and joists, or install angled backing blocks in the void — mandatory for big assemblies and anything holding LED gear.
- Scarf long runs at 30-45° over a stud, glued.
- Caulk and fill (paint-grade): caulk the wall and ceiling lines with a flexible painter’s caulk — a smooth bead is what makes the job look plastered; a caulk tool keeps those long ceiling lines clean. Fill nail holes, spot-prime, topcoat.
- Wavy ceilings: follow the ceiling and keep the bottom line straight-ish, splitting the difference; caulk absorbs the rest. Never force stiff profiles flat to a dipping ceiling — bed the gap with caulk or scribe.
Pairings That Work
- Cove + Shaker/flat casings: the modern-transitional package — clean curve above, flat stock everywhere else. Pairs beautifully over a nickel gap shiplap wall, where the cove finishes the top edge.
- Cove-crown combo + traditional casings: the safe whole-house choice for 9-ft builder homes.
- Built-up crown + paneled walls: formal dining and libraries; scale everything together.
- Small cove as cabinet crown: 1¾-2½ inch cove atop kitchen uppers reads current where ornate cabinet crown reads 2005.
- Ceiling-color cove: paint it out with the ceiling for the plaster-transition effect; wall-color cove lowers the ceiling visually — usually avoid.
FAQ
Is cove molding cheaper than crown?
Generally yes — simpler knives, less material: $1-$3/ft paint-grade cove versus $1.50-$6 for one-piece crown, and installation labor is similar ($4-$8/ft installed either way).
Can I mix cove in some rooms and crown in others?
Yes, and it’s standard practice: crown in public/formal rooms, plain cove or nothing in bedrooms and utility spaces. Keep one family of profiles per floor so transitions at doorways don’t argue.
What size cove for cabinets vs ceilings?
Cabinets and shelves: ⅝-2½ inches. Ceilings: 3 inches minimum at 8 ft, scaled up per the chart above. The tiny stock in the trim aisle is for furniture, not rooms.
Does cove molding work with modern flat-panel style?
Better than crown does. A modest painted-out cove adds finish without ornament; true minimalist rooms often skip ceiling trim entirely and spend the budget on perfect drywall corners instead.
Bottom Line
Choose cove when you want the ceiling transition softened and quiet, crown when you want it framed and formal, and a cove-crown combination when the room sits between. Size to your ceiling height, cope your inside corners, nail into real backing, and let a clean caulk line do the final magic — the curve will make an ordinary room look deliberately designed.