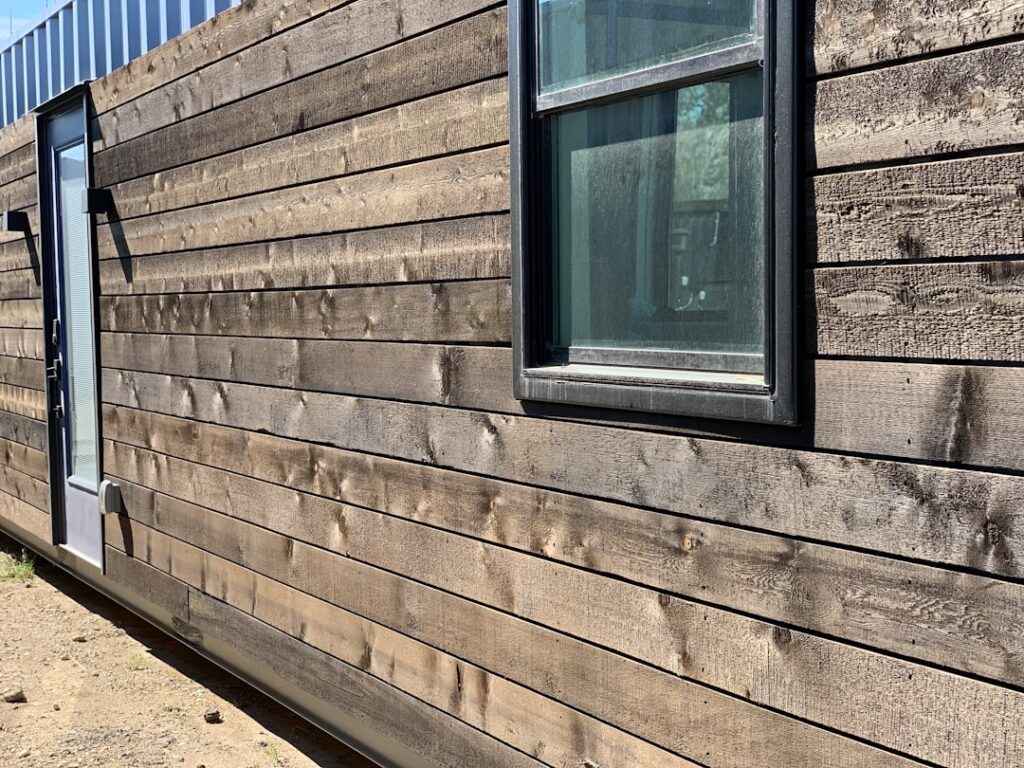
Nickel gap shiplap is the board profile that made the modern shiplap wall possible for regular people. Instead of relying on the installer to space every board an even 1/8 inch apart, the gap is milled into the board itself — a machined reveal exactly the thickness of a nickel that self-registers as you stack the boards. The result: crisp, dead-even shadow lines with no spacers, no drift, and no math. This guide covers how the profile works, how it differs from true shiplap and tongue-and-groove, the material choice (MDF vs pine vs polymer), and a clean install sequence.
How the Profile Works
A nickel gap board is really a tongue-and-groove board wearing a shiplap costume. Each board has:
- A tongue on one edge and a groove on the other (or on some brands, a rabbeted overlap), so boards physically interlock.
- A relieved shoulder at the face of the joint, milled back about 1/16-1/8 inch, so when two boards seat fully together a uniform gap — the “nickel gap,” nominally 0.075-0.125 inch — appears at the surface.
Because the gap is created by the milling rather than by how far apart you place the boards, every joint on the wall is identical by definition. Seat the boards tight, and the reveal takes care of itself. The interlock also lets you blind-nail through the tongue, hiding fasteners completely — something true shiplap’s open lap can’t fully do.
Nickel Gap vs True Shiplap vs Tongue-and-Groove
| Nickel gap | True shiplap | Tongue-and-groove (V-groove) | |
|---|---|---|---|
| Joint | Interlocking tongue/groove with milled reveal | Overlapping rabbets (L-shaped edges) | Interlocking, faces touch |
| Gap | Fixed ~1/8″, automatic | Whatever you set with spacers — can drift | None; V or bead shadow line instead |
| Fasteners | Blind-nail through tongue | Face-nail (or nail through lap) | Blind-nail through tongue |
| Look | Crisp square shadow line | Rustic; gap varies with the installer | Softer V-line, more traditional paneling |
| Best for | Painted modern-farmhouse walls and ceilings | Authentic old-building character | Porch ceilings, wainscot, cottage style |
If your goal is the clean painted look on accent walls, ceilings, or kitchen islands, nickel gap is the right tool. True shiplap earns its place where you want visible face nails and a hand-built vibe.
Material Choice: MDF vs Pine vs Polymer
Primed MDF — the painted-wall default
Pros: dead-flat, knot-free, pre-primed, stable indoors, machines to razor-crisp edges that make the reveal pop, and cheapest per finished foot ($1.30-$2.50/sq ft). Cons: hates water — swollen edges are permanent — and it’s heavy. Use it anywhere dry: living rooms, bedrooms, offices, stair walls. Skip it in full baths, laundry splash zones, and exteriors.
Pine and poplar — the paint-or-stain all-rounder
Primed finger-jointed pine ($2-$4/sq ft) handles occasional humidity better than MDF and holds nails harder. Clear or knotty solid pine can be stained for wood-tone walls. Expect seasonal movement: solid wood nickel gap will open and close its reveal slightly winter to summer — the milled gap disguises most of it, which is another quiet advantage of the profile.
PVC/polymer — wet zones and exteriors
Cellular PVC nickel gap ($3.50-$6/sq ft) is waterproof: bathrooms with showers, mudrooms, covered porch ceilings, exterior accent walls. Paint with lighter colors unless rated for dark, and gap ends for thermal movement per the brand chart.
Sizes
Common face widths are 5¼ and 7¼ inches (1×6 and 1×8 nominal), with 3-inch and 9-11-inch profiles available. Wider boards read more modern and install faster; narrower reads more historic. Thickness runs ½ to ¾ inch — thicker stock shadows better at the reveal and bridges wavy framing more gracefully.
How Much It Costs
Material for an accent wall runs modest: a 12 × 9 ft wall is 108 sq ft — about $200-$350 in primed MDF boards, $300-$500 in pine, plus a $30-$60 in nails, adhesive, and caulk. Professionally installed, nickel gap walls quote at $7-$15/sq ft painted. Ceilings run 30-50% more in labor.
Install Sequence
- Acclimate boards flat in the room 48-72 hours (solid wood especially).
- Find studs and mark them floor to ceiling with light pencil lines or tape. Boards can go straight over drywall — no furring needed on interior walls.
- Level the first course. Everything stacks off board one. Snap a level line; scribe the bottom board to floor or baseboard irregularities so the top edge lands level. Groove-down or groove-up both work — most install tongue-up so nails angle downward hidden.
- Fasten: 18-gauge brads (1½-2 inch) or 16-gauge finish nails through the tongue at every stud, plus a bead of construction adhesive on MDF for insurance. Face-nail only the bottom of the first course and top of the last, where trim or caulk will hide it.
- Stagger end joints on walls longer than your boards — offset seams by at least 16-24 inches between adjacent courses, cutting ends at 30° scarf angles for tighter painted seams.
- Outlets: cut with a jigsaw or oscillating tool; add box extenders — the wall just got ½-¾ inch thicker.
- Corners and edges: inside corners caulk; outside corners take a corner bead of two ripped boards or a manufactured corner. Terminate at ceilings with crown, cove, or a bare caulked line — a small cove or cove-crown molding finishes the transition neatly.
- Do not caulk the nickel gaps. The shadow line is the whole point. Caulk only perimeter joints and corners with a quality painter’s caulk, fill nail holes, then paint.
Painting the Reveal
The gap is the detail everyone sees, so paint it deliberately. Two workable orders: prime and first-coat the boards (including tongue edges) before install, then nail up and apply the finish coat — the fastest route to clean gaps; or install raw and cut into every gap with a 1-inch angled sash brush before rolling faces. A sprayer trivializes all of it if you can mask the room. Satin and eggshell show the shadow line better than flat; semi-gloss amplifies every framing wave — use it only on dead-flat walls.
Mistakes to Avoid
- Skipping the level start. A first course following a crooked floor telegraphs a run-off gap at the ceiling 9 feet later. Level line first, scribe the bottom.
- Forcing seasonal wood tight in July. Solid pine installed swollen will shrink winter gaps wider than the milled reveal. Acclimate and install at normal indoor humidity.
- MDF in the shower zone. One year of splash and the bottom course blooms. PVC there, always.
- Painting gaps shut. Heavy unbrushed paint bridges a 1/8-inch reveal surprisingly easily. Light coats, brush the gaps out.
- No stud plan on ceilings. Adhesive alone will not hold MDF overhead. Nail into every joist, or screw and plug on heavy stock.
- Horizontal vs vertical afterthought. Horizontal widens a room; vertical adds height. Decide per wall — mixed direction on adjoining walls rarely works.
FAQ
Why is it called nickel gap?
The milled reveal is close to the thickness of a US nickel (0.077 inch). Old-school carpenters spaced square-edge boards with actual nickels; the milled profile automated the trick.
Can nickel gap go over textured walls?
Yes — the boards bridge light texture fine as long as nails hit studs. Heavy texture high spots may need knocking down so boards sit flat.
Is nickel gap out of style?
The gray-farmhouse-everything era passed, but the profile has settled into the permanent vocabulary — currently in color-drenched paint treatments, vertical orientations, and ceilings rather than whole white rooms. A painted plank ceiling detail also pairs well with pressed-metal looks; see our metal ceiling tiles guide for that direction.
How much do I order?
Wall area minus openings, plus 10% waste (15% with many corners or a diagonal ceiling). Boards come in 8-16 ft lengths; buy lengths that minimize end seams on your longest walls.
Bottom Line
Nickel gap shiplap gives you the machine-perfect version of a hand-built look: interlocking boards, hidden nails, and a factory-set 1/8-inch shadow line that never drifts. Pick MDF for dry painted walls, pine where you want real wood, PVC where water lives — start level, blind-nail at studs, keep the caulk out of the gaps, and the wall installs itself one registered course at a time.