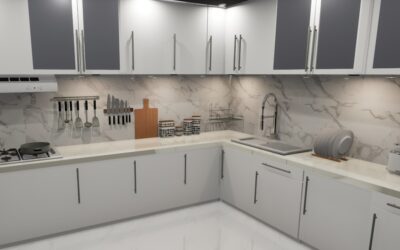
Adding crown molding kitchen cabinets is one of the highest-impact weekend upgrades you can pull off with a $40 nail gun and a miter saw. Stock cabinets ship with plain flat tops that leave an awkward gap between the cabinet and the ceiling. Crown molding fills that gap, softens the transition, and instantly elevates the cabinetry from builder-grade to custom looking. The install is straightforward once you understand how to handle inside corners, outside corners, and the scribing work that hides ceiling dips.
Why Crown Molding Transforms a Kitchen
Cabinets without crown molding look unfinished. The eye reads the flat cabinet top, the gap above, and the ceiling as three disconnected planes. Crown bridges them visually and makes the cabinets feel built in. On 8-foot ceilings, a single 4-inch crown is often enough. On 9 or 10-foot ceilings, stacked crown molding (two or three profiles combined) fills the taller void without stretching a single piece disproportionately.
The upgrade cost is modest. Budget $4-$8 per linear foot for primed MDF crown, $6-$12 for paint-grade poplar, and $10-$25 for stain-grade oak or maple. A typical kitchen uses 30-50 linear feet, so the total materials bill lands between $150 and $600.
Choosing the Right Profile
Crown molding comes in dozens of profiles, but three styles cover most kitchens.
- Traditional cove: curved concave face, reads classic and soft
- Dentil or detailed: small repeating square blocks, formal and fancy
- Shaker or craftsman: flat with a simple step, clean modern look
For stacked crown molding, combine a flat riser (2-3 inches of flat board on top of the cabinet), then a traditional cove crown above it. That setup fits 9-foot ceilings and gives a custom, high-end appearance without specialty millwork.
Tools You Need
- Compound miter saw with crown cutting capacity
- 18-gauge brad nailer (2-inch brads for crown, 1-inch for small fillers)
- Air compressor or cordless brad nailer
- Coping saw (for inside corners, if you choose to cope)
- Wood glue
- Paintable caulk and caulk gun
- Combination square and stud finder
- Step ladder, safety glasses
A cordless brad nailer (DeWalt DCN680, Ryobi P320) runs $150-$250 and eliminates the hose. It pays for itself after one trim project.
Measuring and Planning
Before cutting anything, sketch the cabinet layout from above and mark every inside corner, outside corner, and end return. Inside corners happen where two cabinet runs meet at 90 degrees (L-shape). Outside corners happen where the crown wraps around the end of a cabinet run. End returns are short pieces that die into the wall or into a taller cabinet neighbor.
Measure each cabinet run and add 10 percent for waste. For stacked crown, buy the flat riser material in 8 or 10-foot lengths so long runs can be made without joints.
Installing the Flat Riser (for Stacked Crown)
- Measure the cabinet top width and cut 1×3 poplar or pine to length
- Align the riser flush with the cabinet face frame
- Nail down into the cabinet top with 2-inch brads every 12 inches
- Miter outside corners at 45 degrees, butt inside corners
- Sand edges and fill nail holes later
The riser gives the crown a nail surface and adds visual height. For single-profile crown, skip this step and nail directly to the cabinet.
Cutting Crown Molding Miters
Crown cuts scare DIYers because the molding sits at an angle in the saw. Two approaches work: upside-down and backwards against the fence (the traditional way), or flat with a compound miter angle. For 45-degree wall corners, set the saw to 45 degrees bevel and 31.6 degrees miter. Test-cut scrap pieces first and confirm the joint closes tight before cutting your finish stock.
- Inside corner: cope one piece over a butt-cut piece for a tight joint
- Outside corner: miter both pieces at 45 degrees and glue
- Splice along a run: use a 45-degree scarf joint, not a butt joint
Coping takes practice. Butting mitered joints on inside corners works and looks fine once caulked, especially on painted crown where caulk hides minor gaps.
Nailing the Crown
With the flat riser in place, position the crown so the top sits against the ceiling (or just below it, if the ceiling is uneven). Shoot 2-inch brads through the face of the crown into the riser, angling slightly to catch the most wood. Space nails 12-16 inches apart. Avoid nailing into the crown’s thin decorative face where the nail head will telegraph.
For ceilings that dip or bow, let the crown sit at the highest contact point and plan to scribe and fill the dips with paintable caulk. Never force the crown up against an uneven ceiling, or the miters will open up.
Caulking and Finishing
Caulk is what makes DIY crown look professional. Run a thin bead of paintable latex caulk along the top edge where the crown meets the ceiling, along the bottom where it meets the cabinet or riser, and into every miter joint. Wipe with a damp finger for a smooth concave fillet. DAP Alex Flex and Sherwin-Williams 950A are both reliable choices for $6-$9 per tube.
- Fill nail holes with lightweight spackle or wood filler
- Sand smooth with 150-grit after filler dries
- Prime exposed fillers with shellac-based primer (BIN) to prevent stain bleed
- Topcoat with two coats of cabinet-grade enamel
For stain-grade crown, skip caulk on the joints and use tinted wood filler that matches the stain color. Caulk does not take stain and will show as a glossy line.
Common Mistakes to Avoid
The most frequent DIY mistake is forgetting the ceiling is not level. Cabinets install level, ceilings dip and rise a quarter-inch or more across a run, so the crown gap against the ceiling will vary. Plan on caulking that gap, not chasing it with cut adjustments.
Second, do not nail crown directly through its thin bottom edge. The wood splits and the nail telegraphs. Always nail through the face or through the riser behind it.
Third, avoid mitering an end return at the wall instead of coping or butting. A mitered return that splits into two 45s often opens up as the wood expands with humidity. Use a simple butt cut against the wall if the end is visible.
Budget, Time, and Payoff
For a 30-linear-foot kitchen, plan on $200-$400 in materials, one 8-hour day for an experienced DIYer, or two days split across a weekend for a first-timer. Pros charge $8-$15 per linear foot installed, or roughly $250-$500 labor on top of materials. Either way, the finished look reads as a $5,000-$10,000 cabinet upgrade for a fraction of the price.