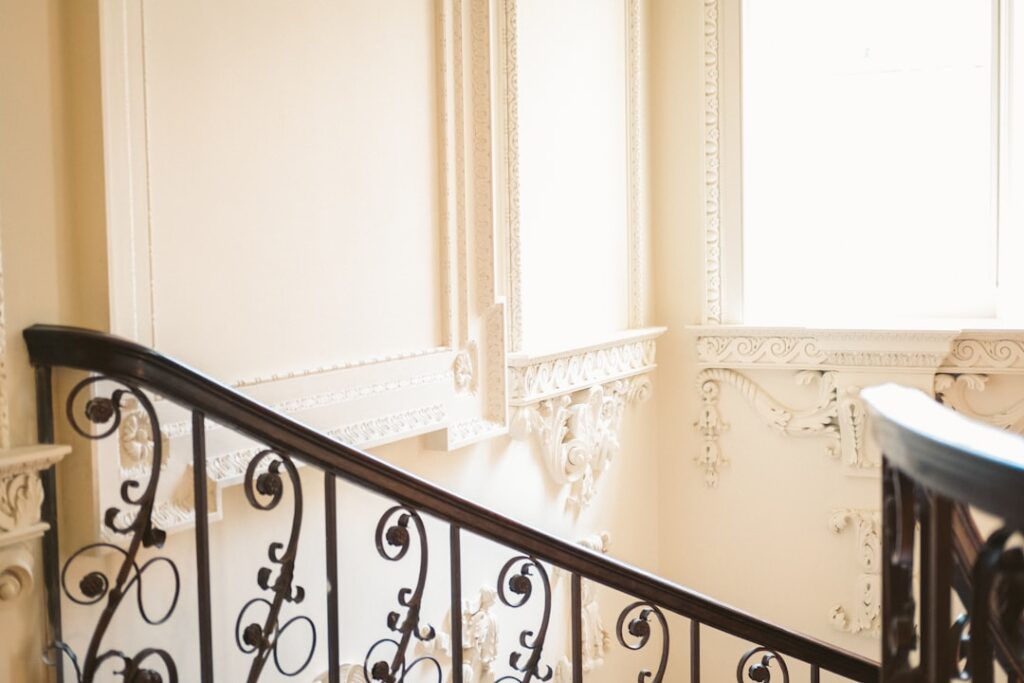
Crown molding profiles are the shaped cross-sections that give crown molding its distinctive character, from simple modern coves to elaborate traditional layers. The profile you choose sets the tone of a room, either whispering subtle elegance or making a grand architectural statement. With dozens of options available, understanding the common styles, appropriate sizes, and materials helps you pick a profile that suits your home’s architecture and ceiling height. This guide breaks down crown molding profiles so you can choose with confidence.
- What a Molding Profile Means
- Common Crown Molding Profiles
- Matching Profile to Architectural Style
- Sizing the Profile to Your Ceiling
- Materials for Crown Molding Profiles
- What Profiles Cost
- Layering Profiles for Custom Looks
- Choosing a Profile: Practical Tips
- Common Mistakes to Avoid
- How Profiles Interact With Light
- Installation Difficulty by Profile Type
- Finding Your Perfect Profile
What a Molding Profile Means
A profile is the silhouette you see when you look at the cut end of a piece of molding. It is the combination of curves, flats, and angles that create the molding’s shape and how it catches light and casts shadow. Crown molding sits at the transition between wall and ceiling at an angle, and its profile determines whether the room feels formal and ornate, clean and contemporary, or somewhere in between. Choosing the right profile is as much about matching your home’s style as personal taste.
Common Crown Molding Profiles
- Cove: A simple concave curve, clean and understated, ideal for modern and minimalist spaces.
- Ogee: An elegant S-shaped curve combining a concave and convex sweep, one of the most popular and versatile traditional profiles.
- Crown with dentil: Features a row of small rectangular blocks (dentils) for a formal, classical look common in Colonial and Georgian homes.
- Bed molding: A smaller, simpler profile often used in less formal rooms or layered with other pieces.
- Stepped or built-up crown: Multiple molding pieces stacked together to create a large, substantial, multi-layered profile for grand rooms.
- Modern flat or reveal: Simple, angular profiles or a recessed reveal that suit contemporary interiors.
Matching Profile to Architectural Style
The best profile complements your home’s character. Traditional and formal homes suit ogee, dentil, and layered built-up profiles that convey craftsmanship and history. Craftsman and farmhouse styles often use simpler, flatter profiles with clean lines. Modern and contemporary interiors call for minimal cove or squared-off profiles, or sometimes a shadow-line reveal instead of traditional crown. Matching the molding to existing trim, door casings, and baseboards throughout the home creates a cohesive, intentional look.
Sizing the Profile to Your Ceiling
Scale matters enormously with crown molding. The height of your ceiling should guide how tall and substantial the profile is:
- 8-foot ceilings: Choose crown roughly 3 to 5 inches tall so it does not overwhelm the room.
- 9-foot ceilings: Crown around 5 to 7 inches works well.
- 10-foot and taller ceilings: Larger profiles of 7 inches or more, or built-up layered crown, hold their proportion in the space.
A common mistake is installing crown that is too small for a tall room, where it looks like an afterthought, or too large for a low room, where it makes the ceiling feel oppressive. Proportion is key.
Materials for Crown Molding Profiles
The same profile can be produced in several materials, each with trade-offs:
- MDF: Affordable, stable, and smooth, ideal for painted profiles and the most popular choice for interior crown.
- Solid wood: Poplar, pine, oak, or maple for stained or painted applications, with authentic grain but a higher price.
- Polyurethane: Lightweight, moisture-resistant, and available in intricate profiles that would be costly to mill in wood, easy to install and great for detailed designs.
- Plaster: Traditional and highly detailed for historic restorations, but heavy and expensive.
For detailed profiles like dentil or ornate ogee, polyurethane offers crisp detail at a reasonable cost and light weight, while MDF and wood suit simpler shapes.
What Profiles Cost
- Simple MDF profiles: $1 to $3 per linear foot
- Solid wood profiles: $2 to $8 per linear foot depending on species
- Polyurethane detailed profiles: $3 to $10 per linear foot
- Built-up multi-piece crown: the combined cost of several profiles plus more labor
- Professional installation: $6 to $15 per linear foot
More elaborate and larger profiles cost more in both material and labor, since intricate corners take longer to cut and fit.
Layering Profiles for Custom Looks
One of the most impressive techniques is building up crown from multiple profiles. By combining a main crown with additional bed molding, a flat filler board, and a cap or base molding, carpenters create large, custom-looking cornices that appear far more expensive than off-the-shelf single pieces. This approach lets you scale the molding to grand ceilings and add depth and shadow lines that a single profile cannot achieve. It requires more planning and precise installation but delivers a high-end result.
Choosing a Profile: Practical Tips
- Bring home samples of a few profiles and hold them at the ceiling to judge scale and shadow.
- Match or complement existing casings and baseboards for a unified look.
- Consider ceiling height first, then style, then detail level.
- For painted rooms, MDF or polyurethane keeps costs down; for stained wood, choose a matching species.
- Order a little extra material to allow for miscuts and future repairs.
Common Mistakes to Avoid
The most common error is choosing a profile that is out of proportion with the ceiling height, either dwarfed in a tall room or overpowering in a low one. Mixing a very ornate crown with an otherwise modern, minimalist home creates a jarring mismatch. Selecting an intricate profile without accounting for the difficulty of cutting its corners can frustrate DIYers. And ignoring the rest of the home’s trim leads to a disconnected look. Always view profiles in the actual room before buying in bulk.
How Profiles Interact With Light
Much of a crown molding profile’s beauty comes from how it plays with light and shadow, and understanding this helps you choose. The curves, flats, and recesses in a profile catch light on their raised faces and cast shadows in their hollows, creating depth and dimension along the top of the wall. An ogee profile, with its flowing S-curve, produces a soft gradient of light and shadow that reads as elegant and traditional. A cove profile creates a single smooth shadow line for a clean, quiet effect. Dentil and deeply cut profiles throw crisp, rhythmic shadows that emphasize formality and craftsmanship.
Room lighting affects this interplay. Rooms with abundant natural light show off a profile’s detail throughout the day, while rooms lit mainly by overhead fixtures may flatten the shadows. Wall color matters too: white crown against a colored wall highlights the profile’s silhouette, while tone-on-tone crown creates a subtle, sophisticated effect where the shadows do the work. When selecting a profile, hold the sample at the ceiling and observe how it looks under your room’s actual lighting at different times of day, since a profile that dazzles in a showroom may read differently at home.
Installation Difficulty by Profile Type
Not all profiles are equally easy to install, and this practical factor deserves consideration, especially for DIYers. Simple, small profiles like a basic cove are the most forgiving because minor gaps at corners are easier to caulk and hide. Larger single-piece crown becomes trickier because the compound angles at corners are harder to cut accurately and any error is more visible. Intricate profiles such as dentil molding demand careful alignment so the blocks line up around corners, which can be genuinely challenging. Built-up crown made from multiple stacked pieces multiplies the complexity, since each layer must be cut and coordinated.
Material influences difficulty as well. Lightweight polyurethane profiles are easier to handle and can be glued in place, reducing the fussiness of nailing, while dense hardwood profiles require precise cuts and sturdy fastening. If you are new to crown molding, starting with a modest single-piece profile in MDF or polyurethane builds confidence before attempting ornate or built-up designs. For complex profiles or grand rooms, hiring a finish carpenter ensures the crisp corners and clean lines that make elaborate profiles worth the investment, avoiding the frustration and wasted material that intricate cuts can cause an inexperienced installer.
Finding Your Perfect Profile
Crown molding profiles are the detail that shapes a room’s personality, so choosing well pays off in lasting style. By matching the profile to your home’s architecture, scaling it to your ceiling height, selecting the right material, and considering built-up layering for grand spaces, you can achieve anything from subtle modern refinement to classic elegance. Take home samples, think about proportion, and coordinate with existing trim. The right crown molding profile transforms plain walls and ceilings into a finished, custom-looking space that feels thoughtfully designed.