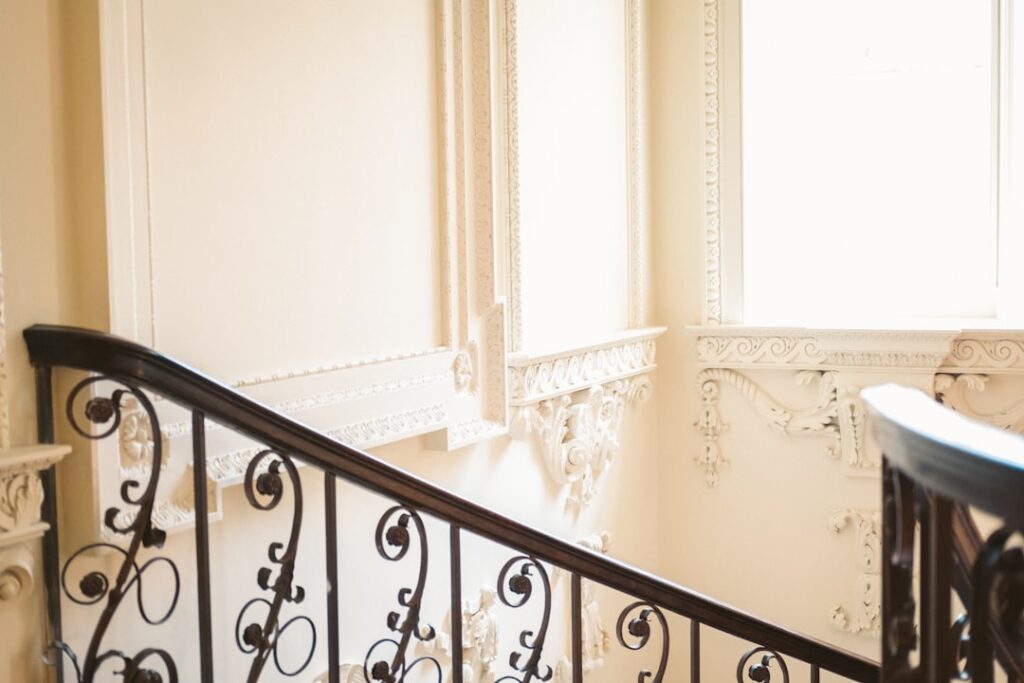
The joint where wall meets ceiling is the least forgiving line in a room; every drywall wave and paint holiday shows there. Crown molding exists to dissolve that line, bridging wall and ceiling at an angle so the eye reads one continuous, finished transition instead of a hard corner. It is also the trim upgrade with the biggest perceived-value return: appraisers and agents consistently list crown among the details that make buyers say “custom” within seconds of walking in. The catch is that crown is the trickiest trim in the house to cut, because it sits at a compound angle. This guide covers the styles, the sizing rules that keep it in proportion, material choices, and what a sound installation involves.
What Crown Molding Actually Is
Unlike baseboard or casing, crown does not sit flat against anything. The profile leans between wall and ceiling at a spring angle, usually 38 or 45 degrees, leaving a hollow triangle behind it. That geometry is what creates crown’s deep shadow lines, and it is also why every inside and outside corner is a compound cut: the miter and the bevel interact, and a half-degree of ceiling sag shows up as a gap. Understanding that one fact explains most of crown’s reputation, and most of the techniques, coping, corner blocks, flexible caulks, that carpenters use to tame it.
Styles and Profiles
Crown profiles are combinations of a few classical shapes: the cove (concave scoop), the ovolo (convex quarter-round), the cyma or ogee (S-curve), and flat fillets between them. From those, the common named styles:
- Cove crown: a simple concave sweep, quiet and versatile; the default in ranches, cottages, and casual rooms.
- Ogee crown: the S-curve profile, the most “classic” silhouette; suits colonial and traditional homes and is the best-selling profile family in America.
- Dentil crown: ogee or ovolo with a row of tooth blocks; formal, Georgian, best in dining rooms and libraries with tall ceilings.
- Stepped or craftsman crown: flat planes and small steps rather than curves; correct for craftsman, mission, and modern-farmhouse trim packages.
- Built-up crown: two or more stock profiles stacked, often a baseboard on the wall, crown above, and a small cove at the ceiling, creating 7-to-12-inch assemblies that read as custom millwork at stock-lumber prices.
Match the profile to the trim already in the house. A dentil crown over shaker flat casings argues with itself; the room reads best when crown, casing, and base share a vocabulary.
Sizing: Match the Crown to the Ceiling
Size is where most DIY crown goes wrong, almost always by going too small. A skimpy 2-inch crown under a 9-foot ceiling looks like an apology. Reliable proportions, measured as the vertical drop of the installed profile:
- 8-foot ceilings: 3 to 5 1/4 inches
- 9-foot ceilings: 4 1/2 to 7 inches
- 10-foot ceilings: 6 to 9 inches, often built up
- 11 feet and up: 9 inches plus, nearly always a built-up assembly
When in doubt, size up one step; crown shrinks visually the moment it reaches the ceiling. In rooms with very low ceilings, 7 feet 6 inches or less, consider skipping crown or using a small cove painted the ceiling color so it does not compress the room further.
Materials: MDF, Wood, Polyurethane, and PVC
For painted crown, primed MDF is the workhorse: dead-straight, knot-free, crisp profiles, $1 to $3 per linear foot in stock sizes. It is heavier than pine and its edges bruise, but on a ceiling nobody touches it. Finger-jointed primed pine costs slightly more and holds nails better. Stain-grade solid wood, oak, maple, cherry, runs $4 to $12 per foot and demands cleaner joinery since caulk cannot rescue stained corners. Polyurethane foam crown deserves more attention than it gets: profiles up to 10 inches weigh ounces per foot, install with adhesive and a few pins, never crack at the joints, and cost $2 to $8 per foot, making them the sane choice for large built-up looks and for plaster ceilings that hate nails. PVC crown serves bathrooms and exterior soffits where moisture rules everything else out. Installed by a finish carpenter, expect $6 to $16 per linear foot all-in for standard painted crown; a typical 12×14 room (52 linear feet) runs $300 to $850 professionally or $75 to $200 in DIY materials.
Install Basics: How the Pros Get Tight Corners
A clean crown job follows a consistent sequence. First, find the framing: crown wants nailing into studs and top plates, and where ceiling joists run parallel to a wall, carpenters often pre-install a beveled backer strip inside the hollow so there is always something to nail to. Second, set the projection: using a scrap, mark how far down the wall the crown lands and snap or laser a reference line around the room; following the wavy ceiling instead of a line is the classic amateur error.
Corners are the craft. Outside corners get compound miters, cut either with the crown held upside-down and leaning against the saw fence (“upside down and backwards”) or flat using the saw’s preset crown stops. Inside corners on painted work are best coped: one piece runs square into the corner, and the mating piece is back-cut along its profile with a coping saw so it nests over the first. Coped joints stay tight when framing shifts seasonally; mitered inside corners open up by the second winter. Beginners have two honest shortcuts, pre-made corner blocks that turn every cut into a square cut, and lightweight foam crown where joints get filled and sanded. Nail with a 16- or 18-gauge finish nailer, glue all corner joints, then fill, caulk both long edges, and paint; like all trim, caulk and paint deliver half the final quality.
Painting and Finishing Crown
Finish work makes or breaks crown more than the cuts do. Prime any raw MDF edges from cuts before painting, since exposed MDF core drinks paint and telegraphs as dull patches. Fill nail holes with lightweight spackle rather than caulk, which shrinks into a dimple, and caulk both long edges, the wall line and the ceiling line, with a quality paintable acrylic-urethane caulk, smoothing with a damp finger for a consistent bead. Those two caulk lines are what make wavy drywall look straight, and they are the entire reason painted crown forgives amateur ceilings. Brush or spray two coats of trim enamel; semi-gloss is traditional, though many designers now prefer satin for large profiles because it hides surface imperfections under raking ceiling light. If the ceiling gets repainted at the same time, paint the crown first and cut the ceiling line in afterward, the easier line to hold by hand.
Crown With Lighting: The Cove Upgrade
One increasingly popular variation is worth planning for before installation: LED cove lighting. Mounting the crown 2 to 4 inches below the ceiling, or using purpose-made lighting crown with a shelf behind the top edge, creates a channel for LED strip that washes the ceiling in indirect light. The parts cost is modest, $20 to $40 per 16 feet of quality LED strip plus a driver, but the wiring needs a plan: a switched outlet in the cove or a low-voltage run to a remote driver, arranged before the crown is nailed shut. Foam and polyurethane profiles work especially well here since many are molded specifically for the purpose and mount easily at the dropped height.
Where to Use It, and Where Not To
Living rooms, dining rooms, primary bedrooms, entries, and kitchens (where crown to the ceiling above cabinets ties the room together) are prime territory. Bathrooms take PVC or poly crown well. Skip crown in rooms with vaulted or heavily angled ceilings unless you are prepared for genuinely advanced transitions, and think twice in short rooms as noted above. Painted crown almost always matches the other trim color, typically a bright or soft white in semi-gloss, which keeps the whole trim package reading as one system. Whether you hire it out at $500 a room or spend a weekend learning to cope joints, crown remains what it has been since plaster cornices: the fastest way to make a builder-grade box feel deliberately designed.