DAP Flexible Floor Patch and Leveler is one of those quiet products that separates a floor job that lasts from one that telegraphs every flaw within a year. It is a ready-mixed, latex-based compound designed to fill cracks, gouges, low spots, and seams in interior subfloors before you lay tile, vinyl, laminate, or carpet. The word “flexible” is the key: unlike rigid cement patches that can crack when a wood subfloor moves, this one stays slightly resilient, which makes it a favorite for plywood and OSB floors that flex underfoot. Here is exactly where it shines, where it does not, and how to apply it correctly.
What This Product Actually Does
Think of floor patch as cosmetic and structural touch-up rolled into one thin layer. It is meant to smooth out the imperfections that would otherwise print through a finished floor — the chipped edge of a plywood seam, a nail hole, a shallow trowel gouge, or a dip where two panels meet unevenly. Because it is pre-mixed in a tub, there is no powder to measure and no pot life racing against you; you open the lid, trowel it on, and close it back up. That convenience makes it ideal for spot repairs and skim coats rather than pouring a whole floor flat, which is a job for a self-leveling underlayment instead.
The flexible latex formula is what lets it bond to wood subfloors without cracking. Rigid Portland-cement patches want a rock-solid substrate; put one on a bouncy plywood floor and normal deflection will fracture it. DAP Flexible Floor Patch and Leveler moves with the wood, so it holds up under vinyl and laminate where minor substrate movement is unavoidable.
Where to Use It — and Where Not To
This product is built for interior, above-grade or on-grade repairs on properly prepared surfaces. Good use cases include filling the joints and screw holes in a new plywood underlayment, feathering a low spot before sheet vinyl, patching cracks in old concrete before tile, and smoothing a rough spot so luxury vinyl plank clicks together flat. It works on concrete, wood, plywood, and existing well-bonded vinyl or ceramic.
- Do use it for: cracks, holes, seams, feather-edging, and skim coats up to the thickness the label allows in a single pass.
- Do not use it for: deep pours to flatten a whole room, exterior surfaces, wet areas with standing water, or as a finished wear surface without flooring on top.
- Do not use it for: filling gaps wider or deeper than recommended in one coat — build those up in thin layers instead.
One realistic limitation: it is a patch and a leveler for shallow work, not a substitute for a poured self-leveler when you have a genuinely wavy floor across a large area. If a 6-foot straightedge shows more than about a quarter inch of dip, reach for a proper leveling compound and save the flexible patch for the finishing touches.
Tools and Prep
You will need a stiff putty knife or a wider drywall taping knife for larger areas, a mixing stick to stir the tub, a vacuum, and clean water for cleanup while it is still wet. Preparation is where most patch jobs succeed or fail. The surface must be clean, dry, and free of dust, grease, paint flakes, and old adhesive, because the latex bonds to the substrate, not to a layer of grime. Vacuum thoroughly and wipe the area, then check that the subfloor is firmly fastened — chase down any squeaks or loose panels with screws first, since no patch can fix a floor that is still moving.
Step-by-Step Application
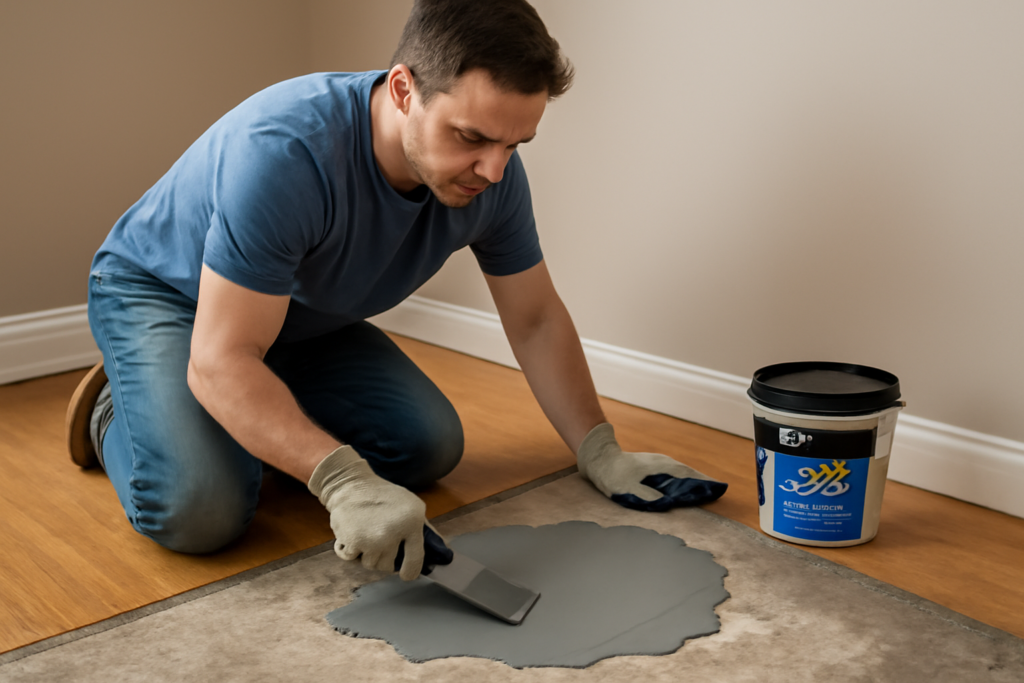
Stir the compound to a uniform consistency before you start. For cracks and holes, press the material in firmly with the edge of your knife so it fully packs the void, then draw the blade flat across the surface to strike it off level with the surrounding floor. For low spots and seams, apply a thin skim and feather the edges out to nothing so there is no ridge to sand later. Work in thin layers rather than one thick glob — thin coats dry faster, shrink less, and are far less likely to crack. If a deeper fill is needed, let the first layer set before adding the next.
Drying time depends on thickness, temperature, and humidity, but thin patches are typically ready to sand and cover in a couple of hours, while deeper fills need longer. Once it is firm, sand or scrape any high spots smooth and vacuum the dust before laying flooring. Because the product cleans up with water while wet, wipe your tools and any smears immediately; once it cures, removal takes real effort.
Cost and Value
A quart-size tub of DAP Flexible Floor Patch and Leveler typically runs about $12 to $18, and a gallon costs roughly $25 to $40, depending on the retailer. A single quart covers a surprising amount of spot repair and skim work, so for most residential prep jobs one or two containers is plenty. Against the cost of a flooring installation that fails because the subfloor was never smoothed, that is cheap insurance. The value here is not glamour; it is the flat, sound base that lets your finished floor look right and stay tight at the seams.
Pro Tips for a Clean Result
A few habits make the difference between an amateur patch and an invisible one. Always feather the edges — a hard ridge at the perimeter of a patch will show through vinyl and can even stop laminate from lying flat. Keep the room in a comfortable temperature range while it cures, since cold slows drying and can weaken the bond. Give deep fills more time than you think you need, because a skin can form on top while the core is still soft. And do a straightedge check across your finished repair before you lay flooring; catching a slight hump now is a two-minute sanding job, while catching it after the vinyl is down means pulling the whole run. Used this way, DAP Flexible Floor Patch and Leveler earns its place in the kit of anyone who installs floors.
How It Compares to Self-Leveling Compound
Homeowners often ask whether they can skip a poured self-leveler and just skim the whole floor with flexible patch. The honest answer is no, and understanding why saves you a failed job. Self-leveling underlayment is a thin, pourable cement that finds its own level across a large area and can be built up to a half inch or more to flatten a genuinely uneven floor. Flexible floor patch is the opposite tool — it is thick, trowel-applied, and meant for shallow, localized repairs measured in the fraction of an inch. The two are partners, not substitutes: pour the leveler to flatten the room, then use the flexible patch to touch up the seams, edges, and small voids the pour leaves behind. Reaching for the right one for each stage is what separates a floor that stays flat and quiet from one that develops squeaks and telegraphed cracks within a season.
Prefer to explore on your own?
See how new flooring looks in your actual room in seconds — free, no signup.
Try the free Floor Studio →