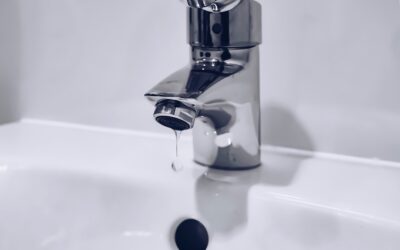
That steady drip echoing through your bathroom at 2 a.m. is not just annoying; it can waste hundreds of gallons a month and stain your sink. The good news is that Delta bathroom faucet repair is one of the most approachable plumbing fixes a homeowner can tackle, usually in under an hour with basic tools. Delta engineers their faucets for serviceability, and the company’s Lifetime Limited Warranty often means the replacement parts are free.
Part of our Bathroom Remodeling & Flooring guide — explore the full guide →
- Understanding Your Delta Bathroom Faucet Before You Repair
- Common Problems and What Causes Them
- Tools and Parts You Will Need
- Step-by-Step Delta Bathroom Faucet Repair
- Fixing Low Water Flow
- Repairing Two-Handle Delta Faucets
- When to Call a Plumber
- Using Delta's Lifetime Warranty
- Identifying Cartridge vs. Ball-Type Faucets
- Preventing Future Faucet Problems
Understanding Your Delta Bathroom Faucet Before You Repair
Delta makes several faucet styles, and knowing which you have determines the fix. Single-handle models use a ball or cartridge mechanism, while two-handle models use individual cartridges or, on older units, rubber seats and springs. Most modern Delta bathroom faucets rely on a replaceable cartridge, which is the heart of the valve and the usual culprit behind leaks and drips.
Before you buy anything, identify your model. The model number is often printed on paperwork, the box, or occasionally stamped on the faucet body. Snapping a photo of the faucet and the cartridge you remove makes matching a replacement far easier at the hardware store or on Delta’s parts site.
Common Problems and What Causes Them
Most Delta faucet issues trace back to a handful of worn parts. Diagnosing the symptom points you straight to the fix:
- Constant drip from the spout: Usually a worn cartridge or, on older two-handle units, worn seats and springs.
- Leak at the base of the handle: Typically a failed O-ring or a loose bonnet nut.
- Low or uneven water flow: Almost always a clogged aerator or a mineral-blocked cartridge.
- Handle hard to turn: A cartridge in need of cleaning or replacement.
- Water leaking under the sink: A loose supply-line connection or failed gasket.
Match your symptom to the cause and you will know exactly which part to service instead of tearing the whole faucet apart.
Tools and Parts You Will Need
Gather these before you start so you are not stuck mid-repair with the water off:
- Adjustable wrench and a set of hex (Allen) keys
- Phillips and flathead screwdrivers
- Needle-nose pliers
- Delta cartridge, O-rings, or seats-and-springs kit for your model
- Plumber’s grease and white vinegar for cleaning
- A rag and a small bowl for parts
Delta’s RP-numbered repair kits are model-specific, so bring your model number or the old part when purchasing. Because of the lifetime warranty, you can often request free replacement parts directly from Delta.
Step-by-Step Delta Bathroom Faucet Repair
Work slowly and keep your parts organized in the order you remove them. This sequence covers the most common cartridge replacement.
Step 1: Shut Off the Water
Turn the shutoff valves under the sink clockwise until they stop. Open the faucet to release pressure and confirm the water is off. Plug the drain so no small parts disappear.
Step 2: Remove the Handle
Pop off the decorative cap if present, then loosen the set screw with the correct hex key. Lift the handle straight up and off. Set the screw somewhere safe.
Step 3: Access the Cartridge
Remove the bonnet nut or retaining clip holding the cartridge in place. Note the orientation, many Delta cartridges have alignment tabs that must go back exactly the same way.
Step 4: Pull and Inspect the Cartridge
Grip the cartridge with pliers and pull it straight out. Inspect the O-rings and seals for cracks, wear, or mineral buildup. If they are damaged, replace the cartridge or its seals.
Step 5: Clean and Replace
Wipe the valve body clean and soak mineral-crusted parts in white vinegar. Coat new O-rings lightly with plumber’s grease, then insert the new cartridge, aligning any tabs to their slots.
Step 6: Reassemble and Test
Reinstall the retaining clip or bonnet nut, replace the handle, and tighten the set screw. Turn the water back on slowly and check for leaks and smooth operation.
Fixing Low Water Flow
If your repair is about weak flow rather than a leak, start with the aerator, the small screen at the tip of the spout. Unscrew it by hand or with tape-wrapped pliers, disassemble it, and soak the pieces in white vinegar for 15 to 30 minutes to dissolve mineral deposits. Rinse, reassemble, and reinstall. This five-minute fix restores flow in the majority of low-pressure complaints.
If cleaning the aerator does not help, mineral buildup inside the cartridge may be restricting flow, in which case the cartridge replacement above solves it.
Repairing Two-Handle Delta Faucets
Older two-handle models often use rubber seats and springs beneath the cartridge or valve stem. When these harden or wear, the faucet drips. To fix them, remove the handle and cartridge as above, then use a hex key or seat wrench to lift out the small rubber seat and spring from the valve body. Drop in the new spring and seat, spring first, wide end down, then reassemble. It is an inexpensive kit and a common repair on long-serving faucets.
When to Call a Plumber
Most Delta bathroom faucet repairs are firmly DIY, but a few situations warrant a pro. Call one if the shutoff valves are seized or leaking, if you find corroded supply lines, if the faucet body itself is cracked, or if leaks persist after a proper cartridge replacement. Stripped or frozen parts on a very old faucet can also make replacement of the entire unit more sensible than repeated repairs.
Using Delta’s Lifetime Warranty
One of the biggest advantages of owning a Delta faucet is the company’s Lifetime Limited Warranty, which covers the original consumer purchaser for as long as they own the home. In practice, that means the cartridge, O-rings, seats, springs, and other functional parts are usually free replacements, you just pay shipping in many cases, or nothing at all through customer service. Before you spend $15 to $40 on a repair kit at the store, it is often worth calling Delta or requesting parts through their website.
To make a warranty claim smooth, have your model number ready and be prepared to describe the problem, a spout that drips, a handle that leaks, low flow. Delta’s support team can usually identify the exact RP part number you need and ship it out. For older or discontinued faucets, they are generally good about supplying a compatible part or a suitable substitute. This warranty is a genuine money-saver over the life of the faucet, so lean on it rather than reflexively buying parts retail.
Identifying Cartridge vs. Ball-Type Faucets
Delta has used a few internal designs over the years, and knowing which you have prevents buying the wrong parts. The classic Delta single-handle faucet uses a ball valve, a rounded metal or plastic ball with slots, controlled by a set of springs and rubber seats beneath it. If your handle sits atop a domed cap and you find a ball inside, you have a ball-type faucet, and the fix usually involves replacing the seats, springs, and the ball if it is worn or scored.
Most newer Delta faucets, including the widely used DIAMOND Seal Technology line, use a cartridge instead, a cylindrical unit you pull straight out. Cartridge faucets are generally simpler to service because the whole worn assembly comes out as one piece. When you open the faucet, take a photo of what you find and match the internal design to the correct repair kit. Bringing the old part to the store, or referencing your model number online, eliminates the frustration of installing a kit meant for a different valve type.
Preventing Future Faucet Problems
A little upkeep keeps drips from returning. Clean the aerator every few months, especially if you have hard water, and wipe down the faucet to prevent mineral etching. If your home has high water pressure, above 80 psi, consider a pressure-reducing valve, since excessive pressure wears cartridges and seals faster. Address drips promptly rather than letting a worn seal grind away at the valve seat.
With the right cartridge kit, a few common tools, and this Delta bathroom faucet repair sequence, you can silence that drip, restore full flow, and stop a small leak from becoming water damage, all without paying for a service call. Keep your model number handy, take advantage of Delta’s lifetime warranty on parts, and this becomes a fix you can confidently repeat any time a faucet acts up.