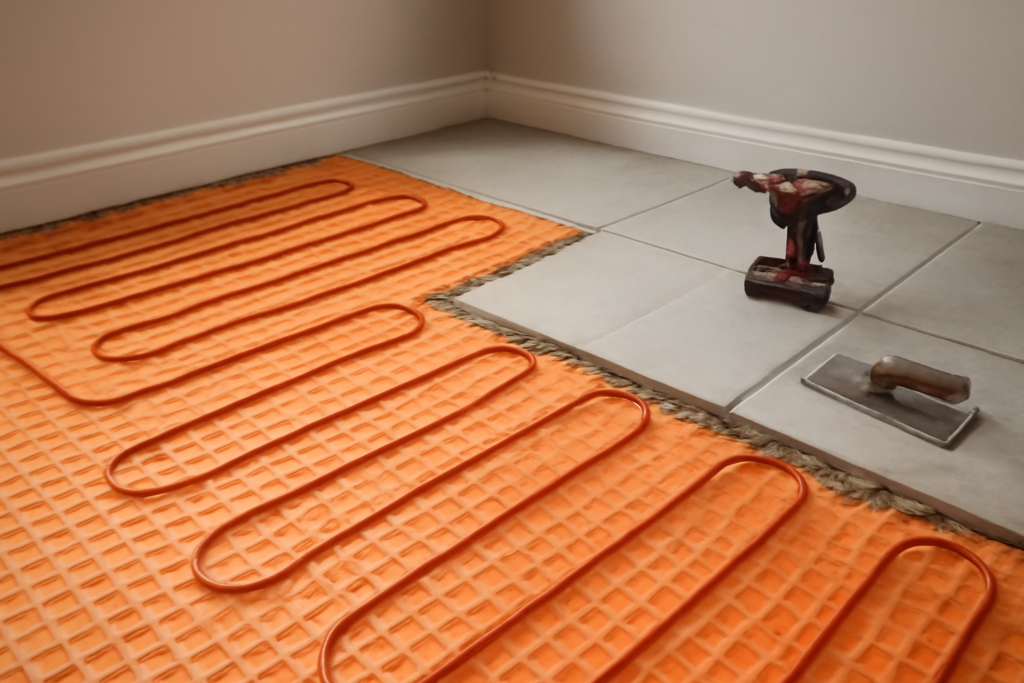
Cold tile on a winter morning is one of the small frustrations of homeownership, and electric radiant heat is the cure. A ditra heated floor, built around Schluter’s DITRA-HEAT system, solves two problems at once: it warms your tile and it protects that tile from cracking. By combining an uncoupling membrane with embedded heating cable, it has become a favorite among tile setters and remodelers.
This guide explains how the system works, weighs the real advantages and drawbacks, and covers what you should know before buying so your investment performs for decades.
What Is DITRA-HEAT?
Schluter DITRA-HEAT is an uncoupling membrane with a twist. The orange polypropylene matrix has stud-like cavities across its surface designed to hold a thin electric heating cable. You snap the cable into place between the studs in whatever pattern your room requires, then cover everything with thinset and tile.
The membrane serves a structural purpose beyond heat. Floors expand, contract, and flex slightly with temperature and load, and that movement is what cracks rigid tile and grout. An uncoupling layer absorbs that stress so it never reaches the tile above. With DITRA-HEAT you get radiant warmth and crack protection in a single installation step.
How the System Works
The complete assembly has a few essential parts. Understanding each helps you budget and plan:
- DITRA-HEAT membrane: the uncoupling layer that holds the cable and bonds to the subfloor.
- Heating cable: a line-voltage electric cable sold in lengths rated for specific square footage; you size it to your heated area.
- Programmable thermostat: controls temperature and scheduling, and includes a floor sensor for accurate readings.
- Floor temperature sensor: embedded in the membrane to feed the thermostat real data.
The cable converts electricity directly into gentle, even heat that radiates up through the tile. Because the system warms the floor surface rather than blowing hot air, rooms feel comfortable at lower thermostat settings and warmth is distributed evenly underfoot.
The Pros of a Ditra Heated Floor
There are several reasons this approach has earned a loyal following:
- Two functions, one layer: you get uncoupling crack protection and radiant heat without stacking separate products.
- Flexible cable layout: the stud matrix lets you route cable around toilets, vanities, and odd room shapes, heating only where you want it.
- Even, quiet warmth: radiant heat eliminates the cold spots and drafts of forced air.
- Low profile: the membrane adds minimal height, helpful in remodels where floor transitions matter.
- Works under most tile and stone: porcelain, ceramic, and natural stone all benefit.
For bathrooms, kitchens, and entryways, the comfort upgrade is genuinely noticeable, and the crack protection adds long-term value.
The Cons and Limitations
No system is perfect, and honest planning means weighing the downsides. Installation is more involved than laying tile alone, and mistakes can be costly because the cable is buried permanently. If a cable is damaged during installation or a tile setter drives a fastener through it, repairs mean pulling up tile.
Operating cost is another consideration. Electric radiant heat is best as a comfort and supplemental heat source rather than a whole-home primary system, since electricity generally costs more per unit of heat than gas. The cable also cannot be cut to length, so you must plan the layout to use the full run you purchased.
Cost Expectations
Prices depend on room size, electrical work, and your market, so use these as rough estimates. Membrane typically runs a few dollars per square foot. Heating cable and a thermostat add meaningfully to the total, and many homeowners find complete material costs land somewhere around $10 to $20 per square foot before labor.
Professional tile installation and the required electrical connection add to that figure. Because a dedicated circuit and code-compliant wiring are involved, factor in an electrician’s time. Getting itemized written quotes that separate materials, tile labor, and electrical work gives you the clearest picture.
Installation Basics and Safety
While experienced DIYers do install DITRA-HEAT, the project rewards careful preparation. The general flow looks like this:
- Prepare and clean a flat, sound subfloor.
- Bond the membrane to the subfloor with the correct thinset.
- Plan and snap the heating cable into the membrane studs, keeping required spacing.
- Install the floor sensor between cable runs.
- Test the cable’s resistance before, during, and after tiling to confirm it is undamaged.
- Embed everything in thinset and set your tile.
- Have a licensed electrician make the final connections to the thermostat and circuit.
This last point is non-negotiable. The heating cable and thermostat operate at line voltage, and connections must be wired to code. Any dedicated-circuit and GFCI work should be handled by a licensed electrician to keep the installation safe. Always follow Schluter’s official installation handbook for cable spacing, thinset selection, and testing, because deviating from the manufacturer’s instructions can void warranties and create hazards.
Running Costs and Energy Efficiency
Understanding what a heated floor costs to run helps set expectations. Because electric radiant heat warms surfaces directly, rooms feel comfortable at lower air temperatures, which can offset some of the electricity use. A programmable thermostat is the key to keeping bills reasonable, since you can schedule the floor to warm only during the hours you actually use the room rather than running it around the clock.
Actual operating cost depends on your local electricity rate, the heated square footage, and how long the system runs each day. For a bathroom floor used mornings and evenings, the cost is typically modest. As a whole-room or whole-home primary heat source, electric radiant becomes expensive, which is why it shines as a comfort upgrade and supplemental heat rather than a furnace replacement.
Maintenance and Longevity
One of the quiet advantages of a properly installed DITRA-HEAT system is that it requires essentially no maintenance once it is buried under tile. There are no moving parts in the floor itself, and the cable is designed to last the life of the tile installation. The thermostat is the component most likely to need attention or eventual replacement, and that is a simple, accessible swap.
The critical longevity factor is correct installation. Testing the cable’s resistance before, during, and after tiling confirms it was never damaged, which is why careful documentation of those readings matters. Get that right, and the system should deliver warm floors reliably for decades.
Is a Ditra Heated Floor Right for You?
If you are already retiling a bathroom, kitchen, or mudroom and want lasting comfort, a ditra heated floor is one of the most satisfying upgrades you can make during the project. Because the membrane is going down anyway for crack protection, adding heating cable is an efficient way to get warmth in the same step.
It makes the most sense as part of a planned tile installation rather than a standalone retrofit, since you have to access the subfloor either way. Pair it with a programmable thermostat, set it to warm the floor before you wake, and you will wonder how you tolerated cold tile for so long.
Prefer to explore on your own?
See how new flooring looks in your actual room in seconds — free, no signup.
Try the free Floor Studio →