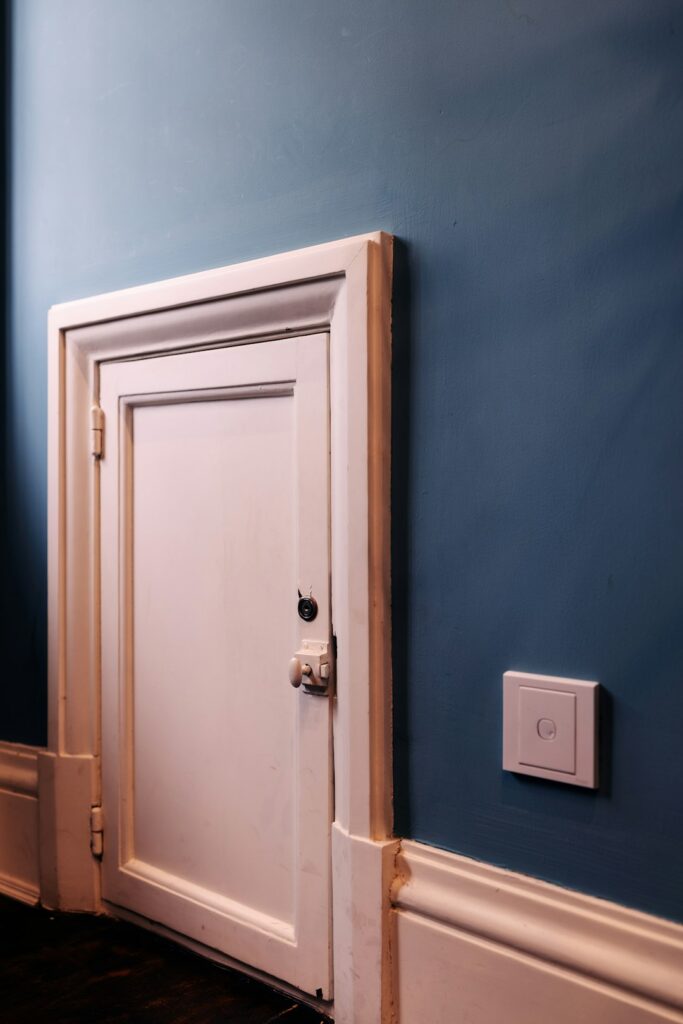
Every flooring project I have worked on in the last 30-plus years eventually comes down to one detail that makes or breaks the finished look: the doorway trim. You can lay a flawless floor across an entire house, but sloppy or mismatched trim around doorways will make the whole job look amateur. Doorway trim is where the floor meets the wall, where one room transitions to another, and where the eye naturally focuses when entering a space.
This guide covers every component of doorway trim, from casing and door stops to thresholds, so you can choose the right materials, measure accurately, install cleanly, and finish with paint or stain that ties the room together.
Types of Doorway Trim
Doorway trim is not a single piece—it is a system of components that work together. Understanding each piece is the first step toward a professional result.
Door Casing
Casing is the visible trim that frames the doorway on both sides and across the top. It covers the gap between the door jamb and the wall surface. Casing comes in widths from 2-1/4 inches to 3-1/2 inches, with 2-1/2 inch being the most common in residential construction. You will need two side pieces (legs) and one header piece for each side of the doorway—six pieces total for a standard interior door.
Door Stop
The door stop is a narrow strip (usually 3/8 to 1/2 inch thick) attached to the inside of the door jamb. It creates a ledge that the door closes against, preventing the door from swinging through the frame. While small, misaligned door stops cause drafts, rattling, and uneven gaps around the closed door.
Threshold
The threshold sits at the bottom of the doorway where the floor meets the door frame. For exterior doors, thresholds create a weather seal. For interior doors, they provide a clean transition between rooms, especially when flooring types or heights change. Thresholds range from simple flat bars to adjustable models with rubber seals.
Transition Strips
When two different flooring materials meet at a doorway—say hardwood transitioning to tile—a transition strip (T-molding, reducer, or overlap strip) covers the seam. These are technically flooring accessories rather than door trim, but they are inseparable from the doorway trim system.
Materials for Doorway Trim
The material you choose affects cost, appearance, and long-term maintenance:
- Solid wood (pine, poplar, oak): The traditional choice. Pine is the most affordable and takes paint well. Poplar is harder and resists denting. Oak is the premium option for stained trim. Expect $0.50 to $3.00 per linear foot depending on species.
- MDF (medium-density fiberboard): Pre-primed MDF casing is the budget king at $0.30 to $0.80 per linear foot. It machines cleanly, paints beautifully, and resists warping. However, MDF swells and disintegrates when exposed to water, so avoid it in bathrooms and exterior applications.
- PVC/Composite: Completely waterproof and rot-proof. PVC trim costs $1.00 to $2.50 per linear foot but never needs repainting and works in any environment. Ideal for bathrooms, laundry rooms, and exterior doorways.
- Finger-jointed pine: Shorter pieces of pine joined end-to-end create a full-length board. It costs less than solid pine, paints just as well, and is strong enough for interior casing. Not suitable for staining as the joints show through.
Popular Styles and Profiles
Door casing profiles range from simple to ornate. Here are the most widely used styles:
- Colonial (ogee): The most common profile in American homes. Features a gentle S-curve along the edge. Works with traditional, transitional, and farmhouse styles.
- Craftsman (flat stock): A flat, square-edged profile with minimal detailing. Clean lines suit modern, Craftsman, and mid-century interiors. Typically 3-1/2 inches wide with a slight backband.
- Ranch (clamshell): A simple, rounded profile common in homes built from the 1960s through 1990s. Inexpensive and widely available, but looks dated in contemporary settings.
- Victorian (fluted): Features vertical grooves and rosette corner blocks. This ornate style suits period homes and formal rooms but requires precise miter work or plinth blocks to look right.
- Modern (minimal): Ultra-thin profiles (1-1/2 to 2 inches wide) with sharp, square edges. Creates a barely-there look that lets the wall and floor take center stage. Increasingly popular in 2026 design trends.
Measuring and Planning
Accurate measuring prevents waste and ensures tight joints. Follow this process:
- Measure the reveal: The reveal is the small setback (usually 3/16 to 1/4 inch) between the edge of the casing and the edge of the door jamb. Mark this reveal line on the jamb with a combination square before cutting anything.
- Measure leg height: Measure from the floor (or top of the flooring) to the reveal mark at the top corner of the jamb. Add 1/8 inch for adjustment. Cut the bottom square and the top at a 45-degree miter for mitered corners, or cut both ends square if using corner blocks.
- Measure header length: Measure between the reveal marks on both sides. For mitered corners, measure the short point (inside edge) and cut 45-degree miters on both ends. For butt joints with corner blocks, measure the exact distance between blocks.
- Account for flooring height: If you are installing trim before flooring, set the casing height to accommodate the finished floor thickness. Use a scrap piece of flooring as a spacer under the leg while nailing.
Buy 10 to 15 percent more material than your measurements indicate. Miters that do not close perfectly, walls that are not plumb, and occasional defective boards will require extra material.
Installation Process
Here is the step-by-step installation process I use on every job:
- Remove old trim: Score the paint line between the old casing and the wall with a utility knife to prevent tearing the drywall paper. Pry carefully with a flat bar, working from one end to the other.
- Mark the reveal: Set your combination square to 3/16 inch and draw a light pencil line on all three jamb faces (both sides and top).
- Cut the header first: Cut the top piece with miters on both ends. Hold it in position aligned with the reveal marks. If it fits, move on. If not, adjust your miter angles.
- Cut and install legs: Measure each leg individually—floors are rarely perfectly level. Cut the miter at the top and a square cut at the bottom. Nail the leg in place with 2-inch (15-gauge or 18-gauge) finish nails, placing nails every 16 inches along both the jamb edge and the wall edge.
- Install the header: Apply a small amount of wood glue to the miter joints. Nail the header in place and pin the miter joints together with a single 1-inch brad from each side.
- Set nails and fill: Use a nail set to sink each nail head below the surface. Fill holes with wood filler for painted trim or color-matched putty for stained trim.
- Caulk the edges: Run a thin bead of paintable caulk where the casing meets the wall. This hides any gaps caused by irregular walls and gives a seamless finished look.
Painting and Staining
The finish you apply to doorway trim matters as much as the trim itself:
For Painted Trim
- Use a high-quality primer on bare wood or MDF. Two coats of semi-gloss or satin latex paint provide the best durability and cleanability.
- Semi-gloss is the industry standard for trim because it resists scuffing and wipes clean easily.
- Paint the trim before installation when possible. Touch up nail holes and caulk lines after installation.
For Stained Trim
- Use only solid wood (oak, maple, cherry) for stained applications. MDF and finger-jointed pine do not accept stain evenly.
- Sand to 150 grit, apply wood conditioner (especially on pine and cherry), then stain and topcoat with polyurethane.
- Match the stain color to your flooring or choose a deliberate contrast. Mismatched stains that look accidental cheapen the entire room.
Cost Guide
Here is what to budget for doorway trim in 2026, including materials and professional labor:
- Materials per doorway (both sides): $15 to $60 depending on material and profile
- Professional installation per doorway: $75 to $150 for labor
- Threshold replacement: $20 to $80 for the piece plus $50 to $100 for installation
- Complete trim package (20 doorways, painted MDF, professional installation): $2,000 to $4,000
- DIY total for 20 doorways (MDF, paint, nails, caulk): $400 to $900
Doing this job yourself saves significant money. The tools required—miter saw, finish nailer, caulk gun—are a worthwhile investment that you will use on future projects.
Frequently Asked Questions
Should door trim match the baseboards?
In most cases, yes. Matching door casing and baseboard profiles create visual continuity throughout the home. The profiles do not have to be identical, but they should be from the same style family. A colonial casing paired with a colonial baseboard looks intentional. A modern casing paired with an ornate baseboard looks like a mistake.
Can I install new casing over existing trim?
Technically you can, but I do not recommend it. Stacking trim creates an awkward, bulky profile and makes future repairs harder. Removing old trim is straightforward and takes about five minutes per doorway with a flat bar and utility knife.
What is the best angle for door casing miters?
Standard miters are 45 degrees, but walls are rarely perfectly square. Test each corner by holding scrap pieces together and adjusting the angle until the joint closes tightly. A digital angle finder is an inexpensive tool that takes the guesswork out of this process.
How do I handle gaps between the casing and the wall?
Paintable latex caulk is your best friend. For gaps up to 1/4 inch, caulk fills and hides them completely. For larger gaps, consider shimming behind the casing or using wider casing that bridges the gap. Never try to fill gaps larger than 1/4 inch with caulk alone—it will crack and look terrible.