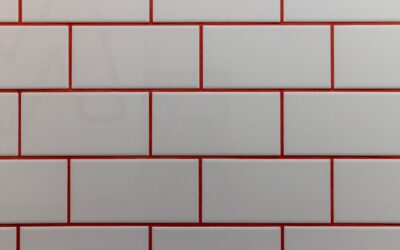
Every so often a product comes along that makes tiling accessible to weekend DIYers, and the double sided adhesive tile mat is exactly that. These peel-and-stick underlayment mats — the category includes brands like MusselBound and Bondera — replace wet thinset mortar with a rolled adhesive membrane. You stick one side to the wall, peel the release film off the other side, and press your tile directly onto the exposed adhesive. No mixing, no mess, no cure time, and you can grout the same day. For the right project, it is genuinely a game-changer.
Part of our Tile & Grout guide — explore the full guide →
But — and this is a big but — an adhesive mat is not a universal replacement for thinset, and using it in the wrong place is a recipe for tile on the floor. In this guide I will explain exactly how these mats work, where they perform beautifully, where you must never use them, the surface prep they demand, and their real weight limits. Used within their lane, these mats are excellent; pushed past it, they fail.
How a Double-Sided Adhesive Mat Works
The product is a thin, flexible membrane coated on both faces with a strong pressure-sensitive adhesive, protected by release liners. You roll it out and press it onto a prepared wall, adhering the first side. Then, section by section as you tile, you peel the top release liner to expose the second adhesive face and press each tile firmly into it. The bond is instant — the tile grabs and holds immediately, with no slump and no waiting for mortar to cure.
That instant grab is the whole appeal. With thinset, you fight tiles sliding down a vertical backsplash and you wait a day before grouting. With an adhesive mat, tiles stay exactly where you place them and you can grout within an hour or two of finishing, because there is no mortar to cure. For a homeowner doing their first backsplash over a weekend, that eliminates the two scariest parts of tiling: mixing mortar and dealing with sag.
The mat also serves as a clean, consistent, uniform-thickness bed, which helps beginners keep tiles in plane. There is no troweling technique to master, no ridges to collapse, no coverage to check. You trade the versatility and strength of mortar for simplicity and speed — a trade that is smart in some situations and dangerous in others.
Where These Mats Work Great
The sweet spot for adhesive tile mats is the kitchen or bathroom backsplash — a vertical, dry-to-low-moisture surface with light tile. This is precisely the application these products are designed and rated for, and they excel at it. A ceramic or glass mosaic backsplash over primed drywall goes up fast, stays put, and looks great, with none of the mess of mortar. For this job, I have no hesitation recommending a quality adhesive mat to a capable homeowner.
They also work on other low-moisture vertical walls with appropriate lightweight tile — an accent wall, the sides of an island, a laundry-room backsplash. The common thread is vertical, dry, and light. As long as the surface stays essentially dry and the tile is within the product’s weight rating, the adhesive holds reliably for years.
The convenience factor is real beyond just speed. Because there is no wet mortar, cleanup is trivial, there is no risk of mortar staining a countertop, and you can tile in a finished kitchen without dust and slop everywhere. For rental updates, quick refreshes, and first-time tilers, that low-mess, low-commitment quality is a genuine advantage.
Where You Must Not Use Them
Now the warnings, because this is where people get hurt. Do not use adhesive tile mats on floors. Floors bear foot traffic, point loads, and shear stress that a pressure-sensitive adhesive cannot handle over time — tiles will eventually loosen and pop. Floors need the structural bond and support of thinset mortar over a proper substrate. No matter how convenient the mat is, it does not belong underfoot.
Do not use them in wet areas — shower walls, shower floors, tub surrounds, steam rooms, or anywhere subject to standing water or constant saturation. These mats are rated for dry to intermittent light moisture, like the occasional splash behind a sink. They are not waterproofing membranes and their adhesive is not designed for continuous wet exposure. A shower needs a proper waterproofing system and thinset, full stop. Manufacturers are explicit about this limit, and ignoring it leads to failure and hidden water damage.
Also skip the mat for heavy tile and natural stone. Large, thick, or dense tiles — big-format porcelain, thick natural stone like marble or travertine — exceed what the adhesive can hold on a wall, and stone can also stain or react to the adhesive. When the tile is heavy or the setting is wet or horizontal, you use thinset. The mat is for light tile on dry vertical walls, and respecting that boundary is the entire safety of the product.
Surface Prep Is Everything
Because the mat relies entirely on adhesion, the surface it sticks to determines whether the installation lasts. The wall must be clean, smooth, dry, and sound. Dust, grease, and residue kill adhesion, so a thorough cleaning and degreasing is step one — especially in a kitchen, where cooking grease films everything. Any grease left on the wall becomes a release layer that lets the mat peel away later.
The surface also needs to be smooth and flat. Adhesive mats do not bridge gaps or fill irregularities the way mortar does; they conform to whatever is behind them, so bumps, ridges, and texture reduce contact area and weaken the bond. On textured or previously painted walls, you generally need to smooth and prime. Bare or repaired drywall should be primed and sealed so the paper face does not fail and so the adhesive has a proper surface to grab.
Manufacturers typically specify priming new drywall and painting or sealing the surface before applying the mat, precisely because the adhesive needs a stable, sealed, smooth substrate. I treat prep as the make-or-break step: a mat on a clean, smooth, primed wall holds for the long haul, while a mat slapped onto a dusty, glossy, or bumpy wall is living on borrowed time. Follow the product’s prep instructions to the letter.
Weight Limits and Tile Selection
Every adhesive tile mat has a weight rating, and it is the number that keeps your tile on the wall. These products are engineered to hold tile up to a specified weight per square foot, and that limit governs both how thick and how large a tile you can use. Lightweight ceramic and glass mosaics, thin subway tile, and standard light wall tile fall comfortably within range; heavy stone and thick large-format porcelain do not.
Before you buy, check the mat’s stated maximum weight per square foot and compare it against your tile. If your tile plus grout approaches or exceeds that rating, the mat is the wrong choice and you should use thinset instead. This is not a place to gamble — an overweight tile assembly on adhesive is a slow-motion failure waiting to happen, and it may not let go until months later.
Tile size interacts with weight. Small mosaics and modest field tiles are ideal because each piece is light and the many joints distribute stress. Big, heavy tiles concentrate load and lever against the adhesive. When I spec an adhesive mat, I keep the tile light and modestly sized, and the moment a client wants heavy stone or oversized format, we switch to mortar. Matching the tile to the mat’s rating is the single most important selection decision.
You Still Have to Grout
One point that surprises some first-timers: an adhesive mat replaces the thinset, but it does not replace grout. After your tile is pressed onto the mat and firmly set, you still grout the joints exactly as you would with a mortared installation. The grout fills the gaps between tiles, locks the field together, keeps moisture and debris out of the joints, and gives the finished surface its clean, complete appearance.
Because there is no mortar to cure, you can usually grout much sooner than with a traditional install — often within a short window after setting the last tile, per the manufacturer’s guidance. Use a standard grout appropriate for your joint width, work it fully into the joints, and clean the haze as you would on any tile job. In a backsplash, a quality grout plus a bead of matching silicone caulk where the tile meets the countertop finishes the job cleanly.
After grouting, the installation looks and functions like any tiled backsplash — you generally cannot tell an adhesive-mat job from a thinset job by looking at it. The mat is simply hidden behind the tile doing its work. Used where it belongs — light tile, dry vertical walls, clean and primed surfaces, within its weight rating — the double sided adhesive tile mat delivers a fast, clean, durable result that makes tiling genuinely approachable. Just remember its limits, and never let convenience talk you into using it on a floor or in a shower.
Prefer to explore on your own?
See how new flooring looks in your actual room in seconds — free, no signup.
Try the free Floor Studio →