Garage floors take more abuse than any surface in the house — hot tires, road salt, dropped wrenches, oil drips — and bare concrete loses that fight a little more every year. A quality epoxy floor coating kit turns that dusty gray slab into a sealed, chemical-resistant surface you can squeegee clean, for a weekend of labor and a few hundred dollars. But the category spans everything from $60 boxes of glorified paint to contractor-grade two-part systems, and the internet is full of peeling one-car-garage horror stories. Nearly all of those failures trace to one step: preparation. Here is how the kits differ, what they honestly cost, and how to get the showroom result instead of the peeling one.
Part of our Epoxy, Concrete & Garage Floors guide — explore the full guide →
What Is Actually in the Box
True epoxy is a two-part thermoset: a resin (Part A) and a hardener (Part B) that you mix immediately before application, triggering a chemical cure into a hard, bonded plastic layer. A typical consumer kit for a one-car garage (about 250 sq ft) includes the two cans, decorative color flakes, an etching acid or cleaner packet, and instructions; some add a nonslip additive or a clear topcoat. Beware the vocabulary trap on the shelf: “epoxy paint” or “1-part epoxy” is latex paint fortified with a little epoxy ester — it applies like paint and wears like paint. If the box does not require mixing two components, it is not the product this article is about, and it will not survive hot tires.

Kit Tiers and Honest Pricing
- Water-based two-part kits ($50 to $120 per car bay): Rust-Oleum EpoxyShield and Quikrete Garage Floor Epoxy are the standards. Thin film build (3-5 mils), forgiving application, low odor. Realistic lifespan: 2 to 5 years in a working garage before touch-ups, longer in basements.
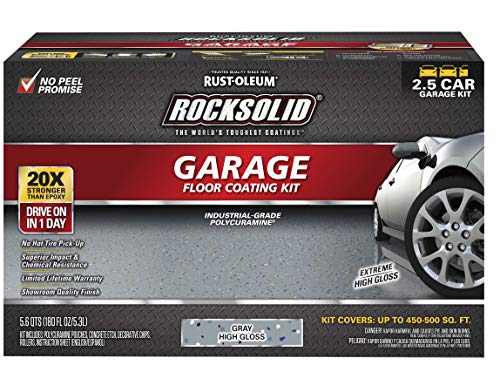
- High-solids kits ($150 to $300 per bay): Rust-Oleum RockSolid (technically a polycuramine) and similar deliver thicker builds, glossier finishes, and stronger hot-tire resistance, with shorter working times.
- 100 percent solids professional-grade kits ($300 to $600 per bay): brands like ArmorPoxy, Epoxy-Coat, and Garage Coatings products build 10-plus mils per coat, cure rock-hard, and are what contractors use. Trade-off: 30-to-40-minute pot life, unforgiving of slow rollers, and strong technique requirements.
For reference, hiring a pro for a full-prep, flake-broadcast, polyaspartic-topcoat system runs $4 to $9 per square foot — $1,500 to $3,500 for a two-car garage. A serious DIY 100-percent-solids job with rented grinder lands around $600 to $900 for the same space, which is the honest comparison point.
Prep Is 80 Percent of the Job — Literally
Epoxy does not stick to smooth, sealed, damp, or oily concrete. Every peeling failure starts here, so treat prep as the project:
- Moisture test first. Tape a 2×2-foot plastic sheet to the slab for 24-48 hours. Condensation or darkened concrete underneath means moisture is migrating up, and epoxy will blister off; fix drainage or choose a breathable coating instead.
- Degrease every spot. Oil stains get degreaser, a stiff brush, and repeat treatments until water no longer beads on them.
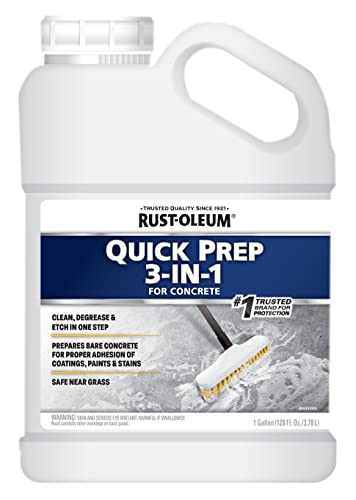
- Profile the surface. The acid-etch packet included with cheap kits is the minimum. Mechanical grinding with a rented diamond cup grinder ($60 to $100 a day) is dramatically better, leaving the 60-grit-sandpaper texture epoxy needs. Pros grind; the failure rate difference is not subtle.
- Repair cracks and spalls with an epoxy patch compound and let it cure fully.
- Vacuum obsessively. Dust is a bond-breaker. Shop-vac, then microfiber tack.
A properly ground, clean, dry slab will hold even a budget kit for years. A smooth-troweled slab given a lazy rinse-etch will shed a premium kit in months.
Application Day: How It Actually Goes
Pick a stretch with slab temperatures between roughly 55°F and 85°F and moderate humidity, and read the pot life on your specific product — mixed epoxy is on the clock. The rhythm: cut in edges with a brush, then roll the field with a 3/8-inch-nap shed-resistant roller in 4×4-foot sections, keeping a wet edge. If your kit includes flakes, broadcast them into the wet epoxy as you complete each section — tossing upward and letting them rain down gives even coverage; the full-flake look uses far more flake than budget kits include ($30 to $60 extra buys enough for full broadcast). Mix only what you can roll within the pot life, and with 100-percent-solids products, pour the mixed batch out onto the floor in a ribbon immediately — left in the bucket, the exotherm accelerates and can cook the batch in minutes.
Recoat and topcoat windows matter: most systems want the second coat or clear coat within a set window (often 12 to 24 hours) for chemical bonding. Respect the cure schedule — typically foot traffic in 24 hours, vehicles in 3 to 7 days. Parking on day two is a classic self-inflicted failure.
Epoxy’s Real Strengths and Real Weaknesses
Cured epoxy resists oil, gas, brake fluid, and road salt; wipes clean effortlessly; brightens a garage measurably (gloss white-flake floors bounce real light); and hardens the slab surface against abrasion. Weaknesses are just as real. UV exposure ambers and chalks standard epoxy, so sun-drenched slabs need a UV-stable polyaspartic or urethane topcoat. Gloss coatings are slippery when wet unless you add anti-slip grit to the final coat — do it, especially near the door. Hot-tire pickup can defeat thin water-based films in southern climates. And epoxy is repairable but not invisible-repairable; patches show, which argues for keeping leftover mixed-ratio materials labeled on a shelf.
Caring for the Cured Floor
A finished epoxy floor asks very little, but the little matters. Sweep grit before it gets ground in — abrasion, not chemistry, is what eventually dulls the gloss — and wash seasonally with a squeegee, warm water, and a few ounces of ammonia-free cleaner. Wipe fuel and brake-fluid spills within a day; cured epoxy resists them, but nothing improves with a month-long soak. Park hot vehicles on parking pads or mats for the first month while the coating reaches full hardness, and lay plywood down before dragging engine hoists or jack stands across the surface. Plan on a maintenance clear coat around year eight to ten on heavily used floors; recoating a sound, scuffed surface costs a fraction of starting over.
Kit, Upgrade, or Hire It Out?
A fair decision tree: choose a $60 to $120 water-based epoxy floor coating kit for basements, laundry rooms, and lightly used garages where budget rules and a 3-to-5-year refresh is acceptable. Step up to a 100-percent-solids kit plus a rented grinder — call it $700 and two hard days — for a working two-car garage you want to look good for 10 to 15 years. Hire a professional polyaspartic system when you want one-day installation, maximum durability, and a warranty someone else stands behind. In all three lanes, the same rule decides the outcome: the coating is only ever as good as the concrete you glued it to. Grind, clean, test for moisture, and even a modest kit will make your neighbors ask who did your floor.