Epoxy flooring paint transforms dull, stained concrete into a glossy, durable surface that resists chemicals, abrasion, and moisture. Whether you want to upgrade your garage, protect a basement floor, or create a professional finish in a workshop or commercial space, epoxy flooring paint delivers a combination of toughness and aesthetics that standard floor paint simply cannot match.
- What Is Epoxy Flooring Paint?
- Types of Epoxy Flooring Paint
- Where to Use Epoxy Flooring Paint
- Garage Floors
- Basements
- Workshops and Utility Rooms
- Commercial and Industrial Spaces
- Patios and Outdoor Areas
- How to Apply Epoxy Flooring Paint: Step-by-Step
- Tools and Materials
- Step 1: Clear and Clean the Floor
- Step 2: Repair Cracks and Damage
- Step 3: Etch the Concrete
- Step 4: Test for Moisture
- Step 5: Mix the Epoxy
- Step 6: Apply the First Coat
- Step 7: Allow the First Coat to Cure
- Step 8: Apply the Second Coat
- Step 9: Cure Before Use
- Cost of Epoxy Flooring Paint
- Epoxy Flooring Paint vs. Other Concrete Coatings
- Maintenance Tips for Epoxy Floors
- Frequently Asked Questions
- How long does epoxy flooring paint last?
- Can I apply epoxy over painted concrete?
- Does epoxy flooring paint yellow over time?
- Can I apply epoxy flooring paint myself?
- Final Thoughts
This guide explains how epoxy flooring paint works, compares the different types available, walks you through the application process, and helps you decide whether it is the right choice for your project.
What Is Epoxy Flooring Paint?
Epoxy flooring paint is a two-component coating system consisting of an epoxy resin and a hardener. When mixed, these components undergo a chemical reaction (crosslinking) that creates a rigid, plastic-like film far harder and more durable than conventional paint. The result is a surface that bonds permanently to concrete and resists impacts, chemicals, tire marks, and moisture.
It is important to distinguish epoxy flooring paint from standard floor paint. Regular latex or acrylic floor paints sit on the surface and wear away relatively quickly. True epoxy coatings chemically bond to the concrete and cure into a thick, protective shell that lasts years longer. For more on professional epoxy systems, see our epoxy flooring guide.
Types of Epoxy Flooring Paint
Water-Based Epoxy Paint
Water-based epoxy is the most beginner-friendly option. It cleans up with water, has lower VOC emissions, and is available in one-part formulas that do not require mixing separate components.
Pros:
- Easy to apply—suitable for DIY projects
- Low odor and low VOC
- Soap-and-water cleanup
- Available at most home improvement stores
Cons:
- Thinner film than solvent-based or 100% solids epoxy
- Less chemical and abrasion resistance
- Shorter lifespan (2 to 4 years in a garage)
- One-part formulas are technically epoxy-fortified latex paint, not true epoxy
Best for: Light-duty garage floors, basements, and laundry rooms where ease of application is a priority.
Solvent-Based Epoxy Paint
Solvent-based epoxy uses chemical solvents as the carrier instead of water. This produces a harder, more durable coating that penetrates deeper into the concrete.
Pros:
- Stronger adhesion and deeper penetration
- Better chemical and abrasion resistance than water-based
- Longer lifespan (3 to 5 years in a garage)
- Good for moderately demanding environments
Cons:
- Higher VOC emissions—requires good ventilation
- Strong odor during application and curing
- Requires solvent-based cleaners for tools
- Longer drying times between coats
Best for: Garages with frequent vehicle traffic, workshops, and utility areas.
100% Solids Epoxy
This is the professional-grade option. 100% solids epoxy contains no water or solvents—the entire volume cures into solid epoxy. A single coat can be 10 to 20 times thicker than water-based epoxy paint.
Pros:
- Maximum thickness and durability in a single coat
- Superior chemical, impact, and abrasion resistance
- Longest lifespan (10 to 20+ years)
- Industrial-grade performance
Cons:
- Short pot life (30 to 45 minutes once mixed)—must work quickly
- Requires precise mixing ratios
- Professional installation recommended
- Highest material cost
Best for: Commercial floors, industrial facilities, showrooms, and homeowners who want the longest-lasting solution.
Where to Use Epoxy Flooring Paint
Garage Floors
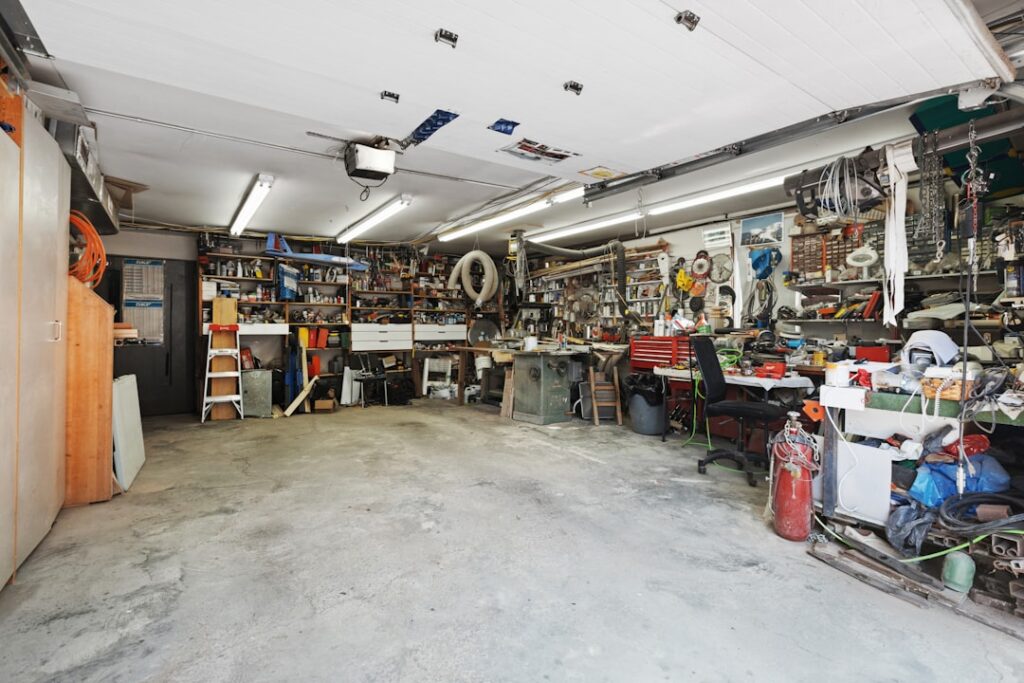
The garage is the most popular residential application for epoxy flooring paint. It transforms stained, cracked concrete into an attractive, easy-to-clean surface that resists hot tire pickup, oil stains, and road salt. Decorative flake chips can be broadcast into the wet epoxy for added texture and slip resistance.
Basements
Epoxy paint seals basement concrete against moisture vapor and creates a finished look. However, basements with active water intrusion need waterproofing before epoxy application—epoxy can blister and delaminate if hydrostatic pressure pushes moisture through the slab. For basements with moisture issues, waterproof flooring options like vinyl or SPC may be more practical.
Workshops and Utility Rooms
Epoxy stands up to dropped tools, chemical spills, and heavy equipment. Its smooth surface makes sweeping up sawdust, metal shavings, and debris quick and easy.
Commercial and Industrial Spaces
Warehouses, auto shops, restaurants, retail stores, and manufacturing facilities use 100% solids epoxy for its extreme durability. The glossy finish also improves lighting efficiency by reflecting overhead lights.
Patios and Outdoor Areas
Standard epoxy is not recommended for outdoor use because UV light causes yellowing and chalking. If you want an epoxy look outdoors, use a UV-stable polyaspartic or polyurea topcoat over the epoxy base, or choose a dedicated exterior concrete coating.
How to Apply Epoxy Flooring Paint: Step-by-Step
Tools and Materials
- Epoxy floor coating kit (resin + hardener)
- Concrete degreaser or cleaner
- Concrete etching solution (muriatic acid or citric acid-based)
- Stiff-bristle push broom
- Roller frame with 3/8-inch nap roller covers
- 3-inch paint brush for cutting in edges
- 5-gallon mixing bucket and drill with mixing paddle
- Decorative flakes (optional)
- Painter’s tape
- Spiked shoes (for walking on wet epoxy)
Step 1: Clear and Clean the Floor
Remove everything from the floor. Sweep thoroughly, then degrease the entire surface with a commercial concrete cleaner. Scrub stubborn oil stains with a degreaser and a stiff brush. Rinse completely and allow to dry.
Step 2: Repair Cracks and Damage
Fill cracks with an epoxy-compatible concrete patching compound. Grind down any high spots or ridges. The surface must be relatively smooth and free of major defects for the epoxy to adhere uniformly.
Step 3: Etch the Concrete
Concrete must be porous enough for the epoxy to bond. Apply an etching solution according to the manufacturer’s instructions—this opens the pores of the concrete surface. The floor should feel like medium-grit sandpaper after etching. Rinse thoroughly (multiple times) and allow to dry completely (24 to 48 hours).
Step 4: Test for Moisture
Tape a 2×2-foot piece of plastic sheeting to the floor with duct tape. Wait 24 hours. If moisture droplets appear under the plastic or the concrete beneath is darker, you have a moisture issue that must be addressed before applying epoxy.
Step 5: Mix the Epoxy
Combine the resin and hardener according to the exact ratio specified on the product. Mix thoroughly for at least 3 minutes using a drill with a mixing paddle. Most two-part epoxies have a pot life of 1 to 2 hours for water-based and 30 to 45 minutes for 100% solids—work efficiently once mixed.
Step 6: Apply the First Coat
Cut in around edges, pipes, and corners with a brush. Then roll the epoxy onto the floor in thin, even coats using a 3/8-inch nap roller. Work in manageable sections and maintain a wet edge to avoid lap marks. If using decorative flakes, broadcast them into the wet epoxy by tossing handfuls into the air and letting them fall randomly.
Step 7: Allow the First Coat to Cure
Follow the manufacturer’s recoat window—typically 12 to 24 hours for water-based and 16 to 24 hours for solvent-based epoxy. The surface should be dry to the touch but still within the recoat window for proper intercoat adhesion.
Step 8: Apply the Second Coat
Apply a second coat using the same technique. This doubles the film thickness and fills in any thin spots from the first coat. For maximum durability, consider a clear polyurethane or polyaspartic topcoat as a third layer.
Step 9: Cure Before Use
Allow the final coat to cure for at least 24 hours before light foot traffic, 72 hours before moving furniture or equipment, and 7 days before driving vehicles on the surface. Full chemical resistance develops after 7 to 14 days.
Cost of Epoxy Flooring Paint
- Water-based DIY kits: $0.50 to $2.00 per square foot for materials
- Solvent-based DIY kits: $1.00 to $3.00 per square foot for materials
- 100% solids (professional): $3.00 to $7.00 per square foot for materials
- Professional installation (including prep): $5.00 to $12.00 per square foot total
For a standard two-car garage (400 to 500 square feet), a DIY water-based epoxy project typically costs $200 to $600, while professional installation with 100% solids epoxy runs $2,500 to $6,000.
Epoxy Flooring Paint vs. Other Concrete Coatings
Epoxy vs. Polyurea/Polyaspartic
Polyurea and polyaspartic coatings cure faster (as little as 4 to 6 hours for full traffic), offer better UV stability, and maintain flexibility that resists peeling. They cost more than epoxy but are often used as topcoats over epoxy bases for the best of both worlds.
Epoxy vs. Latex Floor Paint
Latex floor paint is a single-component paint that sits on the surface. It costs less and applies easily but offers minimal protection against chemicals, abrasion, or hot tires. Epoxy is superior in every performance metric.
Epoxy vs. Concrete Stain
Concrete stain penetrates the surface and changes its color without adding a protective layer. It creates beautiful, translucent effects but offers no chemical or abrasion resistance. Epoxy provides both color and protection. For more on concrete finishes, see our concrete flooring guide.
Maintenance Tips for Epoxy Floors
- Regular sweeping: Sweep or dust-mop weekly to remove grit that can scratch the surface over time.
- Mopping: Mop with a mild detergent and warm water as needed. Avoid harsh chemicals that can dull the gloss.
- Spot cleaning: Wipe up oil, chemical spills, and hot tire marks promptly to prevent staining.
- Protect from UV: Keep garage doors closed when possible, or apply a UV-resistant topcoat to prevent yellowing.
- Avoid sharp impacts: While epoxy is impact-resistant, dropping heavy metal tools from height can chip the coating.
Frequently Asked Questions
How long does epoxy flooring paint last?
Water-based epoxy lasts 2 to 4 years in a garage. Solvent-based lasts 3 to 5 years. Professional 100% solids epoxy lasts 10 to 20 years or more with proper maintenance.
Can I apply epoxy over painted concrete?
It is not recommended. Existing paint creates a bond-breaking layer. Strip or grind off old paint before applying epoxy for proper adhesion.
Does epoxy flooring paint yellow over time?
Yes, standard epoxy yellows when exposed to UV light. This is cosmetic and does not affect performance. To prevent yellowing, apply a UV-stable polyaspartic or polyurethane topcoat.
Can I apply epoxy flooring paint myself?
Water-based and many solvent-based epoxies are DIY-friendly. The key is thorough surface preparation—80 percent of epoxy failures are caused by inadequate prep. 100% solids epoxy is best left to professionals due to its fast pot life and precise application requirements.
Final Thoughts
Epoxy flooring paint is one of the most effective ways to protect and beautify concrete surfaces. For DIY homeowners, a quality water-based or solvent-based epoxy kit can transform a garage or basement in a weekend. For maximum durability and a showroom finish, professional installation with 100% solids epoxy is worth the investment. Whichever route you choose, proper concrete preparation is the non-negotiable foundation of a successful epoxy floor.
For more concrete coating options, visit our epoxy flooring and concrete flooring guides. If you are exploring alternatives for living spaces, check out vinyl flooring and laminate flooring.
Prefer to explore on your own?
See how new flooring looks in your actual room in seconds — free, no signup.
Try the free Floor Studio →