Looking for epoxy garage floor ideas that go beyond basic gray? You’re in the right place. After installing hundreds of garage floor coatings over 30 years, we’ve seen every design trend come and go — and we know which ones deliver lasting results versus which ones just look good in photos.
Today’s epoxy technology lets you transform a dull concrete slab into everything from a mirror-like metallic showroom to a rugged, industrial-grade workspace. The key is matching the right design to your budget, usage, and maintenance tolerance. Here’s a deep dive into the most popular options.
If you’re running out of room even with a clean garage floor, a backyard shed takes the overflow — seasonal gear, tools, lawn equipment. And if you’re parking outside while the garage doubles as a workshop, a carport keeps your car covered without needing a second garage.
We may earn a commission when you purchase through our links.
Metallic Epoxy Floors
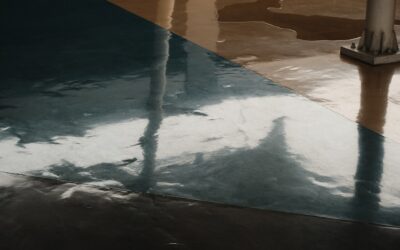
Metallic epoxy is the showstopper of epoxy garage floor ideas. It uses metallic pigments suspended in a clear or tinted epoxy base to create swirling, three-dimensional effects that mimic marble, lava flow, or liquid metal. Every metallic floor is unique because the pigments shift and settle differently during application.
How it works: A metallic pigment powder (typically mica-based) is mixed into a clear 100% solids epoxy. The installer spreads the epoxy, then manipulates the metallic pigments using rollers, brushes, or even leaf blowers to create movement and depth. The pigments continue settling and swirling as the epoxy self-levels, creating one-of-a-kind patterns.
Popular color combinations:
- Silver and charcoal — sleek, modern automotive look
- Copper and black — rich, warm industrial feel
- Pearl white and gold — upscale showroom finish
- Blue and silver — ocean-inspired depth
- Gunmetal and bronze — classic man-cave aesthetic
Cost: $8 to $15 per square foot installed. A two-car garage runs $4,000 to $7,500. DIY metallic kits exist ($400-$800 for a two-car garage) but achieving professional-quality results requires significant practice and skill.
Best for: Car enthusiasts, showroom garages, spaces that double as entertainment areas. Not ideal for heavy workshop use since scratches show more on reflective surfaces.
Flake and Chip Systems
Vinyl flake epoxy (also called chip or broadcast systems) is the most popular choice among homeowners — and for good reason. It’s attractive, hides imperfections, provides texture for slip resistance, and falls in a comfortable mid-range price point.
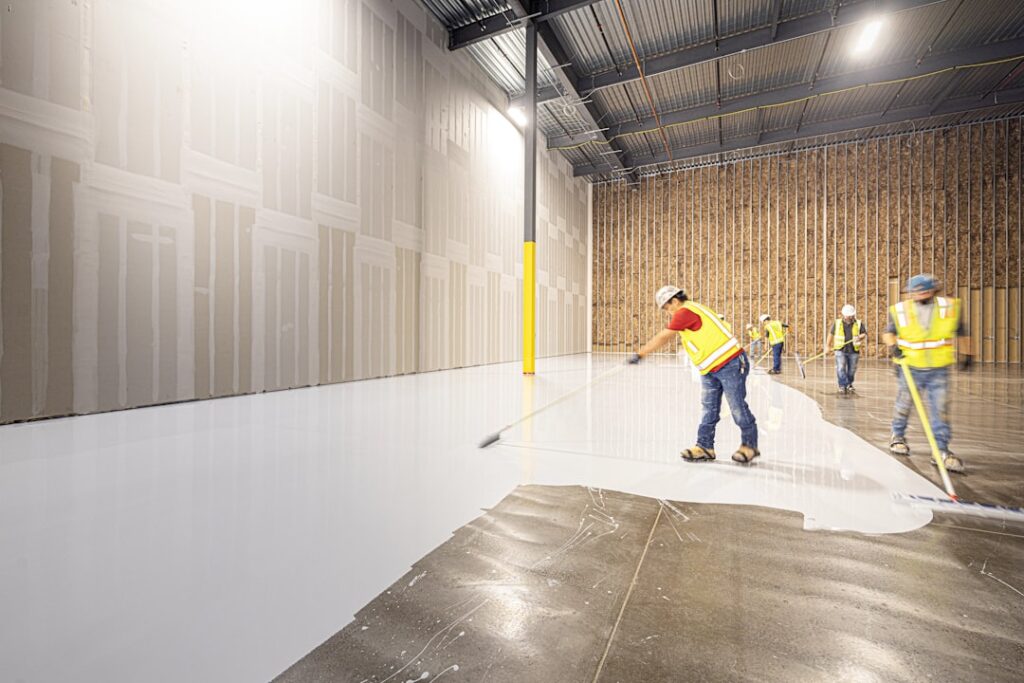
The process involves applying a base coat of colored epoxy, then broadcasting vinyl flakes onto the wet surface. After curing, excess flakes are scraped and vacuumed, then the entire floor gets sealed with a clear topcoat.
Flake size options:
- Small flakes (1/16″): Create a uniform, granite-like appearance
- Medium flakes (1/4″): The most popular size, visible texture with good coverage
- Large flakes (1/2″ to 1″): Bold, dramatic look with distinct pattern
- Blended sizes: Combines multiple sizes for a natural, terrazzo-style finish
Popular color blends:
- Saddle tan — warm brown and cream tones, hides dirt well
- Granite — gray, black, and white flakes mimicking natural stone
- Domino — black and white for a clean, modern look
- Autumn blend — brown, rust, and gold tones
- Full broadcast (100% coverage) vs partial broadcast (50-75% coverage) changes the look dramatically
Cost: $5 to $10 per square foot installed. DIY kits with flakes run $200-$500 for a two-car garage.
Best for: Active garages, workshops, and any space where you need a forgiving surface that hides tire marks and small stains.
Solid Color Epoxy
Solid color epoxy is the clean, minimalist option. A single uniform color across the entire floor creates a sleek, professional appearance at the lowest cost. It’s the workhorse of commercial and industrial settings, but it works beautifully in residential garages too.
Popular color choices:
- Battleship gray: The classic — clean, professional, hides moderate dirt
- Tan/beige: Warm tone that complements wood and brick
- White: Brightens dark garages dramatically, but shows every mark
- Black: Dramatic and sleek, pairs well with bright-colored walls
- Safety blue, red, or green: Zone marking for workshops or commercial use
The downside of solid color epoxy is that it shows every imperfection, tire mark, and scratch. Lighter colors show dirt; darker colors show dust. That said, a quality topcoat and regular cleaning keep a solid color floor looking sharp for years.
Cost: $3 to $7 per square foot installed. The most affordable of all epoxy garage floor ideas, making it ideal for budget-conscious homeowners who still want a durable, professional finish.
Best for: Clean, organized garages. Homeowners who want maximum protection at minimum cost. Commercial and industrial spaces where appearance is secondary to function.
Quartz Aggregate Systems
Quartz epoxy systems embed colored quartz sand into the epoxy for a textured, slip-resistant, and extremely durable finish. These are the heavy-duty workhorses of the epoxy world, commonly found in commercial kitchens, veterinary clinics, and locker rooms — but they work beautifully in residential garages and basements too.
Application involves spreading an epoxy base coat, broadcasting quartz granules to full rejection (meaning the surface is completely covered), scraping off excess after curing, and sealing with one or two clear topcoats. The result is a surface with excellent grip even when wet.
Color options: Quartz comes in dozens of natural and dyed colors. You can create single-color floors or blend multiple quartz colors for a custom look. Popular blends include earth tones, coastal blues, and neutral grays.
Cost: $7 to $14 per square foot installed. The quartz aggregate itself is inexpensive, but the labor-intensive application process and heavy topcoat requirements push costs higher.
Best for: Garages that double as workshops with wet conditions, homes in rainy or snowy climates where tracked-in moisture creates slip hazards, and homeowners who prioritize function and durability over flashy aesthetics.
Custom Designs and Patterns
Epoxy’s versatility opens the door to creative designs that go far beyond standard finishes.
Two-tone layouts: Use painter’s tape or stencils to create distinct zones — a darker color for the parking area and a lighter color for the walkway, for example. This adds visual interest and functional zone marking for around $1-$2 per square foot more than a single color.
Geometric patterns: Diamond, checkerboard, and herringbone patterns are achievable with careful taping and multiple colors. A checkerboard garage floor using two contrasting epoxy colors costs $8-$12 per square foot installed due to the extra labor involved.
Logo and graphic inlays: Car enthusiasts often embed manufacturer logos, racing stripes, or custom graphics into their garage floors. Professional installers use stencils, vinyl decals under clear epoxy, or hand-painted designs. Expect to pay $500-$2,000+ for custom graphic work depending on complexity.
Borders and accents: A contrasting border around the perimeter or parking bays adds a finished look. This is one of the simplest custom touches, typically adding $200-$500 to a standard installation.
Terrazzo-style: Combining multiple flake sizes and colors with a polished clear topcoat creates a finish resembling real terrazzo at a fraction of the cost. This high-end look runs $10-$16 per square foot installed.
Cost Comparison by Style
Here’s how each epoxy garage floor ideas category stacks up on cost for a standard two-car garage (500 sq ft).
- Solid color epoxy: $1,500-$3,500 installed / $300-$600 DIY
- Vinyl flake system: $2,500-$5,000 installed / $400-$800 DIY
- Quartz aggregate: $3,500-$7,000 installed / Not recommended DIY
- Metallic epoxy: $4,000-$7,500 installed / $500-$1,000 DIY
- Custom patterns/logos: $4,500-$10,000+ installed / Not recommended DIY
Remember that these prices include proper surface preparation, which accounts for 30-50% of the total cost. Skimping on prep to save money is the number one cause of epoxy failure regardless of the design you choose.
Best DIY Kits for Each Style
If you’re tackling the project yourself, choosing the right kit is critical. Here are proven options by design category.
Best solid color kits:
- Rust-Oleum EpoxyShield ($80-$120/one-car garage) — entry-level, water-based
- Rust-Oleum RockSolid ($200-$300/one-car garage) — polycuramine, more durable
Best flake kits:
- Rust-Oleum EpoxyShield with Chips ($100-$150/one-car garage) — basic flake system
- ArmorPoxy ArmorGarage ($300-$500/one-car garage) — commercial-grade flake
Best metallic kits:
- Leggari Products Metallic Kit ($500-$700/two-car garage) — popular DIY metallic
- Epoxy-Coat Metallic System ($600-$900/two-car garage) — higher quality pigments
Regardless of the kit you choose, invest in a concrete grinder rental ($150-$300/day). Mechanical surface preparation is dramatically more effective than acid etching for long-term adhesion.
Essential Prep Work for Any Design
Every single one of these epoxy garage floor ideas shares the same foundation: proper concrete preparation. Skip this, and even the most expensive coating will fail.
Step 1 — Clean the floor: Remove all oil, grease, and contaminants. Use a commercial degreaser on stained areas. Power wash the entire surface and let it dry completely (24-48 hours).
Step 2 — Test for moisture: Tape a 2×2-foot piece of plastic sheeting to the floor and wait 24 hours. If condensation appears underneath, you have a moisture issue that needs addressing before coating.
Step 3 — Profile the concrete: The surface needs a texture similar to 60-grit sandpaper for epoxy to bond properly. Diamond grinding is the gold standard — it creates a consistent profile and removes thin coatings or sealers. Acid etching is an alternative for floors in good condition with no existing coatings.
Step 4 — Repair damage: Fill cracks with an epoxy crack filler, patch spalled areas with a cementitious or epoxy patching compound, and grind down any high spots. Let all repairs cure fully before coating.
Step 5 — Vacuum and tack: Remove all dust and debris. A shop vacuum followed by a tack cloth ensures the cleanest possible surface for coating adhesion.
Durability Ranking by Design Type
Not all finishes hold up equally under garage conditions. Here’s how the major design types rank for durability, from most to least resilient.
1. Quartz aggregate (most durable): The embedded quartz granules create an incredibly tough surface that resists abrasion, impact, and chemicals. The textured surface also hides wear patterns. Lifespan: 15-25 years with proper topcoat maintenance.
2. Full-broadcast flake: A full flake broadcast with a quality urethane or polyaspartic topcoat is extremely durable. The flake layer adds thickness and the texture masks wear. Lifespan: 10-20 years.
3. Solid color with topcoat: A 100% solids epoxy base with a polyaspartic or urethane topcoat holds up well, though scratches and wear patterns are more visible than on textured finishes. Lifespan: 10-15 years.
4. Metallic epoxy (least durable of premium options): The clear topcoat over metallic pigments is the wear surface, and it shows scratches and scuffs more than textured systems. The aesthetic impact of wear is greater because any damage disrupts the reflective finish. Lifespan: 8-15 years, but may need topcoat refreshing sooner for appearance.
Regardless of the design you choose, a high-quality topcoat is what truly determines longevity. Polyaspartic and aliphatic urethane topcoats outperform standard epoxy topcoats in UV resistance, scratch resistance, and chemical resistance.
Frequently Asked Questions
What is the most popular epoxy garage floor color?
Gray-based flake systems dominate residential garage floors. A medium gray base with a multi-colored flake blend (gray, white, and black) accounts for roughly 40% of residential installations we see. It’s popular because it hides dirt, complements any wall color, and has broad resale appeal.
Can I combine different epoxy styles in one garage?
Absolutely. A common approach is a metallic or solid-color main floor with a contrasting flake border, or distinct zones for parking versus workshop areas. The key is using compatible products from the same manufacturer and planning the application sequence carefully so wet edges don’t create visible seams.
How long does an epoxy garage floor take to install?
Professional installation typically takes 2-3 days: day one for prep and priming, day two for the epoxy body coat and flake/aggregate broadcast, and day three for scraping and topcoat application. Add 3-7 days of cure time before parking vehicles. DIY projects often stretch to 4-5 days due to longer prep time and single-person application.
Will hot tires peel epoxy off my garage floor?
Hot tire pickup is a real concern with inferior products. Water-based and some solvent-based epoxies can soften under hot tires and peel when the car is moved. To prevent this, use a 100% solids epoxy with a polyaspartic or polyurethane topcoat. These topcoats resist the heat transfer from tires and won’t bond to rubber.
Is metallic epoxy slippery when wet?
Yes, metallic epoxy without an anti-slip additive is very slippery when wet — it’s essentially a smooth, polished surface. Always request an anti-slip aggregate mixed into the topcoat. Fine aluminum oxide or polymer grit added to the clear coat provides traction without significantly altering the metallic appearance.
Prefer to explore on your own?
See how new flooring looks in your actual room in seconds — free, no signup.
Try the free Floor Studio →