Repainting an in-ground pool is one of those projects that looks simple in a how-to video and turns into a very long weekend if you underestimate the prep work or buy the wrong amount of paint. An epoxy pool paint 5 gallon kit is the standard unit most manufacturers sell in, and getting the coverage math right before you start is the difference between finishing in one focused weekend and making a frustrating second trip to the pool supply store mid-project with wet paint drying unevenly while you wait.
This guide covers how far a 5-gallon kit actually goes, what real coverage looks like once you account for two coats and surface texture, full surface prep including acid etching, how many coats you need and why, cure and fill times, ventilation safety, and total cost so you can plan the whole project with confidence before you crack open the first can.
Why Epoxy Is the Right Choice for Pool Surfaces
Pool paint comes in three main chemistries: chlorinated rubber, acrylic, and epoxy, and each has a different lifespan and different compatibility rules. Chlorinated rubber is the cheapest and easiest to apply but only lasts two to three years and cannot be painted over with epoxy without full removal. Acrylic is water-based, dries fast, and works on above-ground or lightly used pools, but it is the least durable of the three, typically needing a refresh every one to two years.
Epoxy pool paint is the premium option, forming a hard, durable, chemically resistant film that typically lasts five to eight years before it needs recoating, substantially longer than the alternatives. It bonds well to properly prepped concrete, gunite, and plaster pool surfaces and stands up to the chlorine, pH swings, and UV exposure that pool surfaces endure every season. The tradeoff is a more demanding application process, a longer cure schedule, and a higher upfront cost, all of which pay off in the years you are not repainting.
One critical compatibility rule: epoxy paint can generally be applied over an existing epoxy coating in good condition, but it cannot simply be painted over chlorinated rubber or most acrylic paints without those old coatings being completely stripped first, since the solvents in epoxy will lift and wrinkle incompatible underlying paint. If you do not know what is currently on your pool, a paint chip test using the appropriate solvent, or a call to the manufacturer’s technical line, will tell you before you waste a coat.
How Far a 5-Gallon Kit Actually Covers
Manufacturers typically rate a 5-gallon epoxy pool paint kit to cover roughly 500 to 600 square feet per coat, which translates to about 250 to 300 square feet of actual pool surface once you apply the standard two coats most systems require. On paper that sounds generous, but real-world coverage runs lower than the can’s stated figure once you account for the texture of gunite or plaster, which has far more surface area per square foot than a smooth wall due to its porous, slightly rough finish.
A good rule of thumb for planning is to calculate your pool’s total surface area, walls plus floor plus any steps or benches, and then divide by 250 rather than the more optimistic 300 to build in a margin for texture and touch-ups. A typical 16-by-32-foot rectangular in-ground pool with an average depth of 5 feet has a surface area in the neighborhood of 1,700 to 1,900 square feet including walls and floor, which means most pools of that size need two 5-gallon kits, sometimes stretching into a third partial kit depending on surface texture and how heavy-handed the application is.
Always buy slightly more than your calculation suggests rather than slightly less, since running out mid-coat means an unplanned trip to the supply store while the section you already painted starts to set up, creating a visible lap line where the old and new paint meet. Most retailers will accept an unopened, unmixed kit back, so erring toward one extra 5-gallon unit costs you nothing but return effort if it turns out unnecessary.
Surface Preparation Before Any Paint Goes On
Surface prep is where most epoxy pool paint jobs succeed or fail, and skipping steps here is the single most common reason a fresh coat peels or blisters within the first season. Start by draining the pool completely and pressure washing the entire surface to remove algae, old flaking paint, calcium deposits, and general grime, then let it dry thoroughly, which can take one to three days depending on humidity and how porous the surface is.
Acid etching comes next and is non-negotiable for bare concrete, gunite, or plaster surfaces, since epoxy needs a slightly roughened, chemically clean surface to bond to mechanically and chemically. A typical etching solution is muriatic acid diluted with water at roughly a one-to-four ratio, applied by pouring and scrubbing in sections, left to react for a few minutes until the fizzing subsides, then rinsed thoroughly and neutralized, often with a baking soda solution, to stop the acid reaction completely before it dries. Wear acid-resistant gloves, eye protection, and old clothing, since muriatic acid splashes will damage fabric and skin on contact, and always add acid to water, never the reverse, to avoid a violent reaction.
After etching and neutralizing, patch any cracks, chips, or rough spots with a pool-rated patching compound and let those patches cure fully per the product instructions before painting over them, since paint applied over uncured patch material will eventually fail at those spots first. A final rinse and a full dry-out period, typically 24 to 48 hours in good weather, ensures no residual moisture is trapped under the new coating, which would otherwise cause blistering later.
How Many Coats and Why
Nearly every epoxy pool paint manufacturer specifies two coats as the standard system, and this is not just a sales tactic to move more product. The first coat acts as a primer-like base that seals the porous surface and provides tooth for the second coat to grip, while the second coat delivers the bulk of the color depth, UV protection, and chemical resistance that gives epoxy its long service life. A single coat, even applied heavily, does not achieve the same film thickness or durability as two properly spaced coats and will wear through noticeably faster, often within two to three years instead of five to eight.
Between coats, most epoxy systems require a recoat window, typically a minimum of 4 to 8 hours and a maximum of 48 to 72 hours, depending on temperature and humidity. Wait too short a time and the first coat has not set up enough to handle a second coat without lifting; wait too long and the surface can cure past the point where the next coat chemically bonds rather than just sitting on top, in which case the manufacturer’s instructions usually call for a light scuff-sand before the second coat goes on.
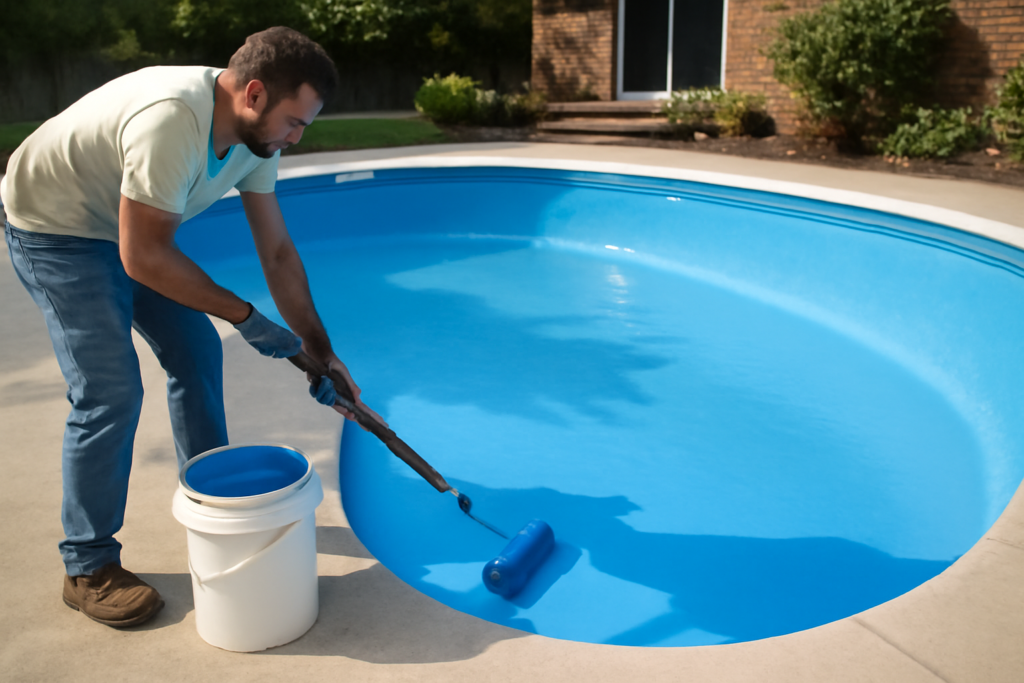
Apply both coats with a 3/8-inch nap roller for the bulk of the surface and a brush for corners, steps, and the waterline tile edge, working in manageable sections so you always maintain a wet edge and avoid visible lap marks where a dried edge meets fresh paint. Two people working opposite ends of the pool toward each other finishes a coat considerably faster and more evenly than one person working alone around the entire perimeter.
Cure Time Before Refilling
This is the step impatience ruins more often than any other part of the project. Epoxy pool paint needs a full cure period, not just a dry-to-touch period, before the pool can be refilled with water, and manufacturers commonly specify 5 to 7 days minimum cure time in warm, dry weather, extending to as long as 14 days in cooler or more humid conditions. Refilling too early traps solvents in the film and causes blistering, softening, or outright failure of the coating within weeks, undoing the entire weekend of prep work.
During the cure period, keep the pool covered or shaded if possible to moderate temperature swings, and avoid walking on the surface more than necessary, since epoxy continues hardening throughout the full cure window and is more vulnerable to scuffing or denting in the first few days than it will be once fully cured. Check the specific product’s data sheet for its exact cure schedule, since formulations vary meaningfully between manufacturers and even between standard and fast-cure product lines from the same brand.
Ventilation and Safety During Application
Epoxy pool paint contains strong solvents, and an empty in-ground pool is essentially a large, low, poorly ventilated pit that traps fumes far more effectively than an open patio would. Never apply epoxy pool paint without active ventilation, ideally a fan positioned to blow fresh air down into the pool and push fumes out and away, and take breaks in open air every 20 to 30 minutes rather than working a full shift inside the basin without a break.
A properly rated respirator with organic vapor cartridges, not just a basic dust mask, is essential equipment here, since dust masks do nothing against solvent vapors and prolonged exposure without protection can cause dizziness, headache, and worse with repeated exposure over a project spanning several hours. Keep a helper aboveground who can check on you periodically, since solvent fume buildup in an enclosed pool can escalate faster than a solo worker inside the pool may notice in the moment.
Total Project Cost
A single 5-gallon kit of quality epoxy pool paint typically costs between 180 and 320 dollars depending on brand and color, with white and standard blues on the lower end and specialty colors or premium formulations running higher. For a typical residential pool needing two kits, budget 400 to 650 dollars in paint alone. Add muriatic acid, patching compound, rollers, brushes, painter’s tape for the waterline, and a respirator with cartridges if you do not already own one, and total material costs for a full DIY repaint usually land between 500 and 800 dollars.
Hiring a professional pool painting crew instead typically runs 2,500 to 5,000 dollars for a similarly sized residential pool, with the labor premium covering their equipment, experience with acid etching, and faster turnaround, plus in many cases a workmanship warranty that a DIY job does not carry. For homeowners comfortable with the physical work and willing to follow the prep steps carefully, doing it yourself saves a substantial amount of money, but only if the prep and cure timelines are respected rather than rushed to get the pool open a weekend sooner.