A floating countertop looks effortless, and that is exactly why it is so easy to get wrong. With no cabinet underneath, every pound of stone, wood, sink, water and leaning elbows has to travel through a few hidden steel brackets into the wall framing. Get the brackets and the anchoring right and you have a clean, open bathroom vanity that makes a small room feel bigger. Get them wrong and the top slowly tilts forward or cracks at the sink cutout.
Part of our Countertops guide — explore the full guide →
The basic recipe is simple. Open the wall or locate the studs, install concealed steel brackets (or a ledger plus brackets) screwed or lag-bolted into solid framing, route the drain and supply lines so they exit the wall neatly under the top, then set a slab or wood countertop on the brackets with adhesive and a level line. Most floating bathroom countertops sit 32 to 36 inches off the floor and project 20 to 22 inches from the wall. Stone tops need more support than wood, and the best builds plan for that before any drywall goes back up.
Planning a Floating Countertop Build
Start with what will sit on the top. A vessel sink, a wall-mounted or deck-mounted faucet, and the countertop material itself drive every other decision. A 3cm quartz or granite slab weighs roughly 18 to 20 pounds per square foot, so a 60-by-22-inch top comes in around 165 to 185 pounds before you add the sink. A solid hardwood slab 1 1/2 to 2 inches thick is lighter, typically 6 to 9 pounds per square foot, but it moves with humidity and needs a durable finish.
Next, decide on the faucet. A wall-mounted faucet keeps the counter clear and frees the top from a faucet hole, but it requires the supply valve body to go inside the wall at the correct height, which means opening the wall. A deck-mounted tall vessel faucet is easier to retrofit but needs a hole drilled in the top and supply lines rising up through it.
Then consider height. Standard vanity height is around 32 inches, and comfort height is 34 to 36 inches. With a vessel sink, the rim of the bowl adds 4 to 6 inches, so many people set the countertop surface lower, around 30 to 32 inches, to keep the bowl rim at a comfortable 36 inches.
Choosing Hidden Brackets
Floating countertop brackets come in a few styles, and the right one depends on the top’s weight, depth and whether you can open the wall.
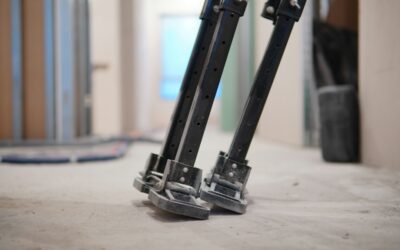
- Concealed flat-bar brackets. Solid steel bars, often 1/4 inch thick by 1 1/2 or 2 inches wide, with a vertical leg that screws to the face of a stud and a horizontal arm that runs under the top. You either let the vertical leg into a notch in the drywall or mount it to the stud before drywall. These are the most common choice for vanity tops.
- In-wall brackets. The vertical portion sits fully inside the stud cavity and fastens to the side of a stud or to blocking, and only the arm pokes through the drywall. These are the cleanest-looking option but require the wall open.
- L-brackets with a front lip. Visible steel brackets with a powder-coat finish. Easy to install on a finished wall and very strong, but you will see them under the top.
- French cleat or ledger with brackets. A hardwood ledger lagged to studs along the back edge carries part of the load, with two or more brackets supporting the front. Good for long wood tops.
For a stone floating bathroom countertop, use heavy-duty steel brackets rated well above your total load and space them no more than about 16 to 24 inches apart so that each one lands on a stud. The arm should extend at least two-thirds of the countertop depth; for a 22-inch top, look for 16- to 18-inch arms. Stone needs support close to the sink cutout because the narrow strips of material at the front and back of the hole are the weakest points.
Tools and Materials
- Stud finder, 4-foot level and laser level if available
- Drill/driver, impact driver and a socket set for lag screws
- Oscillating tool or drywall saw for opening the wall
- Floating countertop brackets sized to the top
- Structural screws or 5/16-inch lag screws, 3 inches or longer
- 2×6 or 2×8 lumber for horizontal blocking
- Silicone adhesive or construction adhesive suited to the top material
- Plumbing parts: drain stub, trap, supply stub-outs and shutoff valves
- Drywall, joint compound and moisture-resistant primer for patching
- Safety glasses, gloves and a helper for lifting the top
Step-by-Step: Building the Floating Vanity Shelf
- Shut off water and power to the work area. If any outlets or lights sit on the wall you will open, turn off the breaker for that circuit and confirm power is off with a non-contact voltage tester before cutting. Never work on powered wires. Close the main water valve or the branch valves before touching plumbing, and open a low faucet to relieve pressure.
- Mark the layout. Snap a level line for the underside of the top. Mark stud locations and the center of the sink.
- Open the wall. Cut a horizontal strip of drywall about 12 inches tall centered on the bracket line, plus whatever is needed to reach the plumbing. In older homes, test paint for lead and joint compound or plaster for asbestos before cutting if the house predates about 1980.
- Add blocking. Install horizontal 2×6 or 2×8 blocking between studs at bracket height. Fasten it with structural screws through the studs. Blocking gives every bracket solid wood behind it, even where a stud is not exactly where you want a bracket, and it gives the countertop back edge something to bear against.
- Rough in plumbing. Set the drain stub-out so the trap will hide behind or under the top, typically 2 to 4 inches below the underside of the counter for a vessel drain. Set supply stub-outs nearby, or install the in-wall valve body for a wall-mounted faucet at the height specified in its instructions. Pressure test before closing the wall.
- Mount the brackets. Fasten each bracket to studs or blocking with lag screws or structural screws, at least two per bracket, embedded 2 1/2 inches or more into solid wood. Check every arm with the level, and use a straightedge across all arms so they are in the same plane.
- Close the wall. Patch with moisture-resistant drywall or cement board around the brackets, tape, mud, prime and paint. If you plan a tile backsplash, now is the time to set it.
- Set the top. With a helper, dry-fit the countertop. Apply beads of silicone along each bracket arm and the back edge, set the top, and check level again. Some brackets accept screws up into wood tops; for stone, adhesive and the top’s own weight hold it.
- Install the sink and faucet. Mount the vessel sink, install the drain and P-trap, connect supplies, and check for leaks with the water on.
- Caulk the joint. Run a bead of mildew-resistant silicone where the top meets the wall.
Hiding the Plumbing
The open space under a floating counter top puts the plumbing on display, so plan for it. A chrome or brushed bottle trap looks finished and takes less room than a standard P-trap. Setting the drain stub-out higher in the wall lets the trap sit right under the top, out of the line of sight. Matching finish escutcheons and short, rigid supply tubes look better than braided lines draped down the wall.
Another approach is to add a narrow apron or skirt along the front edge of the top, 3 to 6 inches deep, which hides the trap from a standing view while still keeping the floor open. A slim open shelf underneath can also hold towels and screen some of the plumbing.
Safety and Structural Notes
A floating countertop is a cantilever. Every pound pushed down at the front edge levers against the fasteners at the top of each bracket. Someone sitting on the edge, a child climbing up, or a heavy bag dropped on the counter can multiply the load. Anchor into framing only, never drywall anchors alone, and use more brackets than the minimum.
- Fasten to studs or solid blocking with lag or structural screws; do not rely on toggle or hollow-wall anchors for a stone top.
- On masonry or concrete walls, use sleeve anchors or wedge anchors rated for the load, set at the depth the anchor maker specifies.
- Steel stud walls need added wood blocking or a backing plate; thin-gauge steel will not hold lag screws well.
- Check with your local building department about permits when you move drain or supply lines. Many areas require a permit for relocating plumbing.
- If the wall is a shear wall, a fire-rated party wall, or you are unsure what is inside it, get professional advice before cutting.
Troubleshooting
The front edge dips over time
Fasteners are pulling slightly from the studs or brackets are undersized. Remove the top, add blocking and longer lag screws, and add a bracket if spacing exceeds about 24 inches.
A hairline crack at the sink cutout
Stone is under tension at the thin strips around the bowl hole. Add a bracket directly under or beside the cutout, and consult a stone fabricator about a repair.
The wood top is cupping
Wood moves with bathroom humidity. Seal all six faces, including the underside and the sink cutout, with a marine or waterproof finish, and allow screw slots in the brackets so the top can expand.
Water stains on the wall under the sink
Check the trap joints and the caulk line at the wall. A small drip runs down the wall unseen until it stains paint.
Cost Ranges
Concealed floating countertop brackets usually run from roughly $20 to $80 each, with heavy-duty stone-rated brackets at the upper end. A DIY build with a wood slab, brackets, blocking and finish might land in the low hundreds, while a quartz or granite top fabricated with a sink cutout often costs several hundred to a couple thousand dollars depending on size and material. Plumbing changes are the wild card: moving a drain or adding a wall-mounted faucet valve can add a few hundred dollars or more if a plumber does it, plus drywall repair.
When to Call a Licensed Professional
Hire a licensed plumber for moving drain lines, installing an in-wall faucet valve, or anything involving the vent stack. If outlets or lighting need to move, a licensed electrician should handle it, and bathroom outlets need GFCI protection. A stone fabricator should template and cut the top and sink hole. Call a contractor or structural professional if the wall is masonry you have not drilled before, if you find damaged or undersized framing, or if you plan a very long or deep top that will carry more than a typical vanity load.
Frequently Asked Questions
How much weight can a floating countertop hold?
That depends on the brackets and the framing. Heavy-duty steel brackets lagged into studs at 16 to 24 inches apart can support a stone vanity top plus a sink and normal use, but nobody should sit or stand on it.
Can I install a floating bathroom countertop without opening the wall?
Yes, with surface-mount L-brackets screwed into studs through the drywall. You will see the brackets, and you cannot add blocking or a wall-mounted faucet valve without opening the wall.
How far apart should floating countertop brackets be?
Place them on studs, typically 16 inches on center, and no more than about 24 inches apart. Add one near each end and near the sink cutout for stone tops.
What height should a floating vanity top be with a vessel sink?
Many people set the counter at 30 to 32 inches so the rim of the vessel bowl lands around 36 inches, which is a comfortable height for most adults.
Is a wood floating counter top a good idea in a bathroom?
It can be, if every surface is sealed with a waterproof finish and you wipe up standing water. Expect to refresh the finish around the sink every few years.