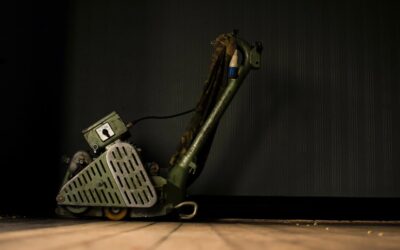
When you refinish a wood floor, the big drum sander does most of the work, but it physically cannot reach the last few inches against walls or into corners. That is exactly where a flooring edger earns its keep. An edger is a compact, handheld disc sander designed to refinish the perimeter, corners, closets, and tight spots a large drum or belt sander leaves untouched. Used well, it makes a refinishing job look seamless; used carelessly, it leaves swirl marks and gouges that haunt the finished floor. This guide explains what it does, how to use it, and whether to buy or rent.
What a Flooring Edger Does
A drum or belt sander handles the open field of a floor, but it is too large to get close to walls, into corners, under low cabinet overhangs, or inside closets. The edger is a powerful rotary sander with a circular sanding disc, sized to fit those edge zones. It is held with two hands and worked along the perimeter to blend the edges into the area the big sander already smoothed. Think of the drum sander as the broad strokes and the edger as the detail work that completes the picture.
Why You Need One for Refinishing
Skipping the edger leaves an obvious unsanded border of old finish around the entire room, which no amount of staining will hide. Because the edger uses a spinning disc rather than the back-and-forth action of a drum, its scratch pattern is different, so the goal is to match grit sequences and blend carefully so the edges look identical to the field. A good edger pass is what separates a professional-looking refinish from an obvious DIY job.
Pros of Using a Flooring Edger
- Reaches what the drum sander can’t: Walls, corners, closets, and tight spots get fully sanded.
- Powerful and fast: Removes old finish quickly along the perimeter.
- Essential for a uniform result: Eliminates the unsanded border that ruins an otherwise good job.
- Widely available to rent: Home centers and rental yards stock them alongside drum sanders.
Cons and Challenges
- Leaves swirl marks if misused: The rotary disc can carve circular scratches that show under finish, especially with coarse grit or pausing in one spot.
- Can gouge: Tipping the machine or letting it sit digs divots into the wood.
- Tiring to operate: It is heavy, vibrates, and is worked in a crouched position, hard on the back and knees.
- Aggressive: It removes material fast, so mistakes happen quickly.
- Dust and learning curve: Even with a dust bag, edging is messy, and technique takes practice.
How to Use a Flooring Edger Correctly
- Match the grit sequence. Use the same grit progression as the drum sander, typically starting coarse (such as 36 or 40 grit), then medium, then fine (such as 80 or 100), so the edges blend with the field.
- Keep it moving. Never let the spinning disc rest in one place; move in small, overlapping, half-moon or circular motions to avoid divots and burn marks.
- Keep it flat. Hold the pad flush to the floor; tipping it cuts gouges. Apply even, gentle pressure and let the machine do the work.
- Work with the grain as much as possible and feather the edge into the drum-sanded area to blend scratch patterns.
- Overlap zones. Edge after each drum-sander grit pass so both areas progress through the same grits together.
- Finish corners by hand. Use a scraper, detail sander, or hand sanding for the very tips of corners the round disc can’t reach.
Avoiding Swirl Marks
Swirl marks are the most common edger complaint, and they appear glaringly once stain or finish goes on. Prevent them by always finishing with a fine enough grit, keeping the machine moving constantly, applying light pressure, and doing a final blending pass. After sanding, inspect the edges under raking light (a work light held low across the floor) before staining; sand out any visible swirls then, because they are nearly impossible to fix after finish is applied. A final hand-sanding or pole-sander pass along the perimeter can erase faint marks.
Buy or Rent?
For a one-time or occasional floor refinish, rent. Edgers are available at equipment rental yards and many home centers, usually rented alongside the drum or belt sander, and renting both together is far cheaper than buying for a single project. Buy an edger only if you refinish floors regularly, such as a contractor or a serious DIYer doing multiple homes; professional-grade machines are a real investment. When renting, ask for guidance on the model, get enough sanding discs in the right grits, and inquire about a dust-collection bag.
Tips for a Better Job
- Practice in a closet or inconspicuous area first to learn the feel.
- Change discs often; a dull disc burnishes rather than cuts and causes swirls.
- Wear a respirator, eye protection, and hearing protection, edging is loud and dusty.
- Vacuum thoroughly between grits so old grit does not scratch the next pass.
- Keep the same direction of progress around the room for consistency.
Edger vs. Other Detail Tools
The edger is not the only tool for floor edges, and knowing the alternatives helps you finish cleanly. An orbital or random-orbit sander is gentler and far less likely to leave swirl marks, but it removes material slowly, so it is better for blending and final passes than for stripping heavy old finish. A handheld detail or corner sander handles the very tips of corners where the round edger disc cannot reach. A sharp pull scraper removes finish in tight inside corners and along baseboards by hand. Many pros use the aggressive edger for the bulk of the perimeter, then switch to an orbital sander and hand scraper for blending and corners, combining speed with a swirl-free result.
Common Edging Mistakes
Most edger problems come from a handful of avoidable errors. Resting the spinning disc in one place gouges or burns the wood almost instantly, so keep it moving at all times. Tipping the machine so only part of the pad contacts the floor carves uneven cuts; hold it flat. Using too coarse a grit on the final pass leaves scratches that pop under stain; always step down through the grits to match the field. Running a worn or clogged disc burnishes instead of cutting and causes swirls, so change discs frequently. And forgetting to inspect under raking light before finishing lets swirl marks slip through, fix them while the wood is still bare, not after the finish reveals them.
The Bottom Line
A flooring edger is an essential partner to the drum sander when refinishing wood floors, handling the perimeter, corners, and closets that the big machine cannot reach. The payoff is a seamless, professional-looking finish; the risk is swirl marks and gouges if you rush. Match your grit sequence, keep the machine flat and always moving, blend the edges into the field, and inspect under raking light before finishing. For most homeowners, renting the edger with the drum sander is the smart move, and with careful technique you can refinish a floor that looks like a pro did it.
Prefer to explore on your own?
See how new flooring looks in your actual room in seconds — free, no signup.
Try the free Floor Studio →