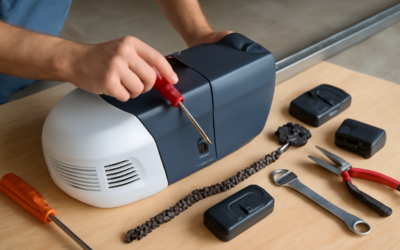
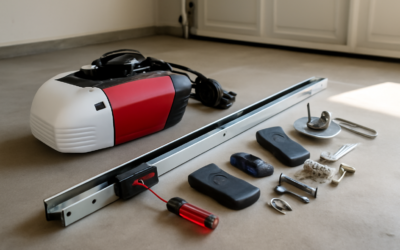
When a garage door opener quits, the panic-buy instinct is to replace the whole unit — but most failures come down to a single worn or broken component that costs a fraction of a new opener to fix. Knowing your garage door opener parts and what each one does lets you diagnose the actual problem, order the right replacement, and skip an unnecessary $300 unit swap for what might be a $15 gear or a $40 sensor pair. An opener is a simple machine at heart: a motor drives a trolley along a rail to pull the door up and lower it down, with safety and control components layered on top. Once you understand how the pieces fit together, troubleshooting becomes logical instead of guesswork.
Part of our Garage Doors guide — explore the full guide →
- The Motor and Control Board
- The Drive System: Chain, Belt, or Screw
- The Trolley and Rail
- The Gears and Sprockets
- Safety Sensors (Photo Eyes)
- Remotes, Keypads, and the Wall Console
- Springs and Cables: Not Opener Parts, But Critical
- Where to Find Replacement Parts
- Lubrication and Preventive Care
- Diagnosing Before You Buy
The Motor and Control Board
At the center of every opener is the motor unit — the box mounted to the ceiling — which houses the electric motor and the logic board that runs everything. The motor provides the muscle to move the door, while the control board (also called the logic board or circuit board) processes signals from remotes, wall buttons, and sensors, then tells the motor when to run and which direction.
Motors rarely fail outright; when an opener won’t run at all despite power, the control board is more often the culprit, especially after a power surge or lightning strike. A failed board might ignore remotes, run the motor erratically, or do nothing. Boards are replaceable as a part, but on an older unit, weigh the cost against a new opener. If the motor hums but nothing moves, the problem is usually mechanical downstream, not the motor itself.
The Drive System: Chain, Belt, or Screw
The drive is how the motor’s rotation becomes the door’s movement, and openers come in three types, each with different parts:
- Chain drive: a metal chain, like a bicycle chain, pulls the trolley — durable and cheap but the noisiest; the chain can stretch and need tensioning
- Belt drive: a reinforced rubber belt replaces the chain for near-silent operation — fewer vibration issues, ideal under living space
- Screw drive: a threaded steel rod turns to move the trolley — fewer moving parts, but the rod needs periodic lubrication
A loose chain that slaps or a door that jerks often just needs the chain tensioned, not replaced. A worn belt or a dry, grinding screw rod points to lubrication or replacement of that specific drive component.
The Trolley and Rail
The trolley is the carriage that rides along the rail and connects to the door via the drawbar arm. As the drive moves the trolley, the arm pushes and pulls the top of the door. The rail is the track the trolley travels on, running from the motor unit to the header above the door.
A common failure here is a stripped or broken trolley, especially the plastic release mechanism. If your motor runs and the drive moves but the door doesn’t, the trolley may have disconnected — check the emergency release cord and the trolley’s engagement with the carriage. The red emergency release handle lets you manually disconnect the door from the trolley during a power outage; if someone pulled it, re-engaging is often the entire “repair.”
The Gears and Sprockets
Inside the motor housing, a set of gears transfers power from the motor to the drive. On many chain and belt units, a plastic drive gear (sometimes called the worm gear) meshes with the motor shaft — and this is one of the single most common failure parts. Years of cycling wear the plastic teeth until they strip.
The telltale sign of a stripped gear is a motor that runs and grinds loudly while the door doesn’t move, often with plastic shavings visible inside the housing. The good news: a gear-and-sprocket rebuild kit is inexpensive, often $15 to $40, and replacing it is a very doable DIY repair that saves a whole new opener. If your opener is more than five years old and this is its first failure, a gear kit is usually the smart fix.
Safety Sensors (Photo Eyes)
Mounted about six inches off the floor on both sides of the door, the safety sensors, or photo eyes, project an infrared beam across the opening. If anything breaks the beam while the door is closing, the opener stops and reverses — a federally mandated safety feature since 1993. These are among the most trouble-prone parts, not because they fail often, but because they go out of alignment or get dirty.
If your door refuses to close and the opener lights flash, suspect the sensors first. Wipe the lenses, clear cobwebs, and adjust the brackets until both sensor LEDs glow steady. A blinking sensor LED means misalignment or an obstruction. Actual sensor failure — a bad photo eye or damaged wiring — is a cheap part to replace, sold as a pair.
Remotes, Keypads, and the Wall Console
The control accessories are the parts you touch every day. The wall console (the button inside the garage) may include lock and light functions. Handheld remotes and exterior keypads communicate wirelessly with the control board using rolling-code security on modern units. These are simple to replace and re-program.
When a remote works only up close, it’s usually a dying remote battery or a poorly positioned antenna wire on the motor unit — that wire should hang straight down, not be tucked up. A wall button that does nothing while remotes work points to the console or its wiring. Universal replacement remotes and keypads are widely available and pair using the Learn button on the motor.
Springs and Cables: Not Opener Parts, But Critical
It’s worth clarifying a dangerous point of confusion. The torsion or extension springs and the lift cables are part of the garage door system, not the opener, but people blame the opener when these fail. The springs do the actual heavy lifting; the opener only guides the door. If a spring breaks, the opener strains and can’t lift the door, mimicking an opener failure.
Never attempt spring or cable repairs yourself. Torsion springs store enormous energy and can cause severe injury if they release. That work belongs to a trained technician with the right tools. If the door is extremely heavy to lift by hand with the opener disconnected, a spring is likely the issue — call a pro.
Where to Find Replacement Parts
Sourcing the right part is easier when you start with your opener’s model and serial number, printed on a label on the motor unit. With that number you can order an exact-match part — a gear kit, sensor pair, trolley, or control board — from the manufacturer or a parts retailer, which guarantees compatibility. Many common wear items like drive gears and photo-eye sensors are also available as quality aftermarket kits at lower cost.
For accessories, universal remotes and keypads work across many brands and pair through the Learn button, so you’re not locked into a single manufacturer. Keep a note of your model number somewhere handy, because the biggest source of wasted money is ordering a part that doesn’t fit and having to return it. When a part is discontinued for a very old opener, that’s often the signal that a full replacement makes more sense than hunting down obsolete components.
Lubrication and Preventive Care
Many “failures” are really just neglect, and a little maintenance extends the life of every part. Twice a year, apply a garage-door-specific lubricant to the chain or screw drive, the trolley, and the door’s rollers and hinges — never use general-purpose grease that attracts grit. A well-lubricated drive puts less strain on the gears and motor, directly reducing the wear that strips gear teeth.
Wipe the safety-sensor lenses when you clean the garage, keep the antenna wire hanging free, and tighten any mounting bolts that have loosened from vibration. Test the safety reversal with a board on the floor a couple of times a year. These small habits keep the sensors aligned, the drive smooth, and the settings accurate, which means fewer surprise breakdowns and a longer service life from the whole system.
Diagnosing Before You Buy
Match the symptom to the part before spending a dime. A grinding motor with no movement means a stripped gear. A door that reverses before closing means misaligned sensors or force settings. A remote with short range means a battery or antenna issue. A dead unit after a storm suggests the control board. Working through symptoms this way turns most repairs into a targeted, affordable fix.
Understanding your garage door opener parts puts you in control: instead of assuming the worst and replacing the entire unit, you can identify the one component that failed, order it for a few dollars to a few tens of dollars, and often fix it in under an hour. Reserve the springs and cables for a professional, but the gears, trolley, sensors, drive, and control accessories are all fair game for a confident homeowner — and knowing which is which is what keeps a minor breakdown from becoming a major expense.