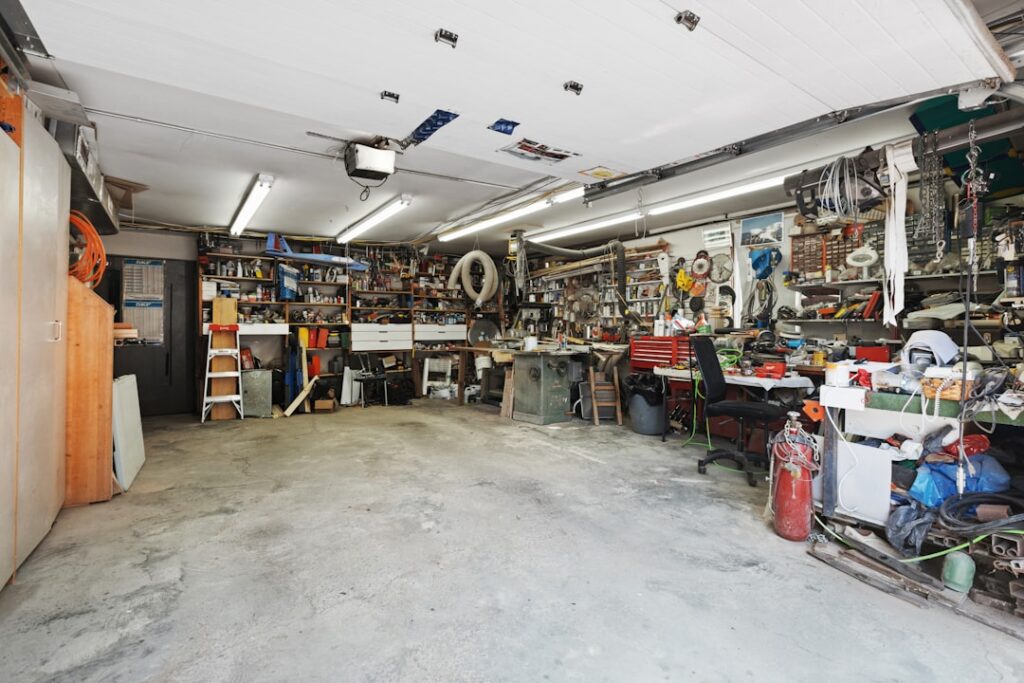
A bare concrete garage floor is functional but far from inspiring. It stains easily, collects dust, and looks increasingly drab over time. Garage epoxy flooring changes all of that, creating a glossy, durable, chemical-resistant surface that transforms your garage from a utilitarian space into a showroom-worthy extension of your home. Whether you use your garage for parking vehicles, as a workshop, home gym, or hobby space, epoxy flooring delivers performance and aesthetics that plain concrete simply cannot match.
This guide covers the types of garage epoxy coatings, costs, DIY versus professional installation, preparation requirements, and long-term maintenance.
What Is Garage Epoxy Flooring?
Epoxy flooring is a two-part coating system consisting of an epoxy resin and a hardener that chemically bond when mixed together. When applied to a properly prepared concrete surface, the mixture cures into an extremely hard, glossy, and seamless coating that adheres tenaciously to the concrete beneath. The result is a floor that resists stains, chemicals, abrasion, and impacts far better than bare concrete or paint.
True epoxy coatings differ from epoxy paint, which is a single-component product sold at hardware stores. While epoxy paint provides some improvement over bare concrete, it is significantly less durable and long-lasting than a two-part epoxy coating system.
If you’re running out of room even with a clean garage floor, a backyard shed takes the overflow — seasonal gear, tools, lawn equipment. And if you’re parking outside while the garage doubles as a workshop, a carport keeps your car covered without needing a second garage.
We may earn a commission when you purchase through our links.
Types of Garage Epoxy Coatings
Several types of epoxy and epoxy-like coatings are available for garage floors, each with different performance characteristics and price points.
Water-Based Epoxy
Water-based epoxy is the most DIY-friendly option. It has low VOCs, minimal odor, and easy cleanup with soap and water. While it provides a noticeable improvement over bare concrete, it is the least durable epoxy type and typically lasts 3 to 5 years in a garage that sees regular vehicle traffic. It is best suited for light-use garages and as an affordable entry point for homeowners testing the epoxy concept.
Solvent-Based Epoxy
Solvent-based epoxy penetrates deeper into the concrete and creates a harder, more durable finish than water-based products. It resists hot tire pickup, chemicals, and abrasion better and typically lasts 5 to 10 years. The trade-off is stronger fumes during application, requiring good ventilation and respiratory protection.
100-Percent Solids Epoxy
This is the professional-grade standard for garage epoxy flooring. It contains no water or solvents — every drop of the product cures into a solid coating. The result is the thickest, hardest, and most durable finish available, lasting 10 to 20 years or more with proper maintenance. Application requires professional skill due to the rapid cure time and precise mixing requirements.
Polyurea and Polyaspartic Coatings
While technically not epoxy, polyurea and polyaspartic coatings are often marketed alongside epoxy as garage floor solutions. They cure much faster than traditional epoxy (often same-day return to service), resist UV yellowing better, and are highly flexible, making them less prone to cracking. Many professional installers use a hybrid system with an epoxy base coat and a polyaspartic top coat for the best combination of adhesion, durability, and UV stability.
Benefits of Garage Epoxy Flooring
Epoxy delivers a long list of practical and aesthetic benefits that justify the investment.
Chemical and Stain Resistance
Epoxy’s non-porous surface resists oil, gasoline, brake fluid, antifreeze, and other automotive chemicals that permanently stain bare concrete. Spills sit on the surface and can be wiped away without leaving a trace.
Durability and Abrasion Resistance
Cured epoxy withstands the weight and abrasion of vehicle tires, rolling tool carts, dropped tools, and heavy foot traffic without chipping, cracking, or wearing through. Professional-grade coatings can handle decades of regular garage use.
Easy Cleaning
The seamless, non-porous surface makes cleaning effortless. A broom and occasional mop with mild detergent keep an epoxy floor looking new. Dust and debris do not embed in the surface as they do with porous concrete.
Aesthetic Transformation
Epoxy comes in a wide range of colors, finishes, and decorative options including solid colors, metallic effects, quartz sand broadcasting, and vinyl chip (flake) systems. The high-gloss finish reflects light, brightening the garage significantly.
Increased Home Value
A professionally coated garage floor is a noticeable upgrade that impresses homebuyers. It signals that the garage has been well-maintained and cared for, adding perceived value to the entire property.
Garage Epoxy Flooring Costs
Costs vary significantly based on the coating type, garage size, and whether you DIY or hire a professional.
DIY Costs
A basic water-based epoxy kit for a two-car garage (400 to 500 square feet) costs $100 to $300 at home improvement stores. Mid-range solvent-based kits run $300 to $600. Premium DIY kits with multiple coats and decorative flakes cost $500 to $1,000. These prices include the coating materials but not tools, surface preparation supplies, or your time.
Professional Installation Costs
Professional garage epoxy flooring typically costs $3 to $12 per square foot, depending on the system and your location. A two-car garage professionally coated runs $1,500 to $6,000, with most homeowners paying $2,500 to $4,500 for a quality multi-coat system with decorative flakes or quartz. This includes surface preparation, crack repair, coating application, and cleanup.
Cost Factors
Concrete condition significantly impacts cost. Heavily cracked, stained, or previously coated floors require more preparation work. Garage size, number of coating layers, decorative options, and geographic location also affect pricing.
DIY Garage Epoxy: Step-by-Step
If you have the time and willingness to do the work, a DIY epoxy job can deliver good results at a significant cost savings.
Step 1: Clean and Prepare the Concrete
This is the most important step and the one most DIYers underestimate. The concrete must be thoroughly clean, free of oil and grease, and have an open pore structure for the epoxy to bond. Start by removing everything from the garage. Degrease oil stains with a concrete degreaser. Repair cracks and divots with a concrete patching compound. Then etch the surface with muriatic acid or a citrus-based concrete etcher to open the pores, or rent a diamond grinder for the best results.
Step 2: Test for Moisture
Tape a plastic sheet to the concrete, seal the edges, and leave it for 24 hours. If moisture forms under the plastic, your slab has a moisture issue that must be addressed before applying epoxy. Moisture trapped beneath the coating will cause it to peel and fail.
Step 3: Mix and Apply the Epoxy
Mix the resin and hardener according to the manufacturer’s instructions. Work in sections, spreading the epoxy with a roller on an extension pole. Maintain a wet edge to avoid lap marks. Most kits require completing the entire floor within the pot life of the mixed epoxy, typically 1 to 2 hours.
Step 4: Add Decorative Flakes (Optional)
If your kit includes decorative vinyl flakes, broadcast them onto the wet epoxy immediately after application. Toss the flakes into the air and let them fall randomly for an even distribution. Apply more flakes in high-visibility areas and fewer near walls.
Step 5: Apply Top Coat
After the base coat cures (typically 12 to 24 hours), apply the clear top coat. This protective layer seals the flakes and provides the glossy, chemical-resistant surface. Some kits require light sanding between coats for proper adhesion.
Step 6: Allow Full Cure
Allow 24 to 72 hours for foot traffic and 5 to 7 days before parking vehicles on the new floor. Full chemical resistance develops over 7 to 14 days depending on the product and temperature.
DIY vs Professional Installation
The decision between DIY and professional installation depends on your budget, skills, and expectations.
When to DIY
DIY makes sense when your concrete is in good condition, you have experience with surface preparation, you are comfortable with the application process, and your budget is limited. A well-executed DIY job using a quality kit can look great and last several years.
When to Hire a Professional
Professional installation is worth the investment when your concrete has significant damage or previous coatings, you want the longest-lasting system possible, you prefer a guaranteed result, or the project includes specialized effects like metallic epoxy. Professionals use commercial-grade equipment and materials that produce results DIY kits cannot match.
Maintaining Garage Epoxy Floors
Epoxy floors are low-maintenance but not no-maintenance. Sweep regularly to prevent grit from abrading the surface under vehicle tires. Mop with warm water and a mild detergent monthly or as needed. Clean up chemical spills promptly, even though the surface is resistant. Avoid dragging sharp metal objects across the surface. Place mats under vehicle drip areas for easy cleanup.
Common Garage Epoxy Problems and Solutions
Peeling and Delamination
The number one cause of epoxy failure is inadequate surface preparation. If the concrete was not properly cleaned, etched, or ground, the epoxy cannot form a strong bond. The only fix is removal and reapplication with proper preparation.
Hot Tire Pickup
Hot tires from a recently driven vehicle can soften and lift lower-quality epoxy coatings. This is most common with water-based and thin-film products. Higher-quality solvent-based or 100-percent solids epoxy and polyaspartic top coats resist hot tire pickup.
Yellowing
Standard epoxy can yellow when exposed to UV light from windows or an open garage door. If UV exposure is significant, choose a polyaspartic or polyurea top coat, which maintains its color and clarity under UV light.
Final Thoughts
Garage epoxy flooring is one of the most impactful home improvements you can make for the money. Whether you tackle it as a DIY project or invest in professional installation, a quality epoxy coating transforms a dull, stained concrete slab into a beautiful, durable, and easy-to-clean surface that enhances your garage’s functionality and your home’s value. Take the time to prepare the concrete properly, choose the right product for your needs, and your epoxy floor will perform beautifully for years to come.