If the idea of grinding concrete and waiting three days for epoxy to cure sounds like too much, garage floor squares are the answer you have been looking for. These interlocking tiles snap together right over your existing slab in an afternoon, with no adhesive, no fumes, and no cure time before you park on them. They also forgive a slab that is cracked, stained, or slightly uneven, since they simply float on top. For renters, weekend warriors, and anyone who wants a fast, reversible upgrade, they are one of the smartest garage flooring options available.
- What Are Garage Floor Squares?
- Rigid vs Flexible: The Two Main Types
- Drainage and Moisture Handling
- How to Install Garage Floor Squares
- What Garage Floor Squares Cost
- Garage Floor Squares vs Epoxy Coatings
- Durability and What to Expect Over Time
- Cleaning and Maintenance
- Are Garage Floor Squares Right for You?
What Are Garage Floor Squares?
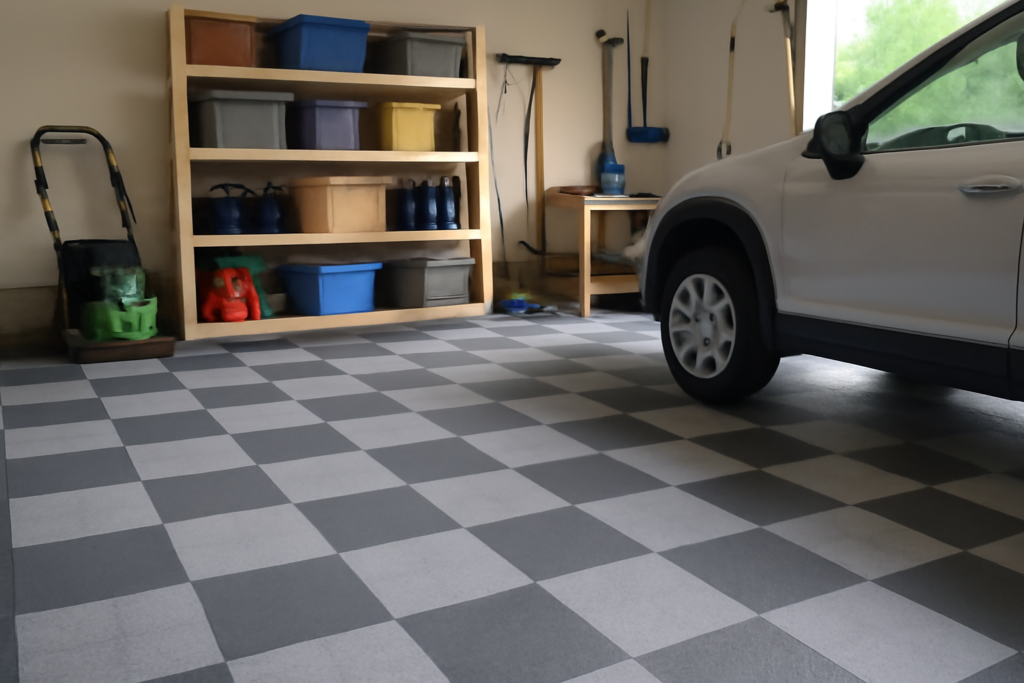
Garage floor squares are modular tiles, typically 12 by 12 inches, that lock together edge to edge with hidden tabs or a peg-and-loop system. Because they interlock rather than glue down, the finished floor floats freely over the concrete and can be taken up and reinstalled elsewhere. They come in a range of colors and surface textures, from coin and diamond patterns to smooth, and mixing colors lets you create checkerboards, borders, or parking-pad outlines.
The big appeal is speed and simplicity. There is no surface prep beyond sweeping, no moisture testing, and no downtime. You can transform a garage in a single afternoon and drive on it immediately.
If you’re running out of room even with a clean garage floor, a backyard shed takes the overflow — seasonal gear, tools, lawn equipment. And if you’re parking outside while the garage doubles as a workshop, a carport keeps your car covered without needing a second garage.
We may earn a commission when you purchase through our links.
Rigid vs Flexible: The Two Main Types
Not all garage floor squares are built the same, and the material changes how they perform. There are two broad categories to choose between.
- Rigid PVC or polypropylene tiles: hard plastic tiles that stay stable under heavy point loads like jack stands and rolling tool chests. Many have an open, grid-style underside that allows air and water to flow beneath, helping the slab dry.
- Flexible PVC or rubber tiles: softer, more cushioned underfoot, quieter, and easier on your feet and dropped tools. Better suited to workshops and gym areas than to supporting a car’s full weight on a small contact patch.
For a floor that regularly holds vehicles and heavy equipment, rigid tiles are the safer choice. For a hobby space, home gym, or workshop where comfort matters more than load, flexible tiles shine.
Drainage and Moisture Handling
One of the underrated advantages of garage floor squares is how they manage water. Many rigid tiles have a raised, vented underside that creates an air gap between the tile and the concrete. That gap lets snowmelt, rain runoff, and washing water drain away and lets the slab breathe, which reduces the trapped moisture and mildew that can plague a fully sealed coating over a damp floor.
Some tiles are solid-top for a watertight surface, while others are perforated to let liquid pass straight through to the concrete below. If you live in a snowy climate and track in a lot of slush, a vented or perforated design keeps water from pooling on top of the floor.
How to Install Garage Floor Squares
Installation is genuinely DIY-friendly and requires only basic tools. Most homeowners finish a two-car garage in two to four hours.
- Sweep the concrete clean; no grinding, etching, or degreasing is needed.
- Dry-lay a starting row along the most visible wall to plan your layout and color pattern.
- Snap the tiles together by aligning the tabs and pressing or tapping them home with a rubber mallet.
- Measure and cut border tiles to fit with a circular saw, jigsaw, or a sharp utility knife for softer tiles.
- Add optional beveled edge ramps around exposed perimeters for a clean, trip-free transition.
Because the floor floats, it accommodates minor slab imperfections, and you can lift and reposition tiles anytime. When you move, you can even take the floor with you.
What Garage Floor Squares Cost
Expect to pay roughly $2 to $5 per square foot for garage floor squares, with rigid PVC tiles generally in the $2 to $3.50 range and premium or thicker rubber tiles reaching $4 to $5 or more. For a standard two-car garage of about 400 to 500 square feet, that puts a typical project between $800 and $2,500 in materials, with no additional cost for coatings, grinders, or professional labor if you install them yourself.
Compared with a professional epoxy or polyaspartic floor at $2,000 to $5,000 installed, tiles can be cheaper up front and are entirely DIY. The tradeoff is a seamed, modular look versus the poured, continuous finish of a coating.
Garage Floor Squares vs Epoxy Coatings
Both are popular for good reason, and the right choice depends on your priorities. Here is how they compare.
- Installation: tiles snap down in an afternoon with no prep; epoxy needs grinding, careful application, and days of cure time.
- Slab condition: tiles hide cracks and stains and tolerate minor unevenness; epoxy requires a sound, properly prepped slab.
- Appearance: epoxy gives a seamless, poured look; tiles have visible seams but offer easy color patterns.
- Reversibility: tiles lift up and move with you; epoxy is permanent.
- Seams and spills: liquids can seep between tiles to the concrete below, while epoxy is fully sealed and easier to wipe clean.
Choose tiles for speed, flexibility, and a forgiving install; choose epoxy for a seamless, sealed, showroom finish you never have to think about again.
Durability and What to Expect Over Time
Quality garage floor squares are surprisingly tough. Rigid polypropylene and PVC tiles are engineered to support the weight of a car, and many carry load ratings well over several thousand pounds per tile, easily handling a jack, jack stands, and a rolling tool chest. The plastic resists oil, gas, brake fluid, and most household chemicals, so spills wipe up without staining. Better tiles include UV inhibitors to slow fading, though a garage that gets strong direct sun through open doors will still see some color shift over many years.
The main wear points are the interlocking tabs and the surface texture. Dragging heavy equipment across the floor or pivoting a loaded jack can occasionally crack a tab or gouge a tile, but because the floor is modular, you simply pop out the damaged square and snap in a replacement, which is a huge advantage over a coating that has to be patched or recoated. Keep a few spare tiles from your original order for exactly this reason.
Cleaning and Maintenance
Maintenance is about as easy as flooring gets. Sweep or blow out debris regularly, and hose or mop the tiles with warm water and a mild cleaner when they need it. On vented or perforated tiles, water drains straight through to the concrete and the slab dries through the air gap underneath. Once or twice a year, and especially in snowy regions, it is worth lifting a section of tiles to sweep out any grit, salt, or moisture that has collected on the slab below, then snapping them back down. That quick step keeps the concrete healthy and prevents any trapped debris from scratching the underside of the tiles.
Are Garage Floor Squares Right for You?
For most homeowners who want a fast, affordable, no-fuss upgrade, garage floor squares are an easy win. They install in an afternoon, hide an imperfect slab, drain water, and can be lifted and reused, all without a single fume or grinder. Pick rigid tiles if you park heavy vehicles, flexible tiles for a comfortable workshop or gym, and a vented design if you deal with snow and moisture. If you crave a seamless, permanent, poured look, an epoxy system may suit you better, but for speed, simplicity, and flexibility, snap-together squares are hard to beat.