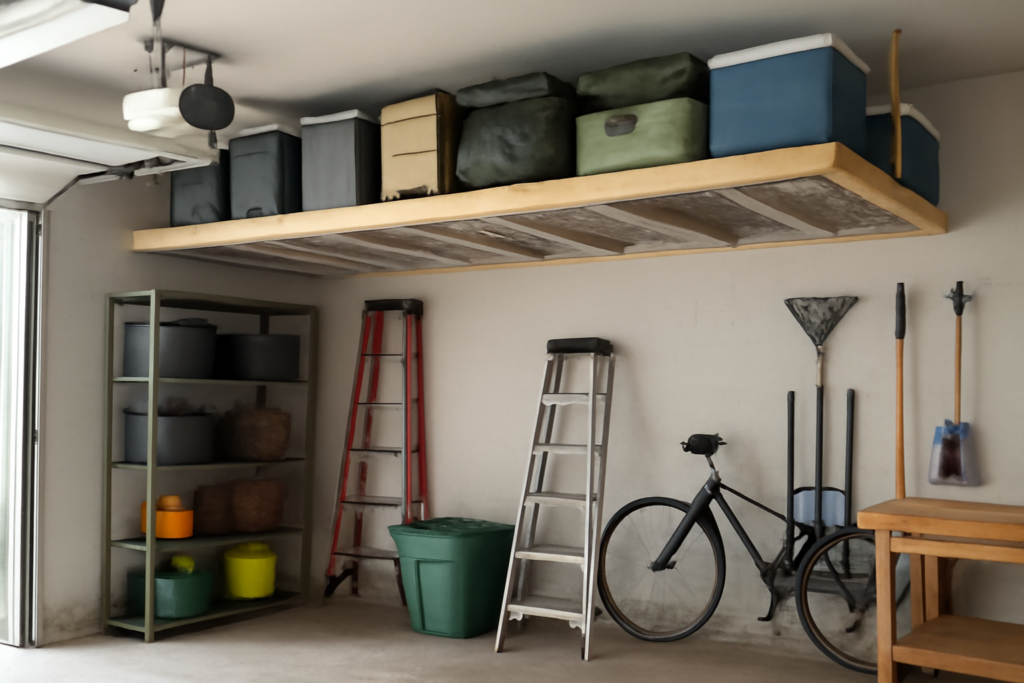
Most homeowners waste the single largest unused zone in the house: the empty air above their parked cars. Garage loft storage reclaims that dead volume, turning eight or nine feet of vertical space into a genuine second floor for holiday bins, camping gear, and lumber offcuts. Done right, it can free up 40 to 60 square feet of cluttered floor without adding a single cabinet. Done wrong, it becomes a sagging hazard hanging over your minivan. This guide walks through what actually works.
- Why Overhead Storage Beats Wall Shelving
- Types of Garage Loft Storage Systems
- Weight Limits and Structural Reality
- Step-by-Step: Installing a Ceiling Rack
- Smart Organization for Loft Space
- Cost Breakdown
- Common Mistakes to Avoid
- What to Store Overhead and What to Keep Below
- Adding Light and Safer Access
- Inspecting and Maintaining Your Loft
- Is Garage Loft Storage Worth It?
Why Overhead Storage Beats Wall Shelving
Wall cabinets and pegboards handle small tools well, but they eat into the depth you need to open car doors. Overhead systems live in space you never use anyway. A typical two-car garage has roughly 400 cubic feet of clear air between the top of the garage door track and the ceiling joists. Capturing even a third of that gives you the equivalent of a small closet.
The trade-off is access. You reach a loft with a ladder, not a casual grab, so it suits things you touch a few times a year: seasonal decorations, luggage, coolers, and off-season sports equipment. Keep frequently used items on lower wall storage and reserve the ceiling for long-dwell inventory.
Types of Garage Loft Storage Systems
There are three broad approaches, and choosing between them comes down to how much weight you plan to carry and whether you want a walkable platform.
Adjustable Ceiling Racks
Steel racks like the FLEXIMOUNTS 4×8 or the SafeRacks 4×8 bolt into joists and hang down 22 to 40 inches. They hold 400 to 600 pounds spread across the deck and cost $130 to $250 each. These are the fastest win for most garages: two people can install one in about two hours. Bins slide onto the wire or solid deck, and adjustable drop height lets you clear the garage door opener.
Built Wood Loft Platforms
For a walkable surface, a framed 2×8 platform decked with 3/4-inch plywood gives you a true mini-attic. Anchored to wall studs and ceiling framing, a well-built loft can carry 50 pounds per square foot or more. Budget $300 to $700 in lumber and hardware for a 6×8 platform. This is the strongest option and the only one you should stand on.
Motorized Lift Platforms
Powered units such as the Garage Gator or Auxx-Lift raise a loaded platform to the ceiling with a switch, eliminating the ladder entirely. They run $600 to $1,400 and handle 200 to 400 pounds, ideal for heavy totes you would rather not haul up a ladder.
Weight Limits and Structural Reality
This is where garage loft storage projects go sideways. Your ceiling joists were sized to hold up drywall and maybe a little insulation, not 500 pounds of Christmas ornaments. Before you load anything, identify what is up there. In a garage with living space above, the joists are structural floor joists and usually robust. In a garage with an open attic truss above, the bottom chords of those trusses are engineered for light loads only, sometimes as little as 10 pounds per square foot.
Never hang concentrated loads from a truss bottom chord without confirming its rating. If you have trusses and want serious storage, distribute the load across as many chords as possible and stay conservative. When in doubt, a $150 consult with a structural engineer is cheaper than a collapsed ceiling. Rafters and joists spaced 16 or 24 inches on center should always be located with a stud finder and confirmed, never guessed.
Step-by-Step: Installing a Ceiling Rack
- Map your joists. Use a stud finder to mark joist centers across the mounting zone, then confirm with a small pilot hole. Note the direction they run.
- Plan clearance. Measure from the ceiling to the top of the raised garage door and the opener rail. Set your drop height to clear both with 3 inches of margin.
- Mount the ceiling brackets. Drive the included lag bolts, typically 5/16 by 3 inches, directly into joist centers. Every bracket must hit solid wood; drywall anchors are not acceptable here.
- Hang the vertical posts and deck. Level the frame, tighten all hardware, and torque the lag bolts fully.
- Load gradually. Test with a fraction of the rated weight first, watch for any deflection, then fill it evenly with the heaviest bins toward the wall side.
A cordless impact driver, a socket set, a 4-foot level, and a solid stepladder cover the whole job. Two people make it dramatically safer, since one holds the deck while the other bolts.
Smart Organization for Loft Space
Uniform bins are the secret to a loft that stays usable. Buy a stack of identical 27-gallon totes with locking lids, label the ends facing out, and keep a simple inventory list taped inside the garage door. Mismatched boxes waste space and topple. Clear totes let you spot contents from below, while opaque ones protect against light-sensitive items.
Group by season and event. One column for winter holidays, one for summer gear, one for camping. Keep a lightweight aluminum ladder mounted nearby on wall hooks so retrieval never involves dragging a ladder across the garage. Heavy items belong low and centered; lightweight, bulky things like sleeping bags can ride the outer edges.
Cost Breakdown
- Single 4×8 steel rack: $130 to $250, holds roughly 600 pounds
- DIY wood platform (6×8): $300 to $700 in materials
- Motorized lift: $600 to $1,400 installed
- Professional install of a rack: add $150 to $300 labor
- Storage totes: $12 to $20 each
For most families, one or two steel racks plus a set of matching totes lands around $400 and delivers the biggest visible cleanup for the money.
Common Mistakes to Avoid
The classic error is mounting racks into drywall or into the wrong framing member. Always hit joists. The second is ignoring garage door clearance, then discovering the door hits a loaded bin. The third is overloading one end, which twists the frame and pulls bolts loose over time. Distribute weight and re-check hardware after the first few weeks, since lag bolts can settle slightly under initial load.
Finally, resist the urge to store anything hazardous overhead. Gasoline, propane, and paint thinner do not belong above your car regardless of how convenient the shelf looks. Keep flammables in a ventilated ground-level cabinet.
What to Store Overhead and What to Keep Below
Not everything belongs in a loft, and matching the item to the storage zone keeps the system usable. Overhead space rewards lightweight, bulky, and seasonal goods: artificial trees, wreaths, patio cushions off-season, luggage, sleeping bags, air mattresses, and empty moving boxes you want to keep. These are things you retrieve a handful of times a year and do not mind climbing a ladder for.
Keep off the loft anything you reach for weekly, anything genuinely heavy that is awkward to lift overhead, and anything sensitive to temperature. Garage lofts sit near the roofline, where summer attic heat can climb past 120°F and winter cold drops below freezing. That rules out candles, vinyl records, electronics, paint, medications, and important documents. Photos and anything paper-based degrade fast in that swing of heat and humidity, so store them inside the conditioned house instead.
Adding Light and Safer Access
A loft you cannot see into is a loft you stop using. A single battery-powered LED puck light or a wired shop light aimed at the deck transforms retrieval, letting you read labels and spot the right bin without guessing. Motion-activated lights are ideal since your hands are usually full.
Access is the other half. A flimsy folding ladder discourages use and invites accidents. Mount a sturdy aluminum ladder on wall hooks within a step of the loft, or install a fold-down attic-style ladder if the loft is deep enough to climb into. Always face the ladder, keep three points of contact, and hand bins up rather than carrying them one-handed. For heavy or frequent loads, this is where a motorized lift platform earns its cost, removing the climb entirely.
Inspecting and Maintaining Your Loft
Overhead storage is not install-and-forget. A few times a year, glance up and check for warning signs. Look for any sag or bow in the deck, which signals overload or a loosening anchor. Re-check the lag bolts at the ceiling brackets, since wood can shrink and bolts can back out slightly over the first year under load. Confirm nothing has shifted toward one end, which twists the frame.
Watch the ceiling drywall around the mounting points too; hairline cracks radiating from a bracket mean the load is stressing the framing and you should lighten it immediately. Keep the total weight well under the rack’s rating rather than pushing the limit, because that stated capacity assumes perfect installation and even distribution. Treat the rating as a ceiling you never approach, not a target, and your loft will carry your seasonal clutter safely for decades.
Is Garage Loft Storage Worth It?
If your garage floor is a maze of bins and you cannot park inside, the answer is almost always yes. A few hundred dollars and an afternoon can restore an entire parking bay, protect your car from weather, and finally give the seasonal clutter a permanent home. Start with one rack over the least-used corner, confirm your framing can carry it, and expand from there. The vertical space was always yours; garage loft storage simply puts it to work.