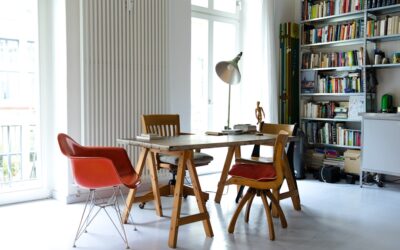
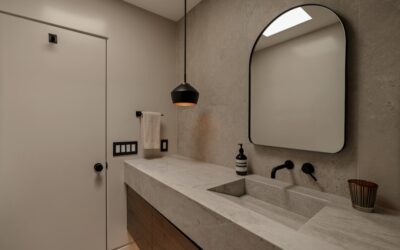
Walk into any well-built garage from the last decade and the floor is probably gray epoxy: light enough to bounce shop light off the work area, dark enough to hide oil drips between cleanings, hard enough to take a 250 lb engine dropping unexpectedly. The same product also shows up in showrooms, basements, breweries, and commercial kitchens, and it’s slowly working its way into residential living rooms in industrial and modern lofts. Grey epoxy flooring covers everything from a $1.50 per sq ft DIY roll-on kit to a $12 per sq ft pro-installed three-coat polyaspartic system, and the gap between those products in real-world performance is measured in years, not months. Here’s how to tell them apart.
The Three Real Tiers of Grey Epoxy
The market has consolidated around three product tiers:
- Single-part water-based epoxy: Big-box DIY kits like Rust-Oleum EpoxyShield. Easy to apply but only 3 to 6 mil thick when cured. Service life 2 to 4 years in a garage
- Two-part 100% solids epoxy: Real epoxy with no solvent, 10 to 20 mil per coat. Service life 8 to 15 years
- Polyaspartic and polyurea topcoats: Faster cure, better UV resistance, often over an epoxy base coat. Service life 15 to 25 years
Color stability differs sharply between tiers. Standard epoxy ambers under UV and turns yellowish in 18 to 36 months when exposed to sunlight. Polyaspartic topcoats stay true to color for 10+ years. If your gray epoxy floor sees any sun (garage with open door, sunroom, basement window), specify a polyaspartic topcoat from day one.
What “Grey” Actually Means in Epoxy
Gray is the most popular epoxy color because it hides dirt, doesn’t show oil drips as obviously as white, and pairs with nearly any cabinet or wall color. Three sub-categories:
- Solid gray: Flat or satin finish, single tone
- Gray flake system: Vinyl color chips broadcast into the wet base coat, then sealed with clear topcoat. Hides imperfections best
- Metallic gray: Pearl pigments mixed with clear epoxy, troweled to create swirls. Most expensive, also most dramatic
The flake system is the workhorse in residential garages. It scratches less obviously than solid color, hides DIY application flaws, and reads as more refined than the pure poured look.
Pricing by System
Mid-2026 pricing for grey epoxy flooring in residential applications:
- DIY water-based kit (Rust-Oleum, Quikrete): $1.50 to $2.50 per sq ft material only
- DIY 100% solids epoxy kit (Armor Chip, ArmorGarage): $2.50 to $4 per sq ft material only
- Pro single-coat 100% solids: $4 to $6 per sq ft installed
- Pro flake system with polyaspartic topcoat: $5 to $8 per sq ft installed
- Pro metallic epoxy system: $8 to $12 per sq ft installed
- Commercial three-coat polyaspartic system: $7 to $14 per sq ft installed
A typical two-car garage at 400 to 500 sq ft runs $2,400 to $4,000 for a pro flake system. DIY in the same space lands at $800 to $1,800 depending on tier, plus 2 to 3 days of your time.
The Prep That Determines Everything
Epoxy adhesion lives or dies on prep. The two acceptable methods:
- Diamond grinding: Mechanical abrasion to CSP-2 or CSP-3 profile per ICRI standards. The pro-grade method
- Acid etching: 10% to 15% muriatic acid wash, only acceptable for thin coatings on un-sealed concrete
Skip the prep and the epoxy will peel in sheets within 12 to 24 months. Diamond grinding with a 7-inch hand grinder rents at $80 to $120 per day with proper diamond cup wheels. Most pros use a 16-inch planetary grinder with HEPA dust extraction, which rents at $150 to $300 per day.
Moisture is the other prep variable. Test the concrete with an ASTM F1869 calcium chloride test or F2170 in-situ RH probe. Slab moisture above 3 lb/1,000 sq ft/24 hr (calcium chloride) or 75% RH (probe) requires a moisture-mitigating primer like ARDEX MC Plus before any epoxy goes down.
Brand Spotlight: ArmorGarage and Polyaspartic Pros
For DIY 100% solids epoxy, ArmorGarage’s Armor Granite kit in Light Gray runs about $3.50 per square foot in materials and includes the base coat, color chips, and a clear topcoat. The 20 mil dry-film thickness from the two coats holds up to hot-tire pickup, which is the failure mode that kills most cheaper epoxies. For pro installation, look for a contractor using PPG Pittsburgh Paints AmerPoly 90 polyaspartic over a 100% solids epoxy base, which delivers a 20 mil total system that cures in 24 hours and accepts foot traffic the next morning.
Pros That Win the Job
- Genuinely chemical-resistant against gasoline, oil, brake fluid, battery acid, and most household cleaners
- Impact-resistant; a wrench dropped from 6 feet won’t crack a properly applied 20-mil system
- Cleanable with just a hose and squeegee
- Lightens the space significantly versus bare concrete (LRV around 35 to 45 for medium gray)
- Antibacterial and seamless, which matters in food prep and pet areas
Cons You Need to Plan For
Slip resistance is the biggest concern. Smooth epoxy under water hits DCOF as low as 0.25, which is well below the 0.42 minimum for wet interior floors. Add aluminum oxide or silica grit to the topcoat for wet areas. The grit reduces visual depth slightly but transforms slip performance.
Cure time for the 100% solids systems requires the floor to be empty for 5 to 7 days. For garages, that means parking the cars on the street through the install week. For a basement project, allow a week off the floor entirely.
Repair is feasible but visible. Spot repairs in flake systems blend reasonably well because the chips hide the patch boundary. Solid color repairs almost always show as a slightly different shade because of UV exposure differences on the original coat.
Application Tips for DIY Success
- Work in 60°F to 85°F ambient temperature with concrete temp above the dew point
- Mix the two components for the full 3 minutes the manufacturer specifies; under-mixed batches cure soft
- Roll the base coat with a 1/4-inch nap phenolic roller, then broadcast flakes to refusal within 10 minutes
- Sweep loose flakes after 24 hours and apply the topcoat within the manufacturer’s recoat window
- Stagger pot life by mixing only one gallon at a time in 75°F+ conditions
Where Grey Epoxy Fits Best
Best fits: residential garages, basements, workshops, laundry rooms, commercial kitchens, breweries, and showrooms. Trickier fits: outdoor patios (UV degrades standard epoxy fast; specify polyaspartic), bathrooms (slip and moisture concerns), and main-floor living areas where the industrial look may not coordinate with the rest of the home.
For most residential garage projects, the right answer is a 100% solids epoxy base with a gray flake broadcast and a polyaspartic clear topcoat installed by a pro. That system runs $5 to $8 per sq ft, lasts 15 to 20 years, and looks better at year five than most painted floors look at year one.