Tired of grout lines that look dingy no matter how hard you scrub? A grout colorant may be the most cost-effective upgrade you can make to a tiled floor, shower, or backsplash. Rather than ripping out tile or regrouting, you apply a pigmented coating directly over the existing grout, restoring an even color and, with many products, sealing the surface at the same time. The result can make a fifteen-year-old bathroom read as freshly renovated for a fraction of the cost.
This guide explains how colorant works, when it is the right call, how to apply it cleanly, and the safety steps that keep the project pleasant rather than fume-filled.
What Grout Colorant Is and How It Works
Colorant, sometimes sold as grout stain or grout paint, is a pigmented liquid formulated to bond to cementitious grout. Most products are acrylic or epoxy-based. When you brush it into the grout joint, the pigment penetrates the porous surface and cures into a uniform, sealed film. Because it bonds chemically and physically, a properly applied coat resists the staining and discoloration that plagued the original grout.
One important distinction: colorant works on traditional cement-based grout, which is porous. It generally will not adhere to epoxy grout, which is non-porous and already sealed. If a drop of water beads on your grout instead of soaking in, test an inconspicuous spot first or skip the product entirely.
Why Homeowners Choose It
The appeal comes down to cost, time, and flexibility. Regrouting a shower can run several hundred dollars in labor and take a couple of days; colorant is a weekend project with materials often under fifty dollars. Beyond economics, it offers benefits that fresh grout cannot:
- It seals porous grout, reducing future staining and mildew.
- It unifies blotchy, unevenly stained lines into one consistent shade.
- It lets you change the color entirely, going from beige to charcoal for a modern look.
- It is far less messy and disruptive than demolition.
When It Is the Wrong Choice
Colorant is a finish, not a structural repair. If grout is cracking, crumbling, or missing in chunks, you have a failed joint that needs to be raked out and replaced before any color goes on. Painting over deteriorating grout only hides a problem that will keep spreading. Likewise, active mold growing behind tile or persistent leaks call for fixing the moisture source first. Use colorant to renew sound grout, not to mask damage.
Preparing the Surface
Adhesion is everything, and adhesion depends on a clean joint. Plan to spend more time prepping than applying. Work through these steps:
- Deep clean the grout with an alkaline grout cleaner; remove all soap scum, grease, and film.
- Address any mildew with an appropriate cleaner and let the area dry completely.
- Scrub the lines with a stiff nylon or grout brush to open the surface.
- Rinse thoroughly and allow the grout to dry for at least 24 hours; trapped moisture ruins adhesion.
- If the grout was previously sealed, strip the sealer so colorant can penetrate.
Tape off or protect any natural-stone tile nearby, since pigment can stain porous stone permanently.
How to Apply Grout Colorant
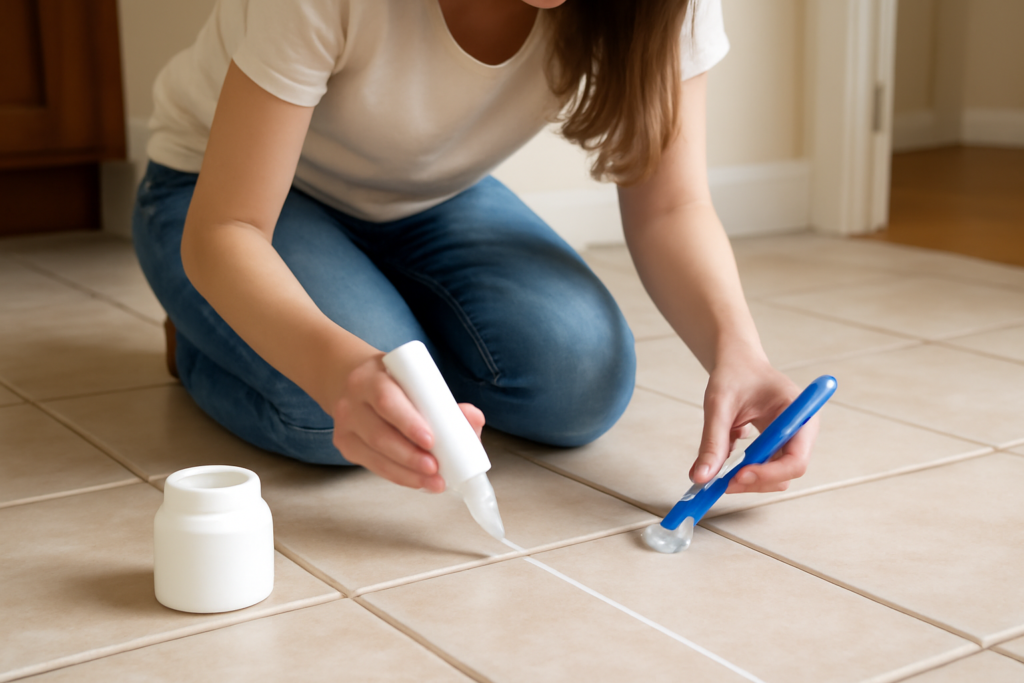
Patience and a steady hand produce the best result. Most kits include a small applicator brush, but many pros prefer a fine artist’s brush or a dedicated grout-coloring tool for tight control.
- Shake or stir the product thoroughly to suspend the pigment.
- Work a manageable area, roughly a few square feet at a time.
- Brush the colorant into the joint, following the line so you do not flood the tile.
- Let it dwell briefly per the label, then wipe excess off the tile face with a damp sponge or cloth before it cures.
- Use a clean toothbrush to even out coverage and catch missed spots.
- Apply a second coat if needed once the first has dried, especially when going darker.
Wipe-off timing is the make-or-break step. Wait too long and you will be scrubbing dried film off the tile; rush it and you will smear the joint. Practice on a hidden area to learn the working window for your specific product.
Curing, Durability, and Maintenance
Most colorants are dry to the touch within an hour or two but need a full cure before exposure to water. For shower floors and walls, that often means staying dry for 24 to 72 hours; check the manufacturer’s instructions, because cure time drives the warranty. Once cured, a quality colorant can last several years, often outlasting unsealed original grout. Maintain it with pH-neutral cleaners and skip harsh acids or abrasive pads, which can wear the film prematurely. When it does eventually fade in high-traffic spots, you can usually touch up rather than redo the whole area.
Choosing the Right Color
Color choice changes the entire feel of a tiled surface, so it is worth a little thought before you commit. Matching the existing grout shade gives a clean refresh that looks original, which is the safe default for most refreshes. Going darker is a popular move because deeper tones hide future staining and read as more modern, turning a dated beige floor into something contemporary. Going lighter is possible but trickier, since pigment must fully cover the old darker color and may need a second coat.
Keep a few practical points in mind. Darker grout makes individual tiles stand out and emphasizes the grid pattern, while a close color match makes the surface feel more seamless. On floors, mid-tone and darker colors stay looking clean far longer than pale shades. Always test your chosen color on a small, hidden section first and let it cure, because grout color often dries a shade different from how it looks wet.
Cost and Time Compared to Alternatives
Part of the appeal is how the numbers stack up against the alternatives. Consider the rough comparison:
- Colorant: materials often under $50 for a typical bathroom, a weekend of DIY labor, and the bonus of a fresh seal.
- Regrouting: raking out and replacing grout costs more in time and materials and is far more labor-intensive.
- Retiling: full demolition and new tile runs into the thousands and takes days.
For sound grout that is simply discolored, colorant delivers the biggest visual improvement per dollar of any of these options. Just remember the trade-off: it is a surface treatment, so the long-term result depends entirely on the quality of your cleaning and prep before the color ever goes on.
Safety and Ventilation
Treat any grout colorant as the chemical product it is. Open windows and run a fan to keep air moving, especially in a small bathroom. Wear nitrile gloves to keep pigment off your skin, and use eye protection when working overhead in a shower. Keep the room ventilated through the curing period, follow the label’s reentry and cleanup guidance, and store leftovers away from children and pets. If a product calls for a respirator, do not skip it. Always test a small, inconspicuous area first to confirm color and adhesion before committing to the whole room.
For most homeowners, colorant is a forgiving, high-impact project. Spend your effort on cleaning and prep, respect the wipe-off window, and you will get a crisp, uniform finish that makes the entire tiled surface look new again.