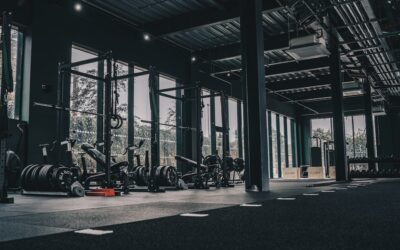
Gym rubber flooring protects your subfloor, reduces noise, absorbs impact, and gives you a stable surface for every type of workout. Whether you are building a home gym in the garage or outfitting a commercial fitness center, rubber flooring is the industry standard for good reason.
This guide covers every format of rubber flooring, the thickness you actually need, cost expectations, and installation methods so you can make a confident buying decision.
Why Rubber Is the Top Choice for Gyms
Rubber has properties that no other flooring material can match in a gym environment. It absorbs shock from dropped weights, provides excellent traction even when wet with sweat, and bounces back from heavy impacts without cracking or deforming.
Beyond performance, rubber flooring dampens sound transmission to rooms below, which matters enormously in home gyms above living spaces and in multi-story commercial buildings. It also protects expensive concrete or wood subfloors from the damage that heavy equipment would otherwise cause.
Once the floor can handle the impact, it’s time to fill the space. A solid storage box keeps bands, gloves, and smaller gear organized between sessions.
We may earn a commission when you purchase through our links.
Types of Gym Rubber Flooring
Rubber Rolls
Rubber rolls are the most popular choice for large gym spaces. They come in widths of four feet and lengths ranging from 15 to 50 feet. Roll installation creates fewer seams than tiles, which produces a cleaner look and reduces the chance of edges lifting.
Rolls are available in thicknesses from three-eighths of an inch to half an inch for general fitness use, and up to three-quarters of an inch for areas dedicated to heavy weightlifting. Most rolls are black with optional colored flecks in blue, red, green, or gray.
The main drawback is weight. A four-by-25-foot roll of three-eighths-inch rubber weighs over 100 pounds, which makes delivery and positioning a two-person job.
Interlocking Rubber Tiles
Rubber tiles use puzzle-piece edges that snap together without adhesive. Standard sizes are two feet by two feet or three feet by three feet, with thicknesses from three-eighths of an inch to one inch.
Tiles are easier to transport, install, and replace than rolls. If one section gets damaged, you can swap it out without affecting the rest of the floor. They are the preferred choice for home gyms where the space may need to serve other purposes later.
The seams between tiles can shift over time under heavy lateral movement, and dirt can accumulate in the joints. Placing tiles on a clean, flat surface and using a thin layer of adhesive at high-traffic areas minimizes these issues.
Rubber Mats
Rubber mats are standalone pieces designed for specific zones rather than wall-to-wall coverage. Common applications include deadlift platforms, under cardio equipment, and beneath squat racks.
Horse stall mats, which measure four feet by six feet and three-quarters of an inch thick, have become a cult favorite in the home gym community. They are extremely durable, widely available at farm supply stores, and cost less per square foot than purpose-built gym flooring. The trade-off is a strong rubber odor that can take weeks to dissipate and a rougher surface texture.
Rubber Pavers
Thick rubber pavers, typically one to two inches, are used under Olympic lifting platforms and in outdoor training areas. They provide the maximum shock absorption for heavy drops and can handle exposure to weather and UV light.
Choosing the Right Thickness
Thickness directly determines how much impact the floor absorbs and how well it protects the subfloor underneath.
Three-eighths inch (8mm). Suitable for cardio equipment, stretching, bodyweight exercises, and light dumbbell work. This is the minimum recommended thickness for a home gym with no heavy lifting.
Half inch (12mm). A good all-purpose thickness that handles moderate free weights, kettlebells, and machine-based training. Most commercial gym floors use this thickness in general fitness areas.
Three-quarters inch (19mm). Recommended for dedicated weightlifting zones where barbells and heavy dumbbells are dropped regularly. This thickness provides meaningful shock absorption and noise reduction.
One inch and above. Reserved for Olympic lifting platforms and CrossFit boxes where loaded barbells are dropped from overhead. Often combined with a plywood base layer for a proper lifting platform.
Rubber Flooring Costs
Gym rubber flooring is priced per square foot, and costs vary based on thickness, format, and brand.
Rubber rolls in three-eighths-inch thickness run one dollar and fifty cents to three dollars per square foot. Half-inch rolls cost two to four dollars. Three-quarter-inch rolls range from three to six dollars.
Interlocking tiles typically cost slightly more than rolls of the same thickness because of the added manufacturing for the interlocking edges. Expect to pay two to five dollars per square foot for standard tiles.
Horse stall mats remain the budget champion at roughly two dollars per square foot for three-quarter-inch thickness, though you sacrifice color options and may need to deal with the initial odor.
For a typical 200-square-foot home gym, budgeting 400 to 800 dollars for quality rubber flooring covers most scenarios.
Installation Guide
Subfloor Preparation
Rubber flooring can go over concrete, plywood, or existing hard-surface flooring. The surface must be clean, dry, and free of debris. Sweep and vacuum thoroughly before laying any rubber. On concrete, check for moisture by taping a plastic sheet to the floor and checking for condensation after 24 hours.
Installing Rubber Rolls
Unroll the rubber in the room and let it relax for 24 to 48 hours. The material will have a curl from being rolled, and this needs to flatten before securing. Cut to fit using a sharp utility knife with a straight edge.
In permanent installations, apply rubber flooring adhesive with a notched trowel across the subfloor, then roll the rubber into place and use a 75-pound floor roller to press out air bubbles and ensure full contact.
For semi-permanent home gyms, double-sided carpet tape at seams and perimeters often provides enough hold without the commitment of full adhesive.
Installing Interlocking Tiles
Start in one corner of the room and work outward. Connect tiles by aligning the interlocking edges and pressing or stepping them together. Cut border tiles to fit with a utility knife, though thicker tiles may require a jigsaw or oscillating tool.
No adhesive is needed for most interlocking tile installations. The weight of the rubber and the mechanical connection between tiles keep the floor stable.
Dealing with Rubber Odor
New rubber flooring has a noticeable smell that comes from volatile organic compounds in the vulcanized rubber. To speed up off-gassing, install the flooring in a well-ventilated space, run fans, and keep windows open for the first one to two weeks. The smell diminishes significantly within a month and is usually undetectable after two to three months.
Maintenance and Cleaning
Sweep or vacuum the floor regularly to remove grit and chalk dust. For deeper cleaning, mop with warm water and a mild detergent. Avoid petroleum-based cleaners, as they can degrade the rubber over time.
Disinfecting is important in commercial and shared gym spaces. A diluted vinegar solution or a rubber-safe gym floor cleaner works well for regular sanitizing. Rinse with clean water after disinfecting to prevent residue buildup.
Rubber flooring does not need sealing, waxing, or refinishing. With basic maintenance, it lasts ten to twenty years even under heavy commercial use.
Home Gym Flooring Layout Tips
Not every square foot of your gym needs the same level of protection. A zoned approach saves money and optimizes performance.
Weightlifting zone. Use three-quarter-inch or thicker rubber under squat racks, deadlift areas, and dumbbell stations. If you do Olympic lifts, build a lifting platform with two layers of plywood topped by thick rubber on the sides and a piece of finished wood in the center for stance grip.
Cardio zone. Three-eighths-inch rubber is sufficient under treadmills, bikes, and ellipticals. The primary purpose here is noise reduction and protecting the subfloor from vibration.
Stretching and bodyweight zone. Thin rubber or even a yoga mat over the gym floor is adequate. Some people prefer the bare rubber surface for floor exercises like planks and burpees.
Rubber Flooring vs. Alternatives
Foam tiles are cheaper and lighter than rubber but compress under heavy loads and wear out quickly. They are fine for yoga studios and children’s play areas but inadequate for serious strength training.
Vinyl flooring is easier to clean and available in more design options, but it dents under heavy equipment and does not absorb impact from dropped weights. Vinyl flooring works in light fitness rooms and dance studios but not in weightlifting environments.
Turf flooring is popular in functional training facilities for sled pushes and agility work. It is typically installed over a rubber underlayment, combining the traction of turf with the impact protection of rubber.
Concrete and epoxy flooring are durable and easy to clean, but they offer zero shock absorption and will crack under dropped weights. They work as a subfloor beneath rubber rather than as a standalone gym surface.
Final Thoughts
Gym rubber flooring is a straightforward investment that pays off every time you train. It protects your space, reduces noise, and provides the stable, grippy surface that safe and effective workouts require.
For most home gyms, half-inch interlocking tiles or rolls offer the best balance of protection, ease of installation, and cost. Upgrade to three-quarter-inch in any area where weights hit the floor. Get the thickness right, keep the floor clean, and your rubber gym flooring will outlast just about every other piece of equipment in the room.
Prefer to explore on your own?
See how new flooring looks in your actual room in seconds — free, no signup.
Try the free Floor Studio →