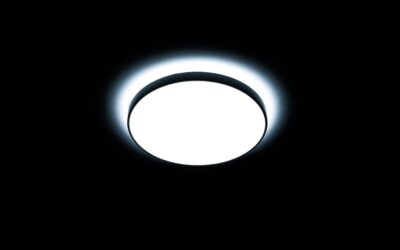
The old way of adding recessed lights meant fitting bulky metal housings between joists, often impossible in a finished ceiling. Halo canless recessed lighting changed that by combining the LED, the trim, and the junction box into one slim disc that clips into a simple hole in the drywall. Because Halo canless recessed lighting needs no separate can and only about half an inch of clearance, it has become the go-to upgrade for remodels, low ceilings, and anyone who wants a clean, modern lighting layout without tearing the ceiling apart. Here is everything you need to know.
What Makes Canless Different
Traditional recessed lighting uses a metal housing, or can, mounted to the framing, into which you install a separate trim and bulb. Canless fixtures, sometimes called wafer or ultra-thin lights, integrate everything into a low-profile LED disc with an attached junction box that hangs above the ceiling. You cut a hole, wire the small box, and snap the disc into place with spring clips.
The advantages are significant. Canless units fit where a bulky housing never could, above ducts or in a shallow ceiling cavity. They seal tightly against air leaks, many are rated for insulation contact and airtight installation, and there are no bulbs to replace since the LED is integrated for the life of the fixture. Halo, a brand under the Eaton lighting umbrella, is one of the most widely stocked and trusted names in this category.
Popular Halo Canless Models
Halo offers several canless lines suited to different needs and budgets.
- Halo HLB series: the flagship, available in 4-inch and 6-inch sizes with selectable color temperature and smooth dimming. A staple for whole-home installs.
- Halo HLB Ultra-Thin: the slimmest profile for the tightest ceilings, with a snap-in junction box.
- Halo RL series retrofit: modules that fit into existing 5- and 6-inch cans if you already have housings.
- Halo Home smart models: Wi-Fi and app-controllable versions for tunable color and scheduling.
Most homeowners choose the HLB 6-inch for general room lighting and the 4-inch for hallways, accents, and smaller spaces. Prices run roughly $18 to $40 per fixture depending on size and features.
Color Temperature Selectable Feature
One of the best features on Halo canless lights is CCT selectability. A small switch on the fixture lets you choose the color temperature at installation, typically among 2700K, 3000K, 3500K, 4000K, and 5000K. That means you buy one product and dial in the exact warmth each room needs.
Pick 2700K to 3000K for living rooms and bedrooms where you want cozy warmth, 3500K for a versatile neutral, and 4000K for kitchens, bathrooms, and workspaces where crisp light helps. Set every fixture in a room to the same value for a uniform look. Halo fixtures also carry a high CRI, generally 90 or above, so colors and skin tones render naturally.
Dimming and Compatibility
Halo canless lights are dimmable, but as with any LED, the dimmer must be compatible or you will see flicker. Halo publishes a dimmer compatibility list, and pairing their fixtures with a matched dimmer such as a Lutron Diva LED or a Leviton Decora LED model gives smooth dimming down to low levels.
Confirm the dimmer’s minimum load can handle the small wattage of a few LEDs, since some dimmers need more load than a couple of canless discs draw. If lights flicker at the low end, swapping to a reverse-phase LED-rated dimmer usually cures it. For smart control, the Halo Home line works with app scheduling and voice assistants without a separate hub in many cases.
Installing Halo Canless Lights
Installation is genuinely DIY-friendly, one of the biggest reasons canless fixtures took off.
- Turn off the breaker and confirm the circuit is dead with a voltage tester.
- Use the included template to mark and cut the hole with a hole saw or drywall saw, 4 inches or 6 inches to match the fixture.
- Reach into the ceiling, pull the supply cable to the fixture’s junction box, and connect black to black, white to white, and ground to ground inside the box.
- Tuck the junction box up into the ceiling cavity beside the hole.
- Fold the spring clips on the LED disc, push it up into the hole until the clips grab and the trim sits flush against the ceiling.
- Restore power and test, checking your CCT switch setting looks right.
The whole process takes about 15 to 30 minutes per light once you have a rhythm, far faster than mounting traditional cans. Just match the wire gauge to your circuit and never overload the dimmer.
Pros, Cons, and Cost
Halo canless lighting has clear strengths and a few limitations worth weighing.
- Pros: ultra-slim fit, fast install, no bulbs to replace, airtight and IC-rated options, selectable color, energy-efficient at 9 to 15 watts.
- Cons: the whole fixture must be replaced if the integrated LED ever fails, and beam spread is fixed compared with adjustable trims in traditional cans.
For cost, budget $18 to $40 per fixture plus $25 or so for a compatible dimmer. A typical room with six lights runs $150 to $300 in materials for a DIY install. Professional installation adds roughly $75 to $150 per fixture. Given the speed of installation and the 20-plus year rated LED life, Halo canless recessed lighting delivers strong value and a clean, modern ceiling for most homes.
Sizing and Spacing Halo Fixtures
Getting the layout right is as important as choosing the fixture. Six-inch Halo lights suit general room illumination in spaces with 8- to 10-foot ceilings, while 4-inch units work better for hallways, accent lighting, and smaller rooms. A useful spacing rule divides the ceiling height by two: for an 8-foot ceiling, place fixtures about 4 feet apart; for a 10-foot ceiling, roughly 5 feet apart. Keep the outermost fixtures 2 to 3 feet from the walls to avoid harsh shadows and to gently wash the vertical surfaces.
Plan brightness by the room. Aim for roughly 20 to 30 lumens per square foot, so a 200-square-foot living room wants somewhere near 4,000 to 6,000 total lumens. A Halo HLB6 puts out around 900 to 1,200 lumens depending on the setting, so five or six fixtures typically cover an average room. Sketch the ceiling first, marking joists, ducts, and plumbing you must avoid, and stagger fixtures around obstructions rather than forcing a rigid grid that collides with a beam.
Airtight and Insulation Ratings
One reason Halo canless fixtures perform well is their sealing. Many models are rated airtight, which stops conditioned air from leaking through the fixture into the attic, and IC-rated, meaning they can sit in direct contact with blown-in or batt insulation without a fire risk. Together these ratings matter most on a top-floor ceiling below an attic, where a leaky, non-IC fixture would waste energy and create a hot spot in the insulation.
When shopping, confirm the specific model carries both the airtight and IC ratings if it will sit under insulation. Halo’s HLB and Ultra-Thin lines generally do, but always read the label. Choosing sealed, IC-rated fixtures keeps your heating and cooling bills down and satisfies energy codes in most jurisdictions, an easy win that also improves comfort.
Smart and Tunable Options
Beyond basic selectable-white fixtures, Halo offers smart models that add real flexibility. The Halo Home line lets you control color temperature, brightness, and schedules from a phone app, and many versions integrate with voice assistants for hands-free control. You can warm the lights to a cozy 2700K in the evening and shift them to a crisp 4000K for morning tasks, all without changing a bulb or a switch.
Tunable white fixtures are especially valuable in multipurpose rooms, an open kitchen and living area or a home office that doubles as a guest room. Rather than committing to one color at install, you dial the mood to fit the moment. The smart versions cost a bit more, but for a space where lighting needs change throughout the day, the ability to tune color and set scenes makes Halo canless fixtures feel genuinely modern and future-proof.