Herringbone LVT flooring combines one of the most timeless floor patterns in design history with the practicality and affordability of luxury vinyl tile. The result is a floor that looks like it belongs in a high-end showroom but performs beautifully in kitchens, bathrooms, and busy family homes. Whether you want a classic oak herringbone or a bold grey slate look, LVT makes it more accessible than ever.
- What Is Herringbone LVT Flooring?
- Benefits of Herringbone LVT Flooring
- 1. Affordable Elegance
- 2. Waterproof Performance
- 3. Durability and Easy Maintenance
- 4. Comfortable Underfoot
- 5. Design Versatility
- Top Brands for Herringbone LVT Flooring
- Installation Methods for Herringbone LVT
- Herringbone vs. Chevron: Understanding the Difference
- Design Ideas for Herringbone LVT Flooring
- Pricing and Cost Breakdown
- Maintenance Tips for Herringbone LVT
- Frequently Asked Questions
- Is herringbone LVT suitable for underfloor heating?
- Can I install herringbone LVT myself?
- How long does herringbone LVT last?
- Does the herringbone pattern make a room look bigger or smaller?
- Final Thoughts
In this guide, we cover everything you need to know about herringbone LVT flooring, from how it differs from LVP herringbone to the top brands on the market, installation methods, pricing, and room-by-room design ideas.
What Is Herringbone LVT Flooring?
Herringbone is a pattern where rectangular tiles or planks are arranged in a staggered zigzag formation, with each piece meeting the next at a 90-degree angle. The pattern has been used in architecture for centuries, from ancient Roman roads to Parisian apartments. Traditional herringbone floors were made from solid hardwood or natural stone, but modern manufacturing has brought the look to luxury vinyl tile.
LVT, or luxury vinyl tile, is a type of resilient flooring made from multiple layers of PVC and printed with high-definition photographic images that replicate the appearance of wood, stone, or other natural materials. When cut into shorter, narrower pieces and installed in a herringbone arrangement, LVT creates a convincing and durable version of the classic pattern.
Herringbone LVT vs. LVP Herringbone: What Is the Difference?
The terms LVT and LVP (luxury vinyl plank) are often used interchangeably, but there is a subtle distinction. LVT typically refers to tile-format pieces that can mimic stone or wood, while LVP specifically refers to plank-format pieces designed to look like wood. For herringbone patterns, the distinction matters because:
- Herringbone LVT usually comes in shorter, narrower rectangular pieces specifically sized for herringbone installation, often around 6 inches by 24 inches or similar proportions.
- Herringbone LVP may refer to longer planks that are installed in a herringbone or chevron pattern, though these require more cutting and waste.
- Some manufacturers sell dedicated herringbone collections where the planks are pre-cut to the correct size and include click-lock systems designed for angled installation.
In practice, most homeowners shopping for a vinyl herringbone floor will find what they need labeled as either LVT or LVP. The key is to look for products specifically designed for herringbone installation rather than trying to force standard planks into the pattern.
Benefits of Herringbone LVT Flooring
There are several reasons herringbone LVT has surged in popularity over the past few years. Here are the main advantages:
1. Affordable Elegance
Real hardwood herringbone flooring typically costs $8 to $15 per square foot for materials alone, and professional installation can push the total to $15 to $25 per square foot. Herringbone LVT, by contrast, generally runs $3 to $7 per square foot for materials, with installation costs of $3 to $6 per square foot. You get a similar visual impact at a fraction of the cost.
2. Waterproof Performance
Unlike hardwood, LVT is fully waterproof. The PVC core does not absorb moisture, which means herringbone LVT can be installed in kitchens, bathrooms, laundry rooms, and basements without worry. This is a major advantage over real wood herringbone, which can warp and cup when exposed to moisture.
3. Durability and Easy Maintenance
Quality herringbone LVT features a wear layer ranging from 12 mil to 28 mil, protecting the printed design from scratches, scuffs, and daily wear. Cleaning requires nothing more than regular sweeping and occasional mopping with a pH-neutral cleaner. There is no need for sanding, refinishing, or waxing.
4. Comfortable Underfoot
LVT is softer and warmer underfoot than real tile or stone. Many herringbone LVT products include an attached underlayment or cork backing that adds cushion and sound absorption, making them comfortable to walk on even in bare feet.
5. Design Versatility
The photographic printing process means herringbone LVT is available in virtually any look: light oak, dark walnut, whitewashed pine, grey stone, marble, and more. This flexibility allows the herringbone pattern to work in traditional, modern, farmhouse, Scandinavian, and industrial interiors.
Top Brands for Herringbone LVT Flooring
Not all herringbone LVT is created equal. Here are some of the most respected brands offering dedicated herringbone collections:
Karndean
Karndean is one of the most recognized names in luxury vinyl, and their Art Select and Knight Tile collections include multiple herringbone options. Karndean herringbone planks are typically glue-down, which provides a very stable and professional finish. Their wood-look designs are exceptionally realistic, with hand-scraped textures and beveled edges. Prices generally range from $4 to $7 per square foot.
Amtico
Amtico is a premium UK-based brand that offers some of the most lifelike herringbone LVT on the market. Their Spacia and Signature collections feature planks specifically cut for herringbone and parquet patterns. Amtico products are glue-down and often specified for commercial projects due to their durability. Expect to pay $5 to $9 per square foot.
COREtec
COREtec offers herringbone options within their Plus and Pro lines. These feature a rigid SPC core with an attached cork underlayment, making them suitable for floating installation. This is a good choice if you want click-lock herringbone without the complexity of glue-down. Prices range from $3.50 to $6 per square foot.
Mannington
Mannington’s ADURA Max collection includes herringbone-compatible pieces in several wood tones. The rigid core construction and HydroLoc waterproof technology make these a solid performer in moisture-prone areas. Pricing falls in the $4 to $6 per square foot range.
LifeProof (Home Depot)
For a budget-friendly option, LifeProof offers herringbone LVT through Home Depot. While the designs may not be as detailed as Karndean or Amtico, they provide a good entry point for homeowners on a tighter budget, typically $2.50 to $4 per square foot.
Installation Methods for Herringbone LVT
Installing herringbone LVT is more complex than standard stagger-pattern vinyl because each piece must be placed at a precise angle. There are two primary installation methods:
Glue-Down Installation
Glue-down is the traditional method for herringbone LVT and is preferred by many professionals. Each tile is adhered directly to the subfloor using a pressure-sensitive or full-spread adhesive. Benefits include a very stable floor with no movement, a thinner profile (good for transitions to other flooring), and compatibility with underfloor heating systems. The downside is that glue-down requires a perfectly smooth, clean, and level subfloor, and the process is more labor-intensive.
Click-Lock Floating Installation
Some manufacturers, such as COREtec, offer herringbone LVT with a click-lock system that allows floating installation over an existing subfloor. This is faster and more DIY-friendly, but the click mechanism must be specifically engineered for angled herringbone placement. Not all click-lock systems support this, so always confirm with the manufacturer before purchasing.
Installation Tips
- Start from the center: Snap a chalk line down the center of the room and begin laying tiles outward from this line to ensure the pattern is symmetrical.
- Dry lay first: Arrange several rows without adhesive to check the pattern alignment and plan your cuts along the walls.
- Maintain consistent spacing: Use spacers to keep the gap between tiles uniform, typically 1 to 2 millimeters for glue-down or as specified by the manufacturer.
- Acclimate the tiles: Leave the LVT in the room for at least 48 hours before installation to allow it to adjust to the temperature and humidity.
- Use a sharp utility knife: LVT cuts cleanly with a score-and-snap method. A sharp blade ensures precise cuts for the angled edges at the walls.
Herringbone vs. Chevron: Understanding the Difference
Herringbone and chevron patterns look similar at first glance but are distinct. In a herringbone pattern, rectangular pieces are laid at 90-degree angles so the end of one piece meets the side of the next, creating a staggered zigzag. In a chevron pattern, the ends of each piece are cut at an angle (usually 45 degrees) so they meet in a continuous V shape along a straight line.
Chevron creates a cleaner, more uniform zigzag, while herringbone has a more traditional, textured look. Most LVT herringbone products are cut as standard rectangles for herringbone installation. If you want a chevron pattern, you will need pieces with angled ends, which are less common in LVT but available from some premium brands.
Design Ideas for Herringbone LVT Flooring
The herringbone pattern works in virtually every room, but the look changes significantly depending on the color, material, and surrounding decor.
Living Rooms
A warm oak or natural walnut herringbone LVT adds character and movement to living rooms. Pair it with neutral walls and simple furniture to let the floor be the focal point. The pattern visually expands the space, making it a good choice for smaller living areas.
Kitchens
Grey or greige herringbone LVT is extremely popular in kitchens, especially when paired with white or light-colored cabinetry. The waterproof properties of LVT make it ideal for kitchens where spills are inevitable. Consider running the herringbone pattern perpendicular to the longest wall to create a sense of width.
Bathrooms
Herringbone LVT in a stone or marble look transforms bathrooms into spa-like spaces. A light Carrara marble effect or warm travertine tone adds luxury without the cold feel or maintenance demands of real stone. Ensure the product has a textured surface for slip resistance in wet areas.
Entryways and Hallways
Herringbone is a classic choice for entryways because it creates an immediate sense of style and craftsmanship. A dark wood tone or high-contrast pattern makes a strong first impression. The durable wear layer of LVT handles the heavy foot traffic that entryways receive.
Bedrooms
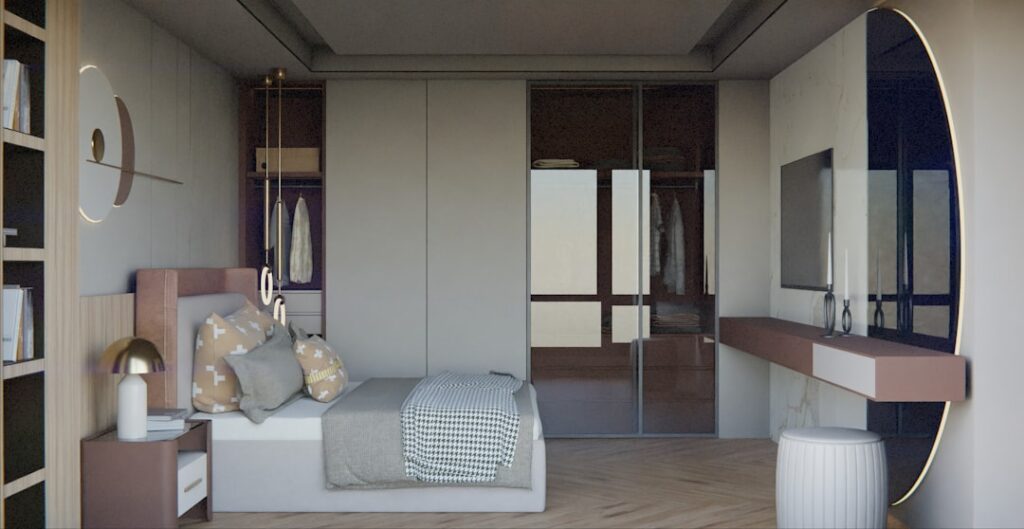
For bedrooms, consider lighter herringbone LVT in whitewashed or blonde wood tones. These create a calm, airy atmosphere. The softness of LVT underfoot is an added bonus for bedrooms where you frequently walk barefoot.
Pricing and Cost Breakdown
Here is a general pricing guide for herringbone LVT flooring in 2026:
- Budget options (LifeProof, TrafficMaster): $2.50 to $4.00 per square foot
- Mid-range options (COREtec, Mannington, MSI): $3.50 to $6.00 per square foot
- Premium options (Karndean, Amtico): $5.00 to $9.00 per square foot
- Professional installation: $3.00 to $7.00 per square foot (herringbone costs more to install than standard patterns due to the complexity)
- DIY click-lock installation: Saves $3 to $5 per square foot on labor
For a typical 300-square-foot room, total costs including materials and professional installation range from approximately $1,650 to $4,800 depending on the product and installer.
Maintenance Tips for Herringbone LVT
Keeping herringbone LVT looking its best is straightforward:
- Sweep or vacuum regularly to remove grit and debris that can scratch the wear layer over time.
- Mop with a damp mop and a pH-neutral vinyl floor cleaner. Avoid harsh chemicals, bleach, or abrasive scrubbers.
- Place felt pads under furniture legs to prevent indentation, especially on thinner LVT products.
- Use doormats at entrances to reduce the amount of dirt tracked onto the floor.
- Wipe up spills promptly, even though the floor is waterproof, to prevent residue buildup.
- Avoid dragging heavy furniture or appliances across the floor. Lift items or use furniture sliders.
Frequently Asked Questions
Is herringbone LVT suitable for underfloor heating?
Yes, most herringbone LVT is compatible with underfloor heating systems. Glue-down products typically perform best with radiant heat because the adhesive bond ensures efficient heat transfer. Always check the manufacturer’s guidelines for maximum surface temperature, which is usually 80 to 85 degrees Fahrenheit.
Can I install herringbone LVT myself?
Click-lock herringbone LVT is DIY-friendly for experienced home improvers, though it requires patience and careful planning. Glue-down herringbone is more challenging and generally recommended for professional installation. Either way, expect the project to take longer than a standard plank layout.
How long does herringbone LVT last?
Quality herringbone LVT with a wear layer of 20 mil or more typically lasts 15 to 25 years in residential settings. Budget products with thinner wear layers may show signs of wear after 8 to 12 years, especially in high-traffic areas.
Does the herringbone pattern make a room look bigger or smaller?
Herringbone generally makes rooms appear larger because the zigzag pattern draws the eye along the length of the room, creating a sense of movement and depth. The effect is strongest with lighter colors and in rooms with good natural light.
Final Thoughts
Herringbone LVT flooring delivers one of the most stylish looks in interior design at a price point that suits most budgets. With waterproof performance, easy maintenance, and realistic wood and stone visuals, it is a practical choice for every room in the house. Whether you opt for a premium brand like Karndean or a budget-friendly option from LifeProof, the key is to choose a product specifically designed for herringbone installation and to plan your layout carefully before you begin. The result is a floor that looks far more expensive than it actually is.
Prefer to explore on your own?
See how new flooring looks in your actual room in seconds — free, no signup.
Try the free Floor Studio →