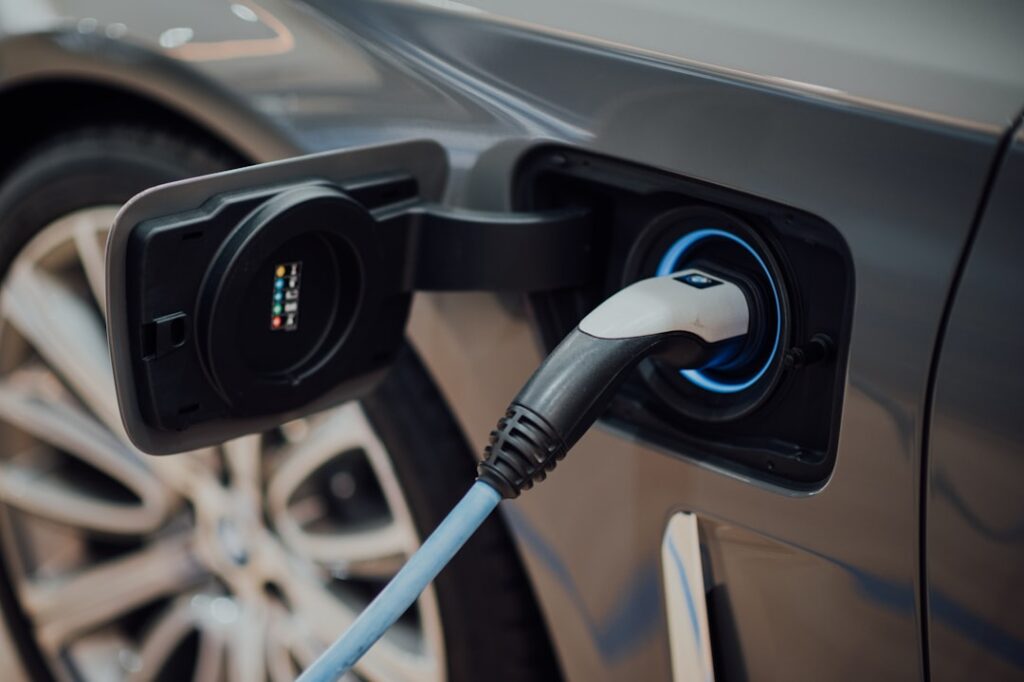
Plugging your electric car into a standard wall outlet works, but it’s painfully slow — roughly 3 to 5 miles of range per hour. A proper home EV charger installation on a 240-volt circuit changes everything, delivering 25 to 40 miles of range per hour so you wake up to a full battery every morning. Getting there means more than mounting a box on the wall, and home EV charger installation done right involves a licensed electrician, a permit, and a hard look at your electrical panel.
- Level 1 vs. Level 2: What You Actually Need
- What Home EV Charger Installation Costs
- Why You Need a Licensed Electrician and a Permit
- The Panel Load Calculation You Can’t Skip
- Hardwired vs. Plug-In: Which to Choose
- Step-by-Step: What the Install Looks Like
- Rebates and Tax Credits Worth Chasing
- Picking the Right Charger
- Where to Mount It and Common Layout Mistakes
- Renting or Selling? Read This First
- The Bottom Line
Level 1 vs. Level 2: What You Actually Need
There are two realistic ways to charge at home. Level 1 uses the cordset that ships with the car and plugs into a regular 120-volt household outlet, pulling about 12 amps. It adds only 3 to 5 miles of range per hour — fine for a plug-in hybrid or a low-mileage commuter, but agonizing for a 300-mile battery-electric vehicle.
Level 2 is what most owners want. It runs on a 240-volt circuit, typically wired for 40 or 50 amps, and delivers roughly 25 to 40 miles of range per hour depending on the unit and your car’s onboard charger. A dead-empty battery is full in 6 to 10 hours overnight. That’s the sweet spot for daily driving, and it’s why nearly every serious buyer installs a Level 2 station.
What Home EV Charger Installation Costs
Budget $800 to $2,500 installed for a hardwired Level 2 charger, all-in. The spread depends almost entirely on how far the charger sits from your electrical panel and whether your panel can handle the load. Here’s how the money breaks down:
- The charging unit (EVSE): $350 to $750 for a quality 40- to 48-amp station. Popular models run $400 to $600.
- Electrician labor: $300 to $1,200. A short run from a panel in an attached garage is cheap; fishing conduit across the house or trenching to a detached garage is not.
- Wire, conduit, and a breaker: $100 to $400 in materials. Copper wire priced for 50 amps isn’t cheap, and longer runs need thicker gauge.
- Permit and inspection: $50 to $250, depending on your city.
Where it climbs: if the run exceeds 40 or 50 feet, or the electrician has to open finished walls, expect labor toward the top. If your panel is full or undersized, add-ons can push the total to $3,000 or more.
Why You Need a Licensed Electrician and a Permit
This is the part people want to skip, and it’s the part you shouldn’t. A Level 2 charger draws 32 to 48 continuous amps — one of the largest sustained loads in a typical home. Wired wrong, it’s a fire hazard sitting in your garage overnight.
The National Electrical Code covers EV charging under NEC Article 625. A hardwired 40- to 50-amp circuit requires a dedicated breaker, correctly sized copper conductors, proper conduit, and in many cases a GFCI-protected or listed disconnect. A licensed electrician sizes all of it, pulls the permit, and schedules the inspection. That inspection isn’t bureaucratic busywork — it’s your confirmation the work is safe, and it protects your homeowner’s insurance claim if anything ever goes wrong. Many utilities also require a permit before they’ll approve an EV charging rebate.
The Panel Load Calculation You Can’t Skip
Before anyone runs wire, the electrician performs a load calculation to confirm your service can absorb the new circuit. Most homes have a 100-amp or 200-amp main panel. A 200-amp panel usually swallows a 50-amp EV circuit without complaint. A 100-amp panel, especially one already feeding electric heat, an electric range, a dryer, and central AC, may not have the headroom.
If the calculation comes up short, you have options:
- Dial the charger down. Most Level 2 units let you set a lower amperage — say 32 amps on a 40-amp circuit — which trims the load while still charging fast overnight.
- Install a load-management device. These monitor total household draw and throttle the charger when the house is busy, often avoiding a panel upgrade entirely.
- Upgrade the panel or service. Going from 100 to 200 amps runs $1,500 to $4,000 and sometimes involves the utility, but it future-proofs the home.
Hardwired vs. Plug-In: Which to Choose
You can hardwire the charger directly into the circuit or plug it into a NEMA 14-50 outlet. Hardwiring is cleaner, supports higher amperage (48 amps and up), handles outdoor exposure better, and avoids a common failure point — cheap 14-50 outlets have overheated and melted under continuous EV loads.
A plug-in setup lets you unmount the unit and take it with you, and it’s slightly simpler to swap. But if you go that route, insist on an industrial-grade receptacle rated for continuous duty, not the $15 hardware-store outlet. For a permanent home station, most electricians recommend hardwiring on a 48-amp circuit if your panel allows it.
Step-by-Step: What the Install Looks Like
- Site walk and quote. The electrician checks your panel, measures the run to your parking spot, and does the load calc. Get an itemized quote.
- Permit pulled. Your electrician files with the local building department — usually a day or two.
- Circuit run. They install the breaker, run conduit and copper wire from the panel to the charger location, and mount the unit at about 48 inches off the floor.
- Termination and test. The charger is hardwired or the outlet installed, then energized and tested under load.
- Inspection. A city inspector signs off. Only then is the job legally complete.
Start to finish, a straightforward install is a half-day of work; inspection scheduling stretches the calendar to a week or two.
Rebates and Tax Credits Worth Chasing
Don’t pay full freight without checking incentives. The federal Alternative Fuel Infrastructure tax credit covers 30% of hardware and installation, up to $1,000 for homeowners in eligible (non-urban or low-income) census tracts. Many electric utilities add their own rebates — $100 to $500 is common — and some offer discounted overnight EV charging rates that cut your fuel cost to pennies per mile. Stack these and a $1,800 install can net out closer to $1,000.
Picking the Right Charger
Match the charger’s amperage to what your car and panel can use — a 48-amp unit is wasted on a car that accepts only 32 amps. Look for a UL-listed station, a cable long enough to reach either side of the car (a 24-foot cord saves headaches), and an outdoor rating (NEMA 4) if it’s mounted outside. Smart features like scheduled charging and app monitoring are genuinely useful for hitting off-peak rates, but they’re not worth a fire-sale on build quality.
Where to Mount It and Common Layout Mistakes
Placement seems obvious until you’ve lived with a bad one. Mount the unit within reach of your car’s charge port — remember that a Nissan Leaf ports up front, a Tesla ports rear-left, and a Ford at the front fender, so a charger jammed in the wrong corner can leave you draping a cable across the hood. Standard mounting height is 42 to 48 inches from the floor, high enough to keep the connector out of standing water and easy to grab.
Think about a two-car future too. If there’s any chance of a second EV, ask the electrician to size the circuit and leave conduit stubbed for a future second charger now, while the walls and the panel work are already open. It’s a fraction of the cost of coming back later. In a detached garage, factor a trench and buried conduit into the plan — that’s often the single biggest driver of a higher quote, sometimes adding $1,000 or more on its own.
Renting or Selling? Read This First
If you rent, you can’t just start drilling. Get written landlord approval, and consider a plug-in unit on an existing or added 240-volt outlet so you can unmount it and take it when you move. Some states have “right to charge” laws that ease approval in multi-unit buildings, but the electrical work still needs consent and a permit.
For homeowners, a permitted, inspected Level 2 charger is a genuine selling point as EV adoption climbs — buyers increasingly look for it, much like they look for a finished garage. Keep the permit paperwork and inspection sign-off; it documents that the work was done to code, which matters at closing and for insurance.
The Bottom Line
A home EV charger is one of the higher-value upgrades you can make for an electric car, turning overnight parking into a full tank every morning. Budget $800 to $2,500, hire a licensed electrician, get the permit and load calculation, and let the inspector sign off. Skip the incentives and you leave real money on the table; skip the permit and load calc and you’re gambling with the largest continuous electrical load in your house. Do it right once and you can forget about it for the life of the car.