Combining tile and wood flooring in the same space is one of the most impactful design decisions you can make — and one of the trickiest to execute well. I’ve been installing mixed-material floors for over 20 years, and I can tell you that the difference between a stunning tile-to-wood transition and an awkward one comes down to planning, material selection, and transition execution. Get those three elements right, and you create a floor that looks intentional and sophisticated. Get them wrong, and you end up with a visual speed bump that disrupts the entire room.
- Table of Contents
- Why Combine Tile and Wood Flooring
- Planning the Layout
- Transition Options Between Tile and Wood
- T-Molding Transition Strips
- Flush (Seamless) Transitions
- Metal Transition Strips
- Creative Transitions
- Threshold and Reducer Strips
- Getting the Heights Right
- Best Design Combinations
- Wood Tone + White or Gray Tile
- Dark Wood + Patterned Tile
- Light Wood + Large-Format Tile
- Matching Tones
- Contrasting Styles
- Creative Layout Ideas
- The Kitchen Island Boundary
- The Diagonal Transition
- The Hexagon Scatter
- The Curved Transition
- The Rug Pattern
- Material Selection Tips
- Installation Process
- Step 1: Plan and Mark
- Step 2: Prepare the Substrate
- Step 3: Install Tile
- Step 4: Install Transition
- Step 5: Install Wood
- Step 6: Finish and Seal
- Common Mistakes to Avoid
- Ignoring Height Differences
- Placing Transitions in High-Traffic Paths
- Choosing Clashing Materials
- Forgetting Expansion Gaps
- Inconsistent Grout Color
- Cost Considerations
- Frequently Asked Questions
- Where should the transition between tile and wood flooring be placed?
- Can you do a seamless transition between tile and wood without a transition strip?
- What is the best tile to pair with hardwood flooring?
- How do you handle the height difference between tile and hardwood?
- Does combining tile and wood flooring increase home value?
In this guide, I’ll share everything I’ve learned about combining these two materials — from the practical considerations that most design blogs ignore to creative layout ideas that I’ve seen work beautifully in real homes.
Table of Contents
Why Combine Tile and Wood Flooring
There are both practical and aesthetic reasons to use two flooring materials in one space. Understanding your motivation will guide every decision that follows.
Practical Reasons
Wood flooring isn’t ideal for every area. Kitchens, bathrooms, mudrooms, and entryways expose floors to water, dirt, and heavy wear. Tile handles these conditions better than wood. By using tile in wet or high-abuse zones and wood in living areas, you get the best performance from each material where it matters most.
Design Impact
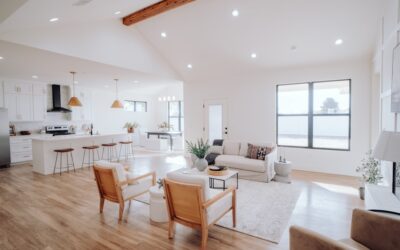
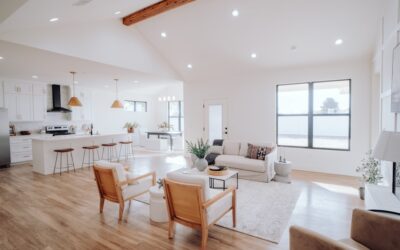
Mixing materials creates visual zones within open-concept spaces. In a great room that combines kitchen, dining, and living areas, tile in the kitchen zone and hardwood in the living and dining zones subtly defines each space without walls or physical barriers. This zoning effect is one of the most effective tools in open-concept design.
The Open-Concept Challenge
Open floor plans are the norm in modern homes, and they present a flooring dilemma: one continuous material can feel monotonous in a large space, but a jarring transition between materials can be worse. The goal is to combine tile and wood in a way that feels cohesive — like a deliberate design choice, not a compromise.
Planning the Layout
Define Your Zones
Before selecting materials or transitions, map out exactly where each flooring type will go. Walk through your daily routines and think about where water, dirt, and heavy traffic occur. The transition line should feel logical — it should follow architectural cues like cabinet edges, island perimeters, or changes in ceiling height.
Transition Line Placement
The transition between tile and wood should occur at a natural boundary. In a kitchen-to-living-room transition, the line typically follows the edge of the kitchen island or the perimeter of the kitchen cabinetry. In an entryway, the transition often follows the edge of a foyer or the line of a half-wall. Avoid placing transitions in the middle of a traffic path where they’ll get maximum wear and visual attention.
Direction of Planks and Tiles
Consider how the direction of your wood planks and tile layout interact. In most cases, I run wood planks parallel to the longest wall and perpendicular to the tile-wood transition line. This creates a clean, deliberate meeting point. Running planks parallel to the transition line can look awkward because the cut ends of the planks are exposed along the entire length.
Transition Options Between Tile and Wood
T-Molding Transition Strips
T-molding is the most common transition method. A T-shaped strip bridges the gap between the two materials, accommodating slight height differences and providing a clean visual break. T-moldings are available in wood, metal, and composite materials. Wood T-moldings that match your hardwood floor create a seamless look. Metal T-moldings (brass, stainless steel, matte black) make the transition a design feature.
Flush (Seamless) Transitions
The holy grail of tile-to-wood transitions is a flush joint with no transition strip — just the two materials meeting precisely at the same height. This requires exact height matching and careful installation. A thin bead of flexible caulk or grout fills the joint to allow for material movement. This looks absolutely stunning when done well, but it demands a high level of craftsmanship and proper substrate preparation.
Metal Transition Strips
Schluter, Tile Trim, and similar brands offer metal transition profiles in aluminum, brass, stainless steel, and matte black finishes. These create a thin, clean line between materials and handle height differences of up to 1/2 inch. I’ve been using more matte black metal transitions recently — they add a modern, architectural quality to the junction.
Creative Transitions
For a more artistic approach, some designers use irregular, organic transition lines. Instead of a straight line between tile and wood, the materials interlock in an irregular pattern — tiles gradually give way to wood planks, or hexagonal tiles scatter into hardwood like a mosaic dissolving into planks. These installations are labor-intensive and require expert planning, but the visual impact is extraordinary.
Threshold and Reducer Strips
When there’s a significant height difference between your tile and wood (more than 3/8 inch), a reducer strip creates a gradual slope from the higher surface to the lower one. These are functional but visible. I try to avoid them in open-concept spaces — the visual bump is distracting. Instead, I’d rather adjust the substrate to get the surfaces flush.
Getting the Heights Right
This is the technical challenge that makes or breaks a tile-to-wood combination. If the surfaces aren’t flush, you’ll need a visible transition strip, which may not match your design vision.
Standard Material Heights
A 3/4-inch solid hardwood floor over 3/4-inch plywood subfloor sits about 1.5 inches above the structural subfloor. A standard porcelain tile (3/8 inch) over 1/4-inch cement board and thinset sits about 3/4 inch above the structural subfloor. That’s a 3/4-inch height difference — significant enough to require either a transition strip or substrate modification.
Achieving Flush Heights
There are several strategies to get both surfaces flush. First, you can build up the tile substrate with thicker cement board, additional plywood, or self-leveling compound. Second, you can use engineered hardwood (thinner profile) instead of solid. Third, you can use thicker format tiles. Fourth, you can plan the subfloor framing to accommodate different heights in different zones (new construction only).
The Self-Leveling Solution
In renovation projects, self-leveling compound is often the easiest way to build up the tile area to match the hardwood height. Pour the leveler to the exact height needed, let it cure, then install the tile over it. I’ve used this approach dozens of times with excellent results — the key is getting the height calculation right before you pour.
Best Design Combinations
Wood Tone + White or Gray Tile
Natural wood tones (oak, walnut, hickory) paired with white, cream, or light gray tile is the most universally appealing combination. The contrast between the warm wood and cool tile creates visual interest without clashing. This works in virtually any style — from farmhouse to contemporary.
Dark Wood + Patterned Tile
Dark hardwood (espresso, ebony, dark walnut) paired with patterned tile (encaustic, Moroccan, geometric) creates a dramatic, high-end look. The dark wood provides a calm backdrop that lets the tile pattern take center stage. This combination works beautifully in kitchens and entryways.
Light Wood + Large-Format Tile
Light wood (white oak, maple, ash) combined with large-format tiles (24×24 or 12×24 rectified porcelain) creates a clean, modern aesthetic. The larger tiles minimize grout lines, making the tile area feel less busy and more compatible with the clean lines of the wood planks.
Matching Tones
For a subtle combination, choose wood and tile in similar tones. Wood-look tile in the wet areas paired with matching hardwood in the living areas creates a cohesive flow. The materials are different but the color palette is unified. This approach minimizes the visual impact of the transition and makes the space feel larger.
Contrasting Styles
For maximum design impact, pair rustic wood (reclaimed, hand-scraped, wide plank) with sleek, modern tile (polished porcelain, marble-look, solid color). The contrast between organic and refined creates tension that’s visually dynamic. Use a clean metal transition strip to bridge the two worlds.
Creative Layout Ideas
The Kitchen Island Boundary
One of the most popular layouts uses the kitchen island as the natural transition point. Tile covers the working side of the kitchen (sink, stove, refrigerator) while hardwood extends from the island outward into the dining and living areas. The island itself sits at the junction, creating a built-in visual transition.
The Diagonal Transition
Instead of a straight line parallel to one wall, run the transition at a 45-degree angle across the floor. This creates visual movement and makes both material zones feel larger. It’s particularly effective in L-shaped kitchens or spaces with angled walls.
The Hexagon Scatter
Hexagonal tiles installed in a gradual scatter pattern where some hexagons “break free” from the tile field and sit individually within the hardwood create a dramatic, organic transition. This requires cutting the wood planks to fit precisely around each hexagonal tile. It’s labor-intensive (budget 2-3 times the normal transition cost) but creates a floor that gets photographed and talked about.
The Curved Transition
Curved transition lines — following the arc of a kitchen island, the sweep of a foyer, or just a gentle S-curve — add elegance and soften the junction between materials. Curved cuts in hardwood require skill, and curved metal transition strips are available from specialty suppliers. The result is organic and architectural.
The Rug Pattern
Tile installed in a rectangular “rug” pattern within a hardwood floor creates a functional zone (under a dining table, in a foyer, in front of a fireplace) with the visual interest of an area rug but the permanence and practicality of tile. Border tiles in a contrasting pattern complete the rug effect.
Material Selection Tips
Coordinating Colors
Bring samples of both materials together before purchasing. What looks great individually may clash when placed side by side. I always recommend laying full-size samples of both materials on the actual subfloor, in the actual lighting conditions of the room, before making final selections. Photographs and swatches are not reliable enough for this decision.
Scale Matters
Match the scale of your materials to the scale of your space. Wide-plank hardwood (7+ inches) pairs well with large-format tiles (12×24 or larger). Narrow strip hardwood (2-1/4 inch) looks better with standard-size tiles (12×12). Mismatched scale creates visual tension that feels unintentional.
Finish Consistency
The sheen level of both materials should be compatible. Matte wood flooring with high-gloss tile creates a jarring contrast. Satin or matte finishes on both materials create a cohesive look. If you want contrast, let the color and material do the work, not the shine level.
Expansion and Movement
Wood and tile expand and contract at different rates. The joint between them must accommodate this movement. Always leave a 1/8 to 1/4 inch gap at the junction, filled with flexible sealant or covered by a transition strip. Never butt wood directly against tile without an expansion gap — the wood will buckle.
Installation Process
Step 1: Plan and Mark
Snap chalk lines marking the exact transition location. Verify heights, check for levelness, and plan the installation sequence. In most cases, I install the tile first and the wood second, because the tile’s exact position determines the transition line.
Step 2: Prepare the Substrate
Ensure both areas are level and at the correct heights. Install cement board or membrane in the tile area. Address any height differences with leveling compound or substrate buildup.
Step 3: Install Tile
Install the tile up to the transition line, making sure the edge tiles are full-size or half-size (avoid thin slivers at the transition — they look bad and break easily). Allow the thinset and grout to cure fully before proceeding.
Step 4: Install Transition
If using a metal transition strip, install it over the tile edge. For flush transitions, apply flexible caulk along the tile edge where the wood will meet it.
Step 5: Install Wood
Install the hardwood up to the transition line, leaving the appropriate expansion gap. Cut end pieces precisely to create a clean meeting line with the tile or transition strip.
Step 6: Finish and Seal
Apply final finishes, fill any gaps with matching caulk, and install transition strips if needed. Clean both surfaces thoroughly and inspect the entire transition line for any imperfections.
Common Mistakes to Avoid
Ignoring Height Differences
This is the number one mistake I see. People choose their tile and wood without checking whether the finished heights will match, then end up with a 1/2-inch lip that requires an ugly reducer strip. Check heights first, select materials second.
Placing Transitions in High-Traffic Paths
A transition strip right in the main walking path between your kitchen and living room will get hit thousands of times a week. Place transitions at the edge of traffic patterns or under doorways where foot traffic naturally adjusts.
Choosing Clashing Materials
A warm honey-toned hardwood next to cool blue-gray tile can create a visual clash that makes both materials look worse. Always audition materials together in your actual space with your actual lighting before committing.
Forgetting Expansion Gaps
Wood moves. Tile doesn’t. If you don’t leave an adequate expansion gap between the two, the wood will push against the tile and buckle. I’ve had to rip out and redo transitions where the previous installer butted the materials too tightly together.
Inconsistent Grout Color
The grout color between tiles near the transition should complement the wood tone. Dark grout next to light wood (or vice versa) draws the eye to the junction in an unflattering way. Choose a grout color that harmonizes with both materials.
Cost Considerations
Material Costs
Using two different flooring materials doesn’t necessarily cost more than using one throughout — tile for wet areas can actually be less expensive than extending hardwood into those zones. The additional cost comes from the transition itself: transition strips run $5-20 per linear foot for standard options and $15-40+ for custom metal profiles. Custom creative transitions (hexagon scatter, curved lines) add $20-50+ per linear foot in labor.
Labor Premium
Installing a combination floor takes 15-25% more labor time than a single-material floor of the same area. The transition area requires precise cutting, height matching, and careful fitting. Some installers charge a flat fee ($200-500) for transition work in addition to their per-square-foot rate.
Budget-Friendly Approach
For the most cost-effective tile-to-wood combination, use a simple straight transition line with a wood-matching T-molding. This minimizes custom cutting and transition material costs while still creating a clean, intentional look. Save creative transitions for one or two key areas where they’ll have the most visual impact.
Frequently Asked Questions
Where should the transition between tile and wood flooring be placed?
The transition should occur at a natural architectural boundary — the edge of kitchen cabinetry, under a doorway, at the perimeter of a foyer, or along the edge of a kitchen island. The line should feel logical to someone walking through the space. Avoid placing transitions in the middle of an open area with no architectural reference point, as this looks random and disrupts the visual flow. In open-concept spaces, I typically follow the line of the kitchen cabinets or island as the defining boundary.
Can you do a seamless transition between tile and wood without a transition strip?
Yes, but it requires meticulous planning and skilled installation. Both surfaces must be exactly flush (within 1/32 inch), and a small expansion gap (1/8 inch) filled with color-matched flexible caulk must be maintained between the materials. The caulk needs to be replaced every few years as it wears. I’ve done many seamless transitions, and they look fantastic, but they’re not forgiving of sloppy work. If you’re not confident in your installer’s precision, a thin metal transition strip is a safer choice that still looks great.
What is the best tile to pair with hardwood flooring?
Porcelain tile is the best general-purpose partner for hardwood because it’s durable, water-resistant, and available in virtually any look. For contemporary homes, large-format rectified porcelain (minimal grout lines) in neutral tones complements hardwood beautifully. For traditional homes, natural stone tile or encaustic cement tile adds character. The key is matching the visual “weight” of the tile to the wood — delicate wood with delicate tile, bold wood with bold tile. Always bring samples of both materials together before purchasing.
How do you handle the height difference between tile and hardwood?
The most reliable method is building up the tile substrate so both finished surfaces are flush. Use thicker cement board, additional plywood, or self-leveling compound under the tile area to raise it to the hardwood level. Alternatively, choose an engineered hardwood with a lower profile that matches your tile height. If a small height difference (under 1/4 inch) is unavoidable, a tapered metal transition strip handles it cleanly. Never accept a significant height difference — it’s a trip hazard and looks unprofessional.
Does combining tile and wood flooring increase home value?
When done well, yes. A thoughtfully executed tile-to-wood combination signals quality construction and intentional design, both of which appeal to buyers. In open-concept homes, the combination of durable tile in kitchen and entry areas with warm hardwood in living areas is exactly what most buyers want. A poorly executed combination — with visible height differences, cheap transition strips, or clashing materials — can actually detract from home value. The quality of the execution matters more than the concept itself.
Prefer to explore on your own?
See how new flooring looks in your actual room in seconds — free, no signup.
Try the free Floor Studio →