Knowing how to cut laminate flooring is essential for any installation project, whether you are a first-time DIYer or an experienced installer. Laminate flooring is made from multiple compressed layers — a melamine wear layer, a decorative image layer, a high-density fiberboard (HDF) core, and a moisture-resistant backing — and each layer affects how the material behaves when cut. The right tool and technique depend on the type of cut you need to make.
This guide covers every cutting method you will encounter during a laminate flooring installation, from simple straight cuts to complex curves around door frames and pipes.
- Cutting Tools Overview
- Cutting with a Miter Saw
- Cutting with a Circular Saw
- Cutting with a Jigsaw
- Using a Manual Laminate Cutter
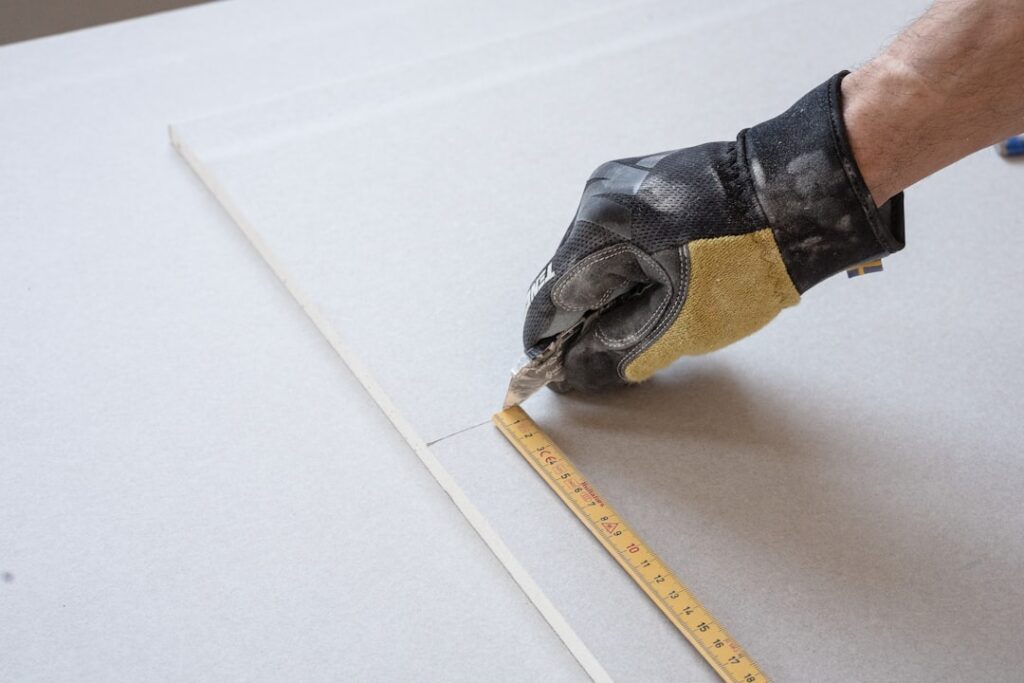
- Score and Snap with a Utility Knife
- Cut Types: Straight, Length, Curved, and Notch
- Blade Selection Guide
- Safety Tips
- Frequently Asked Questions
- What is the easiest way to cut laminate flooring?
- Do you cut laminate face up or face down?
- Can you cut laminate flooring with a box cutter?
- How do you cut laminate flooring already installed?
- Why is my laminate chipping when I cut it?
- Can you cut laminate flooring with scissors or tin snips?
- How do you cut laminate flooring around a toilet?
- Do you need a special blade to cut laminate flooring?
Cutting Tools Overview
Before you start cutting, it helps to understand which tools are best suited for each scenario. Here is a comparison of the five main methods for cutting laminate flooring.
| Tool | Best For | Cut Quality | Speed | Noise | Cost |
|---|---|---|---|---|---|
| Miter saw | Crosscuts (width cuts) | Excellent | Very fast | High | $100 – $300 |
| Circular saw | Length (rip) cuts | Good to excellent | Fast | High | $50 – $150 |
| Jigsaw | Curves, notches, door frames | Good | Moderate | Moderate | $40 – $120 |
| Laminate cutter (manual) | Straight crosscuts | Good | Moderate | Silent | $30 – $80 |
| Utility knife | Quick straight cuts (thin laminate) | Fair | Slow | Silent | $5 – $15 |
For a typical room installation, most professionals use a miter saw for crosscuts and a jigsaw for curves and notches. If you are working in an apartment or noise-sensitive environment, a manual laminate cutter paired with a jigsaw covers nearly every situation.
Cutting with a Miter Saw
A miter saw (also called a chop saw) is the most popular tool for cutting laminate flooring crosscuts — the cuts made across the width of the plank to fit the last piece in each row.
Setup and Technique
- Install a fine-tooth blade (80 to 100 teeth for a 10-inch or 12-inch saw).
- Place the laminate plank on the saw table with the decorative side facing up. On a miter saw, the blade enters from above, so having the good side up ensures any chipping occurs on the bottom.
- Measure and mark your cut line with a pencil on the decorative face.
- Align the blade to the waste side of your mark.
- Hold the plank firmly against the fence and lower the blade smoothly through the material at a controlled speed.
- Let the blade reach full speed before contacting the laminate.
Pro tip: Apply a strip of painter’s tape along the cut line to further reduce chipping on the decorative surface. This is especially helpful on textured or embossed laminate.
Cutting with a Circular Saw
A circular saw excels at rip cuts — long cuts along the length of a plank. This is the cut you need for the last row of laminate in a room, which almost always needs to be narrowed to fit.
Setup and Technique
- Install a fine-tooth blade (40 to 60 teeth for a 7¼-inch saw).
- Place the laminate plank on a stable, flat surface with the decorative side facing down. A circular saw cuts upward, so the good side goes down to prevent chipping on the visible face.
- Measure the required width at both ends of the plank and snap a chalk line or draw a straight line connecting the marks.
- Clamp a straight edge (a level or factory edge of another board) parallel to your cut line to serve as a guide for the saw’s base plate.
- Cut slowly and steadily along the guide, letting the saw do the work without forcing it.
Pro tip: When ripping laminate, support the offcut side to prevent it from snapping off at the end of the cut and damaging the decorative layer.
Cutting with a Jigsaw
A jigsaw is the most versatile tool for learning how to cut laminate flooring. It handles curves, notches, cutouts around pipes, and intricate shapes around door frames — cuts that no other tool can make as easily.
Setup and Technique
- Install a fine-tooth, downward-cutting (reverse-tooth) jigsaw blade specifically designed for laminate. These blades cut on the downstroke, which pushes the decorative layer against the base of the saw and minimizes chipping on the top surface.
- Place the laminate decorative side up when using a reverse-tooth blade (decorative side down with a standard blade).
- Mark your cut line clearly. For pipe cutouts, drill a hole larger than the pipe diameter and cut from the drilled hole.
- Cut at medium speed with the orbital action turned off or set to the lowest setting for the cleanest edge.
- Support the plank securely — jigsaws vibrate, which can cause thin laminate to bounce and create rough cuts.
Using a Manual Laminate Cutter
A manual laminate cutter (also called a laminate guillotine) is a lever-operated tool that slices through laminate planks without electricity, dust, or noise. It works like a paper cutter but with a heavy-duty blade designed for laminate’s HDF core.
When to Use It
- Apartments where noise is a concern
- Small to medium rooms where you mainly need crosscuts
- Situations where you want to cut in the same room as the installation (no dust)
Limitations
- Only makes straight crosscuts — no rip cuts, curves, or notches
- Most models handle planks up to 8 inches wide (some up to 12 inches)
- Cut edge is slightly rougher than a saw cut, but hidden under baseboards
- Struggles with thicker laminates (14mm+) and planks with attached underlayment
Score and Snap with a Utility Knife
The score-and-snap method works for thin laminate (8mm or less) when you need a quick crosscut and don’t have power tools available.
Technique
- Mark your cut line on the decorative face.
- Using a metal straightedge as a guide, score the decorative surface firmly with a sharp utility knife. Make 3 to 5 passes, pressing harder each time.
- Place the plank on the edge of a table with the scored line aligned with the table edge.
- Press down sharply on the overhanging section. The plank should snap cleanly along the score line.
- If needed, clean up the edge with medium-grit sandpaper.
This method is best for quick cuts where the edge will be hidden under a baseboard or quarter round molding. It is not suitable for cuts that will be visible.
Cut Types: Straight, Length, Curved, and Notch
Straight Crosscuts
The most common cut in any laminate installation. You need a crosscut at the end of every row to fit the last plank. Use a miter saw, manual laminate cutter, or utility knife. Always measure twice and mark the decorative face.
Length (Rip) Cuts
Required for the first and last rows of a room, which usually need to be narrowed. Use a circular saw with a guide fence or a table saw. The cut edge on the first row faces the wall and is hidden by baseboards. The last row cut is more critical — measure at multiple points because walls are rarely perfectly straight.
Curved Cuts
Needed around curved walls, rounded corners, and fireplace hearths. Use a jigsaw. Create a cardboard template first, trace the curve onto the laminate plank, and cut carefully along the line. For large radius curves, cut just outside the line and sand to the exact shape.
Notch Cuts
Required where planks meet door frames, pipes, and built-in obstacles. For rectangular notches (door frames), mark two parallel lines and one connecting line, then cut with a jigsaw or make two miter saw cuts and finish with a jigsaw. For pipe notches, drill a hole 1/2 inch larger than the pipe diameter, then cut a straight line to the hole from the plank edge.
Door Frame Undercuts
Rather than trying to cut laminate to fit around a door frame, undercut the frame itself. Place a piece of laminate (with underlayment if using) next to the frame, lay a flush-cut saw flat on the laminate, and saw through the bottom of the door frame. The laminate then slides underneath for a clean, professional finish.
Blade Selection Guide
The blade you choose has a direct impact on cut quality. Laminate’s abrasive melamine surface dulls blades quickly, so investing in the right blade saves money by reducing replacements and wasted material.
| Saw Type | Recommended Blade | Tooth Count | Key Feature |
|---|---|---|---|
| Miter saw (10″) | Carbide-tipped fine finish | 80 – 100 teeth | ATB (alternate top bevel) grind |
| Miter saw (12″) | Carbide-tipped fine finish | 96 – 120 teeth | ATB grind |
| Circular saw (7¼”) | Carbide-tipped plywood/laminate | 40 – 60 teeth | Thin kerf reduces resistance |
| Jigsaw | Bi-metal reverse-tooth (T101BR) | 10 TPI | Downward cut prevents chipping |
| Jigsaw (curves) | Narrow bi-metal (T101AO) | 20 TPI | Narrow body for tight turns |
Avoid using standard wood blades, demolition blades, or any blade with fewer than 40 teeth on a circular saw. These will produce excessive chipping on the decorative surface of the laminate.
Safety Tips
Laminate flooring produces fine dust that contains melamine and formaldehyde-based resins. Follow these safety precautions when cutting:
- Wear safety glasses — Small chips and splinters eject at high speed during power saw cuts.
- Use a dust mask (N95 or better) — Laminate dust is finer than wood dust and can irritate lungs. If cutting indoors, an N95 respirator is recommended.
- Wear hearing protection — Miter saws and circular saws cutting laminate are louder than cutting solid wood due to the dense HDF core.
- Cut outdoors when possible — Set up your cutting station outside or in a well-ventilated garage to keep dust out of the installation area.
- Secure the workpiece — Never hold laminate freehand while cutting with a circular saw or jigsaw. Use clamps or a vise.
- Check for embedded nails — If reusing or cutting reclaimed laminate, check for staples or nails that can damage blades and create projectile hazards.
- Keep blades sharp — A dull blade requires more force, increases chipping, and is more likely to cause kickback.
Frequently Asked Questions
What is the easiest way to cut laminate flooring?
A miter saw with a fine-tooth blade is the easiest and fastest method for straight crosscuts. For a completely tool-free option, a manual laminate cutter requires no electricity and produces clean cuts with minimal effort.
Do you cut laminate face up or face down?
It depends on the tool. On a miter saw, cut face up because the blade enters from above. On a circular saw, cut face down because the blade cuts upward. On a jigsaw with a reverse-tooth blade, cut face up. The rule is: the good side should face away from the direction the blade enters the material.
Can you cut laminate flooring with a box cutter?
Yes, on thin laminate (8mm or less). Score the decorative surface 3 to 5 times along a metal straightedge, then snap the plank along the score line. This only works for straight crosscuts and produces a rougher edge than a saw.
How do you cut laminate flooring already installed?
Use an oscillating multi-tool with a flush-cut blade. This allows you to cut installed planks without damaging adjacent planks or the subfloor. Mark the cut line, plunge the blade, and cut slowly along the line.
Why is my laminate chipping when I cut it?
Chipping typically results from a dull blade, too few teeth on the blade, cutting too fast, or having the decorative side oriented incorrectly for your tool. Switch to a new fine-tooth blade, reduce cutting speed, and apply painter’s tape along the cut line to reduce chipping.
Can you cut laminate flooring with scissors or tin snips?
No. Laminate’s HDF core is too thick and rigid for scissors or tin snips. These tools will crush and delaminate the plank rather than cutting it cleanly. Use one of the five methods described in this guide.
How do you cut laminate flooring around a toilet?
Create a cardboard template of the toilet base shape. Trace the template onto the laminate plank, then cut the shape with a jigsaw. Leave a 1/4-inch expansion gap around the toilet flange. The gap will be covered by the toilet base when reinstalled.
Do you need a special blade to cut laminate flooring?
You do not need a blade specifically marketed for laminate, but you do need a fine-tooth carbide-tipped blade. Blades labeled for plywood, melamine, or laminate all work well. The key specifications are high tooth count and carbide tips.
Prefer to explore on your own?
See how new flooring looks in your actual room in seconds — free, no signup.
Try the free Floor Studio →