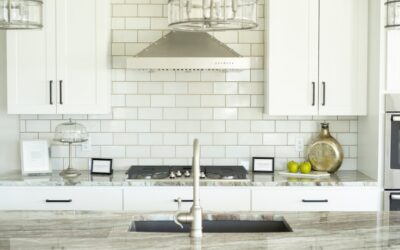
Tiling the wall between your counter and cabinets is one of the highest-impact weekend projects a homeowner can take on, and learning how to install a backsplash in the kitchen is genuinely within reach for a careful DIYer. The job rewards patience over speed: most mistakes come from rushing the layout or skipping the dry fit, not from the tiling itself. With the right tools and an honest day or two, you can finish a standard backsplash for a fraction of what a contractor charges.
- Tools and Materials You Will Need
- Step 1: Prep the Wall
- Step 2: Plan Your Layout
- Step 3: Apply the Adhesive
- Step 4: Set the Tile
- Step 5: Cut Around Outlets and Edges
- Step 6: Let It Cure, Then Grout
- Step 7: Seal and Caulk
- Pro Tips That Save Frustration
- How Long and How Much
- Choosing Between Thinset and Mastic
- Working With Peel-and-Stick as an Alternative
- Avoiding the Most Common Mistakes
- The Bottom Line
Tools and Materials You Will Need
- Tile of your choice, plus 10 percent extra for cuts and breakage
- Thinset mortar or pre-mixed tile adhesive (mastic)
- Notched trowel, usually 1/4-inch
- Tile spacers
- Grout and grout float
- Wet saw or manual tile cutter, plus nippers for curves
- Level, tape measure, pencil, and a chalk line
- Sponge, buckets, and painter’s tape
- Caulk and a caulk gun
Step 1: Prep the Wall
Turn off power to any outlets in the work area at the breaker. Remove outlet covers, clean the wall of grease and dust, and lightly sand any glossy paint so the adhesive grips. Fill holes and let any patches dry. A clean, flat, dry wall is the foundation of a backsplash that lasts.
Step 2: Plan Your Layout
Find the center of your main wall or the focal point above the cooktop and mark a vertical line with a level. Dry-lay a row of tiles on the counter to see how the pattern falls and where cuts will land. The goal is to avoid thin sliver cuts at the ends and to keep the focal area balanced. Mark a level horizontal reference line, since countertops are rarely perfectly level.
Step 3: Apply the Adhesive
Working in sections about 2 to 3 feet wide, spread thinset or mastic on the wall with the flat side of the trowel, then comb it with the notched side held at a 45-degree angle. Only cover an area you can tile before the adhesive skins over, usually within 15 to 20 minutes. Keep the layer even so tiles sit flat.
Step 4: Set the Tile
Press the first tile into place along your reference lines with a slight twist to seat it. Add spacers between tiles to keep grout lines consistent. For mosaic sheets, line up the edges so the spacing carries across seams. Check your work with a level every few tiles and wipe away any adhesive that squeezes into the joints before it hardens.
Step 5: Cut Around Outlets and Edges
Measure carefully around outlets and the ends of the run. A wet saw gives clean straight cuts, while nippers handle small notches around boxes. Outlets may need spacers or box extenders so the cover plate sits flush over the new tile thickness. Take your time here, since these cuts are the most visible.
Step 6: Let It Cure, Then Grout
Allow the adhesive to cure per the product label, typically 24 hours. Remove the spacers, then mix grout to a peanut-butter consistency. Holding the float at a 45-degree angle, press grout into the joints diagonally to fill them completely. After about 15 to 20 minutes, wipe the surface with a damp sponge, rinsing often, to remove the haze without pulling grout from the lines.
Step 7: Seal and Caulk
Once the grout cures for a couple of days, apply a grout sealer if you used a cementitious grout, which protects against stains in the kitchen. Run a bead of color-matched caulk along the seam where the backsplash meets the countertop and at inside corners. Caulk, not grout, belongs in these flexible joints because they move slightly and grout would crack.
Pro Tips That Save Frustration
- Buy all your tile from the same lot number so colors match
- Mix only as much thinset or grout as you can use in 30 minutes
- Use painter’s tape to protect the countertop and cabinet edges
- Keep a wet sponge handy to clean joints as you go, not after
How Long and How Much
A typical backsplash of 30 to 40 square feet takes a confident DIYer one to two days including cure time. Material costs vary widely with tile choice, often $5 to $20 per square foot for tile plus another $50 to $100 for adhesive, grout, and caulk. The labor you save is the real reward.
Choosing Between Thinset and Mastic
One decision trips up first-time tilers more than any other: thinset mortar or pre-mixed mastic. Mastic comes ready to use in a tub, grips quickly, and forgives a beginner who works slowly, which makes it tempting for a small backsplash. The catch is that mastic is not suited to wet or heat-prone areas, so it is a poor choice directly behind a sink or a high-output range. Thinset, mixed from powder, bonds harder, handles moisture and heat, and is the right call for most kitchens, especially with porcelain or glass tile.
As a practical rule, use mastic only for small ceramic backsplashes well away from water, and reach for thinset everywhere else. Heavy tiles like natural stone and large-format pieces also demand thinset, since mastic cannot reliably hold their weight on a vertical wall.
Working With Peel-and-Stick as an Alternative
If full tiling feels like too much, peel-and-stick tile offers a genuine middle ground. These backsplash panels have an adhesive backing that bonds straight to a clean, smooth wall, with no thinset, no grout, and no cure time. A whole kitchen run can go up in an afternoon, and renters favor them because many peel off later without damaging paint. The trade-off is durability and authenticity: peel-and-stick does not match real tile behind a busy cooktop and can lift in steamy, greasy zones over time. For a quick refresh on a tight budget, though, it is a legitimate option worth knowing about before you commit to a full mortar-and-grout job.
Avoiding the Most Common Mistakes
- Starting without a dry layout, which leads to ugly sliver cuts at the ends
- Spreading more adhesive than you can tile before it skins over
- Letting grout haze dry too long, making it far harder to remove cleanly
- Grouting the corner and countertop seams instead of caulking them, so they crack
- Forgetting outlet box extenders, leaving the cover plates floating off the new tile
Each of these is easy to prevent with a little planning, and together they account for the majority of backsplash do-overs.
The Bottom Line
Knowing how to install a backsplash in the kitchen comes down to disciplined prep, a thoughtful layout, and grouting with care. Respect the cure times, plan your cuts before you spread a drop of adhesive, and you will end up with a durable, professional-looking wall that updates the entire kitchen.